
Propagation
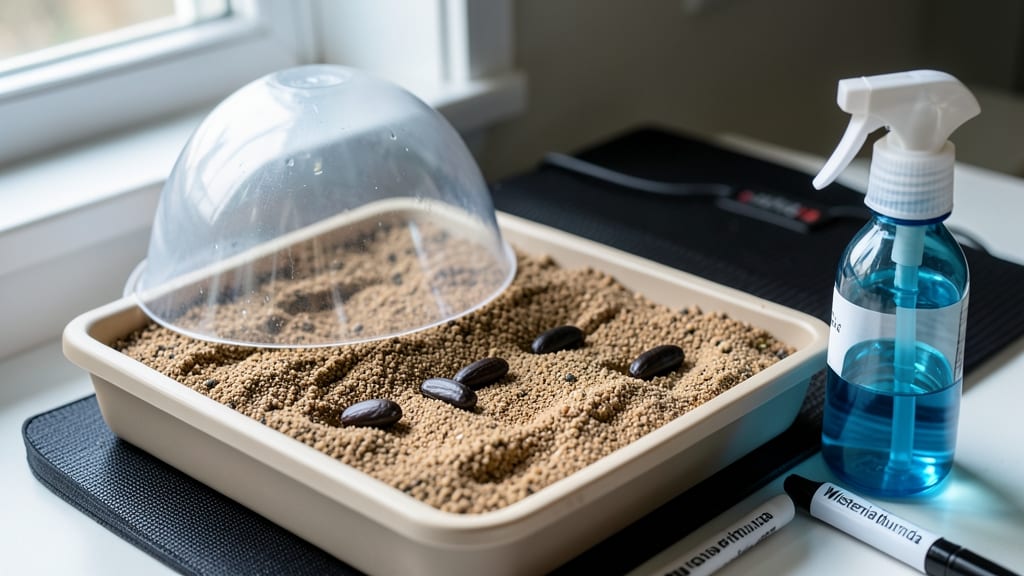
Wisteria seed germination starts with a 120-day cold treatment that mimics winter in nature. 🌱 I’ve tried every shortcut—soaking seeds, heat mats, even store-bought germination aids—but nothing beats the real deal: patience and a refrigerator.
That’s how I finally cracked the code after years of watching seeds rot or sprout too late. The secret isn’t fancy equipment; it’s moisture, time, and the right soil mix. You’ll need a plastic bag, damp paper towels, and a sealed container to trap humidity.
Place the sealed bag in the fridge’s crisper drawer (the coldest spot without freezing) and check monthly for mold or drying. Most seeds won’t crack until day 90-120, but consistency is key—don’t peek too often. Once sprouted, transplant into sterile potting mix and keep warm (70-75°F) under grow lights.
The first true leaves appear in 4-6 weeks, but be ready for a slow start—wisteria seeds are stubborn. Outdoors, young plants need winter protection for their first two years. This method works for all wisteria varieties, but Chinese wisteria germinates fastest.
If you’re impatient, try layering seeds in damp sphagnum moss instead of towels—it speeds up moisture control. Either way, the payoff is worth the wait: a vine that’ll outlive you.
📚 In This Guide
- What you need
- Instructions
- Tips and common mistakes
- Wrapping up and next steps
What you need
- ● Wisteria seeds: Fresh or properly stored seeds (harvested in fall/winter for best results). Aim for at least 10 seeds to account for variability.
- ● Cold stratification setup: Paper towels or peat moss (enough to fully cover seeds in a single layer).
- ● Ziplock bag or airtight container (small enough to fit seeds + moisture source).
- ● Refrigerator with a consistent 34–40°F (1–4°C) temperature (check your fridge’s crisper drawer!).
- ● Germination medium: Seed-starting mix or sterilized potting soil (lightweight, well-draining).
- ● Small pots or seed trays (3–4 inches deep, with drainage holes).
- ● Humidity & warmth: Plastic wrap or humidity dome (to maintain moisture).
- ● Grow light or sunny windowsill (6–8 hours of indirect light daily).
- ● Basic tools: Spray bottle (for gentle watering).
- ● Tweezers (for delicate seed handling).
- ● Seed heat mat (70–75°F or 21–24°C) for post-stratification warmth.
- ● pH testing kit (ideal soil pH: 6.0–7.0).
- ● Fungicide (to prevent damping-off in humid conditions).
- ● Growth hormone gel (like Rootone) for stubborn seeds.
- ● Journal/notebook (to track stratification dates and sprouting progress!).
Step-by-step instructions for wisteria seed germination
Here's my foolproof method for breaking dormancy and getting wisteria seeds to sprout reliably.
🌱 Step 1: Collect and Clean the Seeds
Harvest fully mature wisteria pods when they turn brown and begin splitting open. The seeds inside should be plump and firm—any shriveled or soft ones won't germinate. I crack open the pods by hand, then soak the seeds in lukewarm water for 24 hours to soften the tough outer shell. This step is crucial because wisteria seeds have a thick seed coat that resists water absorption.
After soaking, gently rub the seeds between two paper towels to remove any remaining pod fragments. You'll notice the seeds feel slightly softer and smoother to the touch. Store them in a sealed container in your refrigerator until you're ready to stratify—this mimics the natural winter chilling period they need to break dormancy.
❄️ Step 2: Cold Stratification for 60-90 Days
Place the cleaned seeds in a paper towel-lined container with just enough water to keep the towels damp (not soggy). I use a small plastic container with holes in the lid to allow airflow. Seal it and store in your refrigerator's crisper drawer where temperatures stay consistently 35-40°F.
Check the seeds weekly—you'll see condensation on the container walls, which is normal. If the towels dry out, mist them lightly with water. After 60-90 days, the seeds will begin to sprout. You'll notice tiny white roots emerging first, followed by the seed coat splitting open. This is your signal that stratification worked and germination is about to begin.
🌿 Step 3: Prepare Germination Trays
Fill small seedling trays with a light, sterile potting mix designed for seed starting. I press the mix down lightly to create a firm surface, then use a spray bottle to moisten it until evenly damp. Avoid waterlogging—the mix should hold together when squeezed but not drip water.
Plant the stratified seeds ½ inch deep in the prepared trays, spacing them 1 inch apart. Gently firm the soil around each seed to ensure good contact. Place the trays in a warm, bright location—70-75°F is ideal. You'll see sprouts emerge in 1-3 weeks, depending on how long they spent in stratification.
☀️ Step 4: Provide Ideal Growing Conditions
Once sprouts appear, move the trays to a location with bright, indirect light. I use a grow light on a timer for 14 hours daily to ensure strong, even growth. Keep the soil consistently moist—water when the top ½ inch feels dry to the touch. Avoid overhead watering to prevent fungal diseases.
When seedlings develop their first true leaves (not the initial seed leaves), they're ready for slightly larger containers. Transplant them into 3-inch pots filled with a well-draining potting mix. This step prevents root binding, which can stunt growth. Keep them in warm conditions until they're large enough for outdoor planting in spring.
Tips & tricks for perfect wisteria seed germination
Here's what I learned after years of trial and error—because wisteria seeds won't play nice without these key tricks.
Soaking Secret: That 24-hour soak in lukewarm water isn't just about softening—it's about breaking the seed's natural defense mechanism. I've found that using a glass jar with a loose lid works best, as it lets excess moisture escape while keeping the seeds submerged. After soaking, I always do a quick visual check: if the seeds still feel rock-hard, give them another 12 hours.
Stratification Strategy: The 60-90 day cold period is non-negotiable, but here's my pro move: I label my containers with the start date and set a reminder in my phone. Wisteria seeds are sensitive to temperature fluctuations, so I avoid opening the fridge door too often. If you notice mold developing, toss those seeds—they won't germinate, and mold can spread to others.
Planting Precision: When planting those ½-inch deep seeds, I use a toothpick to make small holes—it gives you better control than fingers. The 1-inch spacing might seem generous, but wisteria seedlings need room to grow. I've learned the hard way that crowding leads to leggy, weak plants. After planting, I give the trays a gentle tap on the counter to settle the soil around each seed.
Lighting Logic: That 14-hour grow light schedule is critical, but here's what nobody tells you: I start with lower intensity for the first week to prevent seedling shock. After sprouts appear, I gradually increase brightness. If you don't have a grow light, a south-facing window works, but you'll need to rotate trays daily for even light exposure.
Pro Tips for Wisteria Seed Germination
- Here's what I learned after years of trial and error—because wisteria seeds won't play nice without these key tricks.
- Soaking Secret: That 24-hour soak in lukewarm water isn't just about softening—it's about breaking the seed's natural defense mechanism.
- Stratification Strategy: The 60-90 day cold period is non-negotiable, but here's my pro move: I label my containers with the start date and set a reminder in my phone.
Frequently asked questions
Got questions about germinating wisteria seeds? You’re not alone! Here are answers to the most common concerns—from timing to troubleshooting—to help you succeed with your cold-stratified sprouts.
How long does cold stratification take for wisteria seeds?
Wisteria seeds typically need 60–90 days of cold stratification (33–41°F) to break dormancy. Place them in a sealed container with moist peat moss or a damp paper towel, then refrigerate. Patience is key—rushing this step often leads to rot or failed germination.
What’s the best temperature for germinating wisteria seeds after stratification?
After cold treatment, transfer seeds to a warm (70–75°F) environment to kickstart germination. Use a heat mat or place the container near a sunny window. Consistency matters—fluctuations can stall sprouting. Expect germination in 2–6 weeks under ideal conditions.
Can I germinate wisteria seeds without cold stratification?
Cold stratification is essential for wisteria seeds—skipping it usually results in zero germination. However, you can mimic natural conditions by scarifying seeds (lightly nicking the shell) or using a warm-cold-warm cycle (e.g., 2 weeks warm, 4 weeks cold, repeat). Still, cold stratification is the most reliable method.
Why aren’t my wisteria seeds sprouting after stratification?
Check for these common issues:
- Moisture imbalance: Seeds must stay evenly damp—not soggy or dry.
- Improper timing: Ensure stratification lasted at least 60 days.
- Old or damaged seeds: Wisteria seeds lose viability quickly; use fresh ones.
- Temperature shock: Avoid moving seeds between extreme temps during stratification.
How do I transplant wisteria seedlings once they sprout?
Once seedlings have 2–3 true leaves (not just cotyledons), they’re ready for transplanting. Use well-draining soil and a small pot (3–4 inches) to avoid overcrowding. Harden them off gradually (5–7 days) before moving outdoors. Wisteria is slow-growing—be patient!
Wrapping up and next steps
Germinating wisteria seeds with cold stratification isn’t just a process—it’s your ticket to nurturing those dreamy, fragrant vines! With the right mix of patience, moisture control, and a little fridge magic, you’re well on your way to reliable sprouts. 🌱✨
Now that you’ve got the blueprint, roll up your sleeves and start stratifying—your future wisteria’s roots (and your green thumb) will thank you! Ready to plant those sprouts? Dig in and watch your garden bloom with confidence!