
Propagation
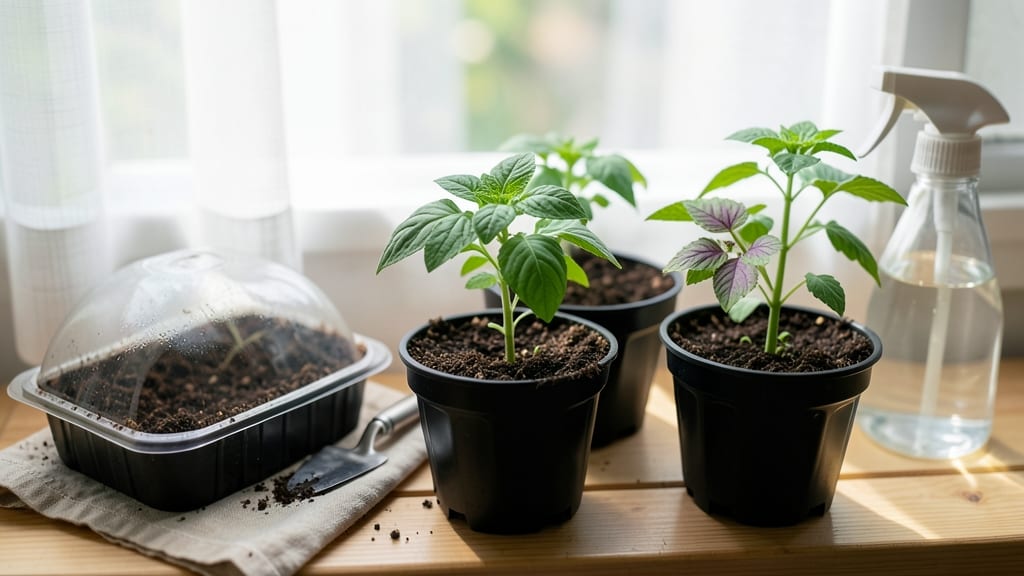
The right potting soil for seed starting can mean the difference between a thriving tray of seedlings and a sad, moldy mess. ✨ I’ve lost count of the flats of seedlings I’ve watched turn to mush from damping off—until I finally cracked the code with a lightweight, sterile mix that lets those tiny roots breathe.
Most store-bought garden soil is too dense and nutrient-heavy for seeds, smothering them before they even sprout. You need a soilless blend—think peat moss, coconut coir, or perlite—with just enough starter fertilizer to kickstart growth without overwhelming delicate seedlings.
The key is sterilization (heat-treated or pasteurized) to wipe out fungus and bacteria that cause damping off. Once you’ve got the right mix, you’ll see those first green hooks popping through in 5-10 days instead of weeks.
The soil stays fluffy and drains fast, so roots don’t rot, and you avoid the heartbreak of losing your entire batch to mold. No more guessing—just reliable, consistent germination every time. This works for veggies, flowers, and herbs alike, whether you’re starting in trays, egg cartons, or peat pots.
Let’s get those seeds off to the best possible start!
📚 In This Guide
- What you need
- Instructions
- Tips and common mistakes
- Wrapping up and next steps
What you need
- ● Seed starting mix (sterilized): 1 bag (1–2 cubic feet) – Look for a lightweight, sterile blend labeled for seed starting (e.g., Promix, FoxFarm Seedling Mix, or Black Gold Seedling Mix). Avoid garden soil—it’s too dense and may harbor pathogens.
- ● Perlite or vermiculite: 1–2 cups – Adds aeration and moisture retention. Perlite is lighter; vermiculite holds more water.
- ○ Coco coir or peat moss: Optional (1–2 cups) – Boosts water retention if your mix feels too dry.
- ● Slow-release fertilizer: 1 tbsp (5–10-5 or 14-14-14 ratio) – Mix into the soil for early nutrition.
- ● Seed trays or pots: 2–4 inch cells or small pots (quantity depends on seeds sown). Biodegradable pots are eco-friendly!
- ● Spray bottle: 1 – For gentle watering (avoids compacting soil).
- ● Trowel or small shovel: 1 – Helps mix additives evenly.
- ● Grow lights or sunny windowsill: Access to 12–16 hours of light daily.
- ● Plastic wrap or humidity dome: 1 sheet – Keeps moisture in until seeds germinate.
- ● Hydrogen peroxide (3%): 1 tbsp per quart of water – Sterilizes soil if repurposing old mix.
- ● Mycorrhizal fungi: 1 packet – Enhances root growth (great for veggies!).
- ● pH test kit: 1 – Ensures your mix is neutral (6.0–7.0) for most seeds.
How to mix the perfect lightweight seed-starting soil
Here’s my foolproof blend that keeps seedlings strong and prevents that dreaded damping-off disease.
🌱 Step 1: Combine Base Materials for Airy Texture
Start with 50% peat moss or coconut coir—this holds moisture without smothering roots. I like to mix it with 30% perlite or vermiculite to create air pockets. The perlite keeps things loose so water drains freely, while the peat or coir retains just enough moisture for germinating seeds.
Use your hands to gently fold the materials together until they look uniformly fluffy. If it feels too dense, add a little more perlite. You’ll know it’s right when a handful crumbles easily between your fingers—no clumping, no sticking together.
💧 Step 2: Add Organic Matter for Nutrient Boost
Stir in 20% compost or worm castings for gentle nutrition without overwhelming seedlings. Too much compost can introduce pathogens, so I sift mine first to remove any chunks. The goal here is a light, crumbly texture that still provides the tiniest bit of food to kickstart those tiny roots.
Mix thoroughly until the compost is evenly distributed. You’ll see little dark specks throughout the lighter mix. This step is where seedlings get their first energy boost—skip it, and they’ll struggle to stand on their own.
✂️ Step 3: Adjust Moisture for Ideal Germination Conditions
Slowly add warm water while mixing until the soil reaches a damp sponge consistency. It should hold together when squeezed but not drip. I like to test by forming a loose ball—if it stays intact but crumbles easily, you’ve got it right. Overwatering now leads to soggy soil and damping-off later.
Let the mix sit for 10-15 minutes before using. This gives any excess moisture time to distribute evenly. If it feels too dry after sitting, add a tiny splash of water and remix. The right moisture balance is everything—too wet, and seeds rot; too dry, and they won’t sprout.
☀️ Step 4: Sterilize to Prevent Disease
Spread the mix on a baking sheet and pop it in the oven at 200°F for 30 minutes. This kills any lurking fungi or bacteria that could cause damping-off. I do this right before planting so the soil stays fresh and sterile. If you don’t have an oven, microwave it in 1-minute bursts until steaming hot, stirring between each burst.
Let it cool completely before using. The mix should be warm to the touch but not hot—just like a cozy spring day. Sterilizing might seem like overkill, but trust me, it’s the difference between a thriving seed tray and a sad, moldy mess.
🪴 Step 5: Test and Use Immediately
Fill your seed-starting containers with the mix, pressing down lightly to remove air pockets. Fill to 1 inch below the rim—this prevents overflow when you water. Tap the container gently on the table to settle the soil evenly. You’ll see a uniform, fluffy surface with no gaps.
Now it’s ready for seeds! The lightweight texture lets roots spread easily, and the balanced moisture keeps them happy until they’re strong enough to handle the world. This mix is my secret weapon for healthy, disease-free starts every time.
Tips & tricks for perfect seed-starting soil mix
Here's the secret to avoiding soggy starts and weak seedlings—these small details make all the difference.
Texture Test: In Step 1, when mixing your 50% peat moss or coconut coir with 30% perlite, take a pinch and squeeze it gently. It should crumble immediately when released—no dust, no clumps. If it sticks together, you need more perlite. This airy texture is what prevents damping-off by keeping roots from sitting in water.
Compost Prep: For Step 2, sift your compost through a fine-mesh strainer before adding it. This removes any large chunks that could create anaerobic pockets where harmful bacteria thrive. I like to use worm castings instead—they're naturally sterile and packed with gentle nutrients.
Moisture Balance: During Step 3, when you're adding warm water, think "damp sponge" not "wet towel." The 10-15 minute rest period is crucial—this lets any excess water redistribute. If you skip this, you'll end up with uneven moisture that causes some seeds to rot while others stay dry.
Sterilization Shortcut: For Step 4, if you don't have an oven, use the microwave method but work in small batches. Spread the mix on a microwave-safe plate and zap for 1 minute, stir, then repeat until steaming hot. Let it cool completely before using—hot soil can cook your seeds before they even sprout!
Pro Tips for Potting Soil For Seed Starting
- Here's the secret to avoiding soggy starts and weak seedlings—these small details make all the difference.
- Texture Test: In Step 1, when mixing your 50% peat moss or coconut coir with 30% perlite, take a pinch and squeeze it gently.
- Compost Prep: For Step 2, sift your compost through a fine-mesh strainer before adding it.
Frequently asked questions
Got questions about the best potting soil for seed starting? You’re not alone! Here are answers to the most common concerns—so you can grow confidently from seed.
What’s the difference between potting soil and garden soil for starting seeds?
Garden soil is too dense and may contain pathogens or weeds. Potting soil for seed starting is lightweight, sterile, and formulated to promote root growth while preventing damping off. It’s designed to drain well and retain just enough moisture—no compacting or suffocating seedlings!
When is the best time to use seed-starting mix?
Use it anytime you’re sowing seeds indoors or in seed trays, whether in early spring for warm-season crops or fall for cool-season veggies. For outdoor direct sowing, a seed-starting mix works best in cool, damp conditions (like early spring) to prevent crusting. Always follow your seed packet’s timing guidelines!
Can I make my own seed-starting mix at home?
A simple DIY blend includes:
- 50% peat moss or coco coir (for moisture retention)
- 30% perlite or vermiculite (for aeration)
- 20% compost or worm castings (for nutrients)
Why are my seeds rotting or moldy in the potting mix?
This is usually damping off, caused by overwatering, poor drainage, or a mix that’s too dense. Fix it by:
- Using a sterile, lightweight mix (like a 50/50 peat-perlite blend)
- Watering only when the top inch feels dry (bottom-watering helps!)
- Ensuring pots have drainage holes and avoiding saucers that trap moisture.
How long can I reuse seed-starting mix?
Ideally, discard and replace your mix after one growing season to avoid pathogen buildup. If you must reuse it, sterilize it again (bake or microwave with a splash of water) and avoid using it for high-value crops like tomatoes or peppers, which are prone to disease. Fresh mix = happier seedlings!
Wrapping up and next steps
Choosing the right potting soil for seed starting is your first step toward a thriving garden!
A lightweight, sterile mix—like a blend of coco coir, perlite, and compost—gives your seedlings the perfect foundation to grow strong and disease-free. 🌱 Don’t let damping off or overcrowding hold you back; with the right soil, you’re already halfway to success.
Now that you’re armed with the knowledge, it’s time to roll up your sleeves and get planting! Start small with a few easy seeds, like lettuce or marigolds, and watch your green thumb grow. Happy gardening! 🌿