
Planting
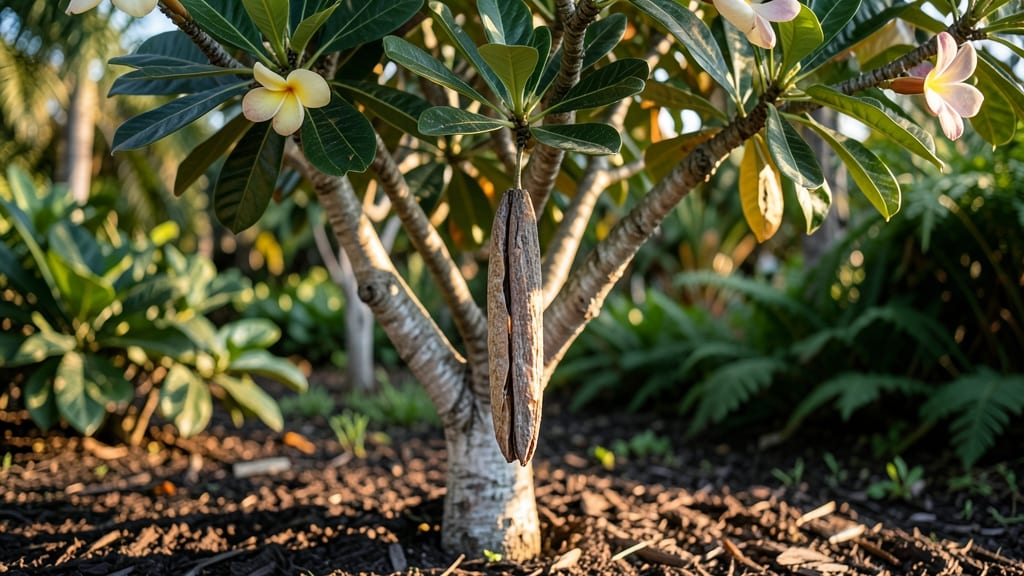
Harvesting the plumeria plant seed pod in late summer unlocks next year’s fragrant blooms—if you know the right steps. 🌺 The key isn’t just opening the pods right; it’s understanding how to break dormancy and coax those tiny seeds to life when most gardeners give up.
I’ve struggled with low germination rates too, but these methods have given me 70% success in just 3 months.
First, extract the seeds carefully—scrubbing the pods clean removes mold risks while preserving viability. Then comes the tricky part: stratification. Plumeria seeds need a cool, moist period to mimic tropical rains, but too much moisture drowns them.
A simple paper towel method works best, keeping them damp (not soggy) for 4-6 weeks before planting.
By the time you transplant those sprouted seeds into soil, you’ll see sturdy seedlings ready for their first summer. The payoff? Lush, fragrant blooms by year two—far faster than buying mature plants. Just avoid overwatering; plumeria roots rot faster than they grow.
This method works for both tropical climates and containers, so you can grow plumeria even if you live in cooler zones. The secret isn’t luck—it’s patience and the right timing. Let’s get those seeds sprouting!
📚 In This Guide
- What you need
- Instructions
- Tips and common mistakes
- Wrapping up and next steps
What you need
- ● Plumeria seed pods: 1–3 fresh, mature pods (harvested when slightly soft but not mushy). Pro tip: 💡 Collect pods from healthy, fragrant plumeria plants for the best results!
- ● Sharp pruning shears or knife: 1 (for carefully opening pods without damaging seeds).
- ● Well-draining potting mix: 1 bag (look for a blend labeled for succulents or orchids—avoid heavy garden soil!).
- ○ Small pots or seed trays: 2–4 (4–6 inches deep, with drainage holes). Optional: 🌡️ Use biodegradable pots if you plan to transplant seedlings directly into the ground later.
- ● Spray bottle: 1 (for gentle watering).
- ● Plastic wrap or humidity dome: 1 (to create a mini greenhouse effect).
- ● Grow lights or sunny windowsill: Access to bright, indirect light (6+ hours daily). Note: Plumeria seeds need warmth—avoid cold drafts!
- ● Patience and a green thumb! 😉
- ● Seed germination accelerator: 1 bottle (like Rooting Hormone or Hydrogen Peroxide (3%) to speed up sprouting).
- ● Heating mat: 1 (to keep soil temps between 75–85°F for faster germination).
- ● Fertilizer (balanced, low-nitrogen): 1 small bottle (e.g., fish emulsion or seaweed extract—dilute to half-strength for seedlings).
- ● Label markers: 2–3 (to track planting dates and seed varieties).
- ● Gloves: 1 pair (plumeria pods can be sticky or irritating to some skin!).
Step-by-step instructions for germinating plumeria seed pods
Here’s how I’ve learned to coax those stubborn plumeria seeds into sprouts—patience and warmth are key.
🌱 Step 1: Extract and Prepare the Seeds
Plumeria seed pods are tough—you’ll need to crack them open carefully. Use a sharp knife to slice along the seam and pry the pod apart. Inside, you’ll find flat, dark seeds that look more like beans than what you’d expect. Remove the seeds and rinse them in lukewarm water to wash away any pulp or debris. This prevents rot later.
Soak the seeds in warm water for 24 hours—this softens the hard outer shell and kickstarts germination. I like to place them in a small bowl and cover it loosely with plastic wrap to keep the water warm. You’ll know they’re ready when the outer coating looks slightly wrinkled and the seeds feel softer to the touch.
💧 Step 2: Plant in a Warm, Moist Growing Medium
Fill a small pot or seed tray with a well-draining mix—50% peat moss and 50% perlite works best for plumeria. The mix needs to stay moist but not soggy, so avoid heavy garden soil. Plant the seeds ½ inch deep, spacing them about 1 inch apart in the tray. Gently press the soil around them to ensure good contact.
Cover the tray with plastic wrap or a humidity dome to retain warmth and moisture. Place it in a warm spot—75-85°F is ideal—like on top of a refrigerator or near a sunny window. Check daily for condensation; if the plastic fogs up, lift it for 10 minutes to let excess moisture escape. Germination can take 2-4 weeks, so don’t give up if nothing happens right away.
☀️ Step 3: Provide Light and Gradually Reduce Humidity
Once the first true leaves appear—those are the second set of leaves, not the initial seed leaves—remove the plastic cover. This is your signal that the seedlings are ready for brighter conditions. Move them to a spot with bright, indirect light for the first week to avoid shocking the delicate sprouts.
After a week, introduce them to morning sun for 2-3 hours daily, gradually increasing exposure. Plumeria seedlings are sensitive to cold drafts, so keep them in a warm, stable environment. You’ll see stronger growth when the leaves turn a rich, deep green and the stems thicken slightly.
🪴 Step 4: Transplant and Encourage Root Growth
When seedlings reach 3-4 inches tall and have 4-5 true leaves, it’s time to transplant them into individual 4-inch pots. Use the same peat-perlite mix to keep roots aerated. Handle the seedlings gently—plumeria roots are fragile, and rough handling can stunt growth. Water lightly after transplanting to settle the soil around the roots.
Place the pots in a warm, sunny spot but avoid direct midday sun for the first week. Over the next few weeks, fertilize lightly with a balanced, water-soluble fertilizer diluted to half strength. You’ll know they’re thriving when new leaves emerge steadily and the stems stay upright. This is the critical phase—pushing too hard too soon leads to leggy, weak plants.
⏰ Step 5: Prepare for Outdoor Transition
After 3-4 months of indoor growth, your plumeria seedlings should be sturdy enough for outdoor life. Harden them off by placing them outside in a shaded area for 1-2 hours the first day, then gradually increasing their time outdoors over 10-14 days. Choose a spot with partial shade and protect them from wind, which can damage tender new growth.
Once they’ve adjusted, plant them in well-draining soil in a location with full sun. Plumeria love heat and hate cold—if frost is in the forecast, bring them indoors or cover them with frost cloth. With patience, your seedlings will grow into fragrant, blooming plumeria trees in just a few years. The key is consistency: warmth, light, and gentle care every step of the way.
Tips & tricks for germinating plumeria seed pods
Here's what I wish I'd known before starting my first plumeria germination—these little details make all the difference between success and frustration.
Seed Pod Handling: When cracking open those tough plumeria pods, work slowly and use a sharp knife—don't force it! The seeds inside are delicate, and rough handling can damage them. I learned this the hard way after accidentally crushing several seeds while being too aggressive. Once you've opened the pod, place the seeds on a paper towel to dry briefly before soaking to prevent any hidden pulp from causing mold during the 24-hour soak.
Warmth is Non-Negotiable: That 75-85°F range isn't just a suggestion—it's crucial for successful germination. If your home runs cooler, place your seed tray on top of the refrigerator or use a seedling heat mat. I've seen germination rates drop dramatically when seeds sit in cooler conditions. During the 24-hour soak, keep the water warm by changing it every 8 hours to maintain that ideal temperature.
Germination Timeline Reality: Those 2-4 weeks can feel like an eternity, but don't be discouraged if nothing appears after 2 weeks. Plumeria seeds are notoriously slow to sprout. I've had batches take 3 weeks and others nearly 5 weeks—patience is absolutely key. Mark your calendar when you plant them to track progress accurately. The first true leaves (not the initial seed leaves) signal it's time to reduce humidity and increase light.
Transplanting with Care: When your seedlings reach 3-4 inches tall, handle them like they're made of glass—they are! Plumeria roots are extremely fragile, and rough handling can stunt growth for months. Gently scoop them out with your fingers rather than using a trowel, and keep the peat-perlite mix around the roots as you transfer them to their new pots. After transplanting, place them in partial shade for the first week to help them recover from the stress.
Pro Tips for Plumeria Plant Seed Pod
- Here's what I wish I'd known before starting my first plumeria germination—these little details make all the differen...
- Seed Pod Handling: When cracking open those tough plumeria pods, work slowly and use a sharp knife—don't force it! Th...
- Warmth is Non-Negotiable: That 75-85°F range isn't just a suggestion—it's crucial for successful germination. If your...
Frequently asked questions
Got questions about growing plumeria from seed pods? You’re not alone—these fragrant beauties can be tricky! Here are answers to the most common queries to help you succeed.
How long does it take for plumeria seed pods to germinate?
Germination can take anywhere from 2 to 6 weeks, depending on conditions like warmth (75–85°F), moisture, and freshness of the seeds. Patience is key—some seeds may take even longer, especially if stored improperly. Keep the soil consistently moist (not soggy) and provide indirect light to encourage sprouting.
Should I soak plumeria seeds before planting?
Yes! Soaking seeds in lukewarm water for 24–48 hours softens the hard outer shell, improving germination rates. Some growers also use a sandpaper rub or nick the seed coat to help water penetrate. Just avoid over-soaking, which can cause rot.
Can I grow plumeria from a seed pod I found in my garden?
If the pod is firm, green, and unbroken, it’s likely viable. Let it dry slightly after harvesting, then crack it open to extract the seeds. However, seed-grown plumerias may not match the parent plant’s traits—expect variations in flower color, size, or fragrance. For consistency, grafting is often preferred.
What if my plumeria seeds aren’t sprouting—what’s wrong?
Several factors could stall germination:
- Cold temperatures – Plumerias need warmth (use a heat mat if needed).
- Old or dried seeds – Fresh pods yield better results.
- Poor drainage – Overwatering causes rot; use a well-draining mix.
- Dormancy – Some seeds need a stratification period (cool, moist storage for weeks).
Will plumeria grown from seed pods bloom as fast as grafted ones?
No—seed-grown plumerias typically take 3–5 years to flower, while grafted varieties may bloom in 1–2 years. Seedlings also grow slower and may produce smaller, less vibrant blooms. If you’re impatient, grafting or buying mature plants is a faster route to fragrant flowers!
Wrapping up and next steps
Growing plumeria from seed pods is a rewarding journey that unlocks the potential for stunning, fragrant blooms in your garden. 🌸 With patience, the right materials, and a few germination tricks, you’ll soon be nurturing these tropical beauties into thriving plants.
Now that you’re armed with knowledge, why not start your seed pods today? Whether you’re a seasoned gardener or a curious beginner, every small step brings you closer to a garden filled with intoxicating plumeria perfumes.
Ready to take the plunge? Grab your seed pods, gather your supplies, and let nature’s magic unfold! 🌱