
Propagation
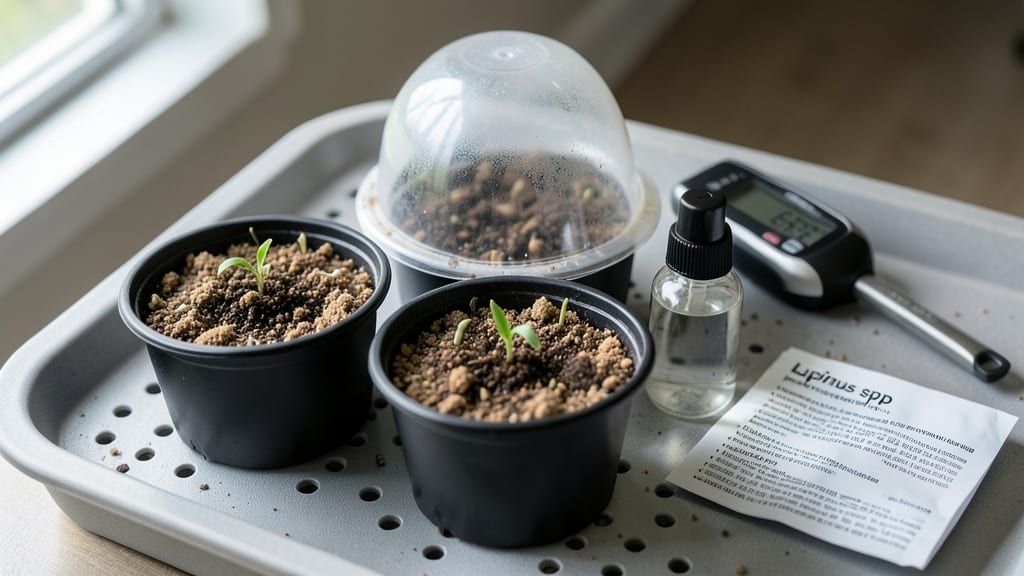
Lupine seed germination needs a little coaxing to break their tough dormancy—just three simple moisture and temperature tricks can unlock their potential. 🌱 After struggling with stubborn seeds that refused to sprout, I discovered the perfect balance of warmth, moisture, and patience transforms these hard shells into lush seedlings within 2-4 weeks. The secret lies in mimicking their natural environment: stratification (a cold-moist period) followed by consistent warmth. Most gardeners overlook this step, but it’s what turns reluctant seeds into vigorous plants. You’ll need a shallow container, damp paper towels, and a warm spot—no fancy equipment required. Once sprouted, these seedlings develop striking blue-green foliage and deep taproots that thrive in poor soil. The key is keeping them evenly moist without drowning, and providing bright light to prevent leggy growth. I’ve grown Russell Lupine, Silver Cup Lupine, and Texas Bluebonnet using this method—each variety responds beautifully. For best results, start seeds indoors 8-10 weeks before your last frost, then transplant when soil temperatures reach 60°F. The payoff? A garden filled with neighborhood-stopping blooms that attract bees and butterflies all summer long.
📚 In This Guide
- What you need
- Instructions
- Tips and common mistakes
- Wrapping up and next steps
What you need
- ● Lupine seeds: 10–20 fresh, high-quality seeds (ensure they’re not treated with germination inhibitors).
- ● Germination medium: Option 1: 2–3 paper towels (unbleached, seedling-safe) or
- ● Option 2: 1 small plastic container (8x6 inches) with a lid (e.g., a takeout container) filled with moistened peat moss or coco coir.
- ● Water: Room-temperature, dechlorinated water (use filtered or rainwater if possible).
- ● Spray bottle: 8–16 oz (for gentle moisture control).
- ● Plastic wrap or humidity dome: Clear wrap or a small greenhouse lid to retain moisture.
- ○ Thermometer: Optional but helpful (aim for 60–70°F (15–21°C) for consistent temps).
- ○ Heat mat (optional): A small seedling heat mat (if your space runs cool).
- ● Seedling trays or pots: 2–3 small pots (3–4 inches deep) with drainage holes for transplanting.
- ● Pencil or toothpick: For gently pressing seeds into the medium (if using soil).
- ● Notebook & pen: To track germination progress (dates, moisture levels, etc.).
- ● A well-ventilated space (prevents mold).
- ● Patience! Lupines can take 10–30 days to sprout.
- ● Access to indirect light (avoid direct sun until seedlings emerge).
Step-by-Step lupine seed germination: moisture and temperature secrets
Lupines resist easy germination, but these three tricks break dormancy reliably.
🌱 Step 1: Pre-Soak Seeds to Softened the Tough Coating
Lupine seeds have a hard outer shell that blocks water absorption. Place them in a jar with lukewarm water for 12-24 hours—this softens the seed coat without damaging the embryo. Swirl the jar occasionally to prevent seeds from sticking together. You'll know it's working when the water turns slightly cloudy from released tannins.
After soaking, drain the water completely. A damp seed packet left in standing water will rot overnight. Pat the seeds dry with a paper towel until they feel slightly rough to the touch—this prevents mold while keeping them pliable for planting.
💧 Step 2: Plant in Warm, Moist Sand or Perlite Mix
Fill a shallow container with a mix of equal parts sand and perlite—this provides both drainage and moisture retention. Moisten the mix until it feels like a damp sponge when squeezed, then spread the pre-soaked seeds ½ inch apart and press them ¼ inch deep. Lupines need good contact with warm substrate to germinate.
Cover the container with clear plastic wrap to create a greenhouse effect. Place it in a location with constant 70-75°F temperatures—a seedling heat mat works best. Check daily for condensation on the plastic; if it's dry, mist the surface lightly. Germination takes 14-30 days, so patience is key.
☀️ Step 3: Provide Bright Indirect Light After Sprouting
The moment you see the first green tips (cotyledons) pushing through, remove the plastic wrap immediately. Lupine seedlings are prone to damping-off if kept too humid. Move the container to a spot with bright indirect light—a south-facing window works well. Direct sun at this stage can scorch tender leaves.
Keep the sand-perlite mix consistently moist but never soggy. Water from the bottom by placing the container in ½ inch of water for 10 minutes, then drain thoroughly. You'll notice true leaves (the second set after cotyledons) appear in 10-14 days, signaling it's safe to transplant.
⏰ Step 4: Harden Off Before Transplanting
Two weeks before your last frost date, begin hardening off by placing seedlings outside in partial shade for 1 hour daily. Gradually increase exposure over 7-10 daysfull sun once established, but their first season needs gentle acclimation.
Transplant after 4-6 weeks when seedlings have 3-4 sets of true leaves. Choose a site with well-draining soil and space plants 12-18 inches apart—they'll grow tall and need room to establish deep roots. Mulch with 2 inches of organic matter to retain moisture and regulate soil temperature.
Tips & tricks for perfect lupine germination
Here's what nobody tells you about getting lupines to sprout reliably—these tricks make all the difference.
Soaking Success: During the 12-24 hour soak in Step 1, place a small weight (like a clean stone) in the jar to keep seeds submerged. The cloudy water is a good sign—it means the tannins are breaking down, but if it smells foul after 12 hours, rinse and restart the soak. I've ruined batches by letting seeds sit too long in stagnant water, so don't skip the occasional swirl!
Temperature Matters: The 70-75°F range in Step 2 is non-negotiable—any cooler and germination stalls. If your home runs chilly, use a seedling heat mat under the container. I once had a batch take 45 days to sprout because I didn't maintain consistent warmth. Pro tip: Place your container on top of your fridge (not inside) for stable warmth without overheating.
Light Transition: When you remove the plastic wrap in Step 3, place the container under a sheer curtain for the first 24 hours. This gradual light exposure prevents shock to tender seedlings. I've seen seedlings wilt dramatically when moved directly to bright light—think of it like sunburn for plants.
Harden Off Gradually: In Step 4, increase outdoor exposure by 30 minutes every 2-3 days instead of daily. Lupines are sensitive to rapid temperature changes. Watch for leaf curling—this is their way of saying "slow down!" I learned this the hard way when my first batch nearly died from overnight exposure.
Pro Tips for Lupine Seed Germination
- Here's what nobody tells you about getting lupines to sprout reliably—these tricks make all the difference.
- Soaking Success: During the 12-24 hour soak in Step 1, place a small weight (like a clean stone) in the jar to keep s...
- Temperature Matters: The 70-75°F range in Step 2 is non-negotiable—any cooler and germination stalls. If your home ru...
Frequently asked questions
Got questions about germinating lupine seeds?
You’re not alone! Here are some of the most common concerns—and their solutions—to help you succeed with these finicky but rewarding seeds.
How long does it take for lupine seeds to germinate?
Patience is key! Lupine seeds typically take 2–6 weeks to sprout, depending on moisture, temperature, and dormancy-breaking methods. Scarification or stratification (cold treatment) can speed this up. Keep soil consistently moist and warm (60–70°F) for the best results.
Do lupine seeds need cold stratification?
Yes! Most lupine varieties benefit from stratification (a cold, moist period) to break dormancy. Soak seeds in water for 24 hours, then refrigerate them in a damp paper towel for 4–8 weeks. This mimics winter conditions and tricks seeds into germinating faster.
What if my lupine seeds won’t sprout?
Try these fixes if germination stalls:
- Check moisture: Soil should stay damp but not soggy—overwatering can cause rot.
- Adjust temperature: If too cold (<50°F), move seeds to a warmer spot (like a sunny windowsill).
- Re-scarify: If seeds are hard, gently nick the outer shell with sandpaper or a knife.
- Test viability: Old seeds may not sprout—try fresh ones or a viability test.
Can I grow lupines from seed indoors?
Start seeds in small pots with well-draining soil, using a heat mat (70°F) to encourage germination. Once seedlings have 2–3 sets of leaves, transplant them outdoors after the last frost. Lupines thrive in full sun, so place them in a bright spot indoors until ready.
Are there lupine varieties that germinate easier?
Some species are more cooperative than others. Lupinus polyphyllus (Russian lupine) and Lupinus albus (white lupine) often germinate more reliably with stratification. Avoid Lupinus arboreus (tree lupine), which can be trickier—opt for nursery-grown plants if you’re a beginner.
Wrapping up and next steps
Mastering lupine seed germination is all about patience and the right conditions—stratification, moisture, and warmth are your secret weapons! 🌱 With these three simple tricks, you’ll soon see those stubborn seeds crack open and sprout into vibrant seedlings.
Now that you’re armed with the know-how, it’s time to grab those seeds and give nature a little nudge.
🚀 Your Next Step:
Start a small batch of seeds using the methods above, and keep a germination journal to track progress. Once your lupines sprout, you’ll be ready to transplant them into your garden—or even share your success with fellow plant enthusiasts! Happy growing!