
Lawn
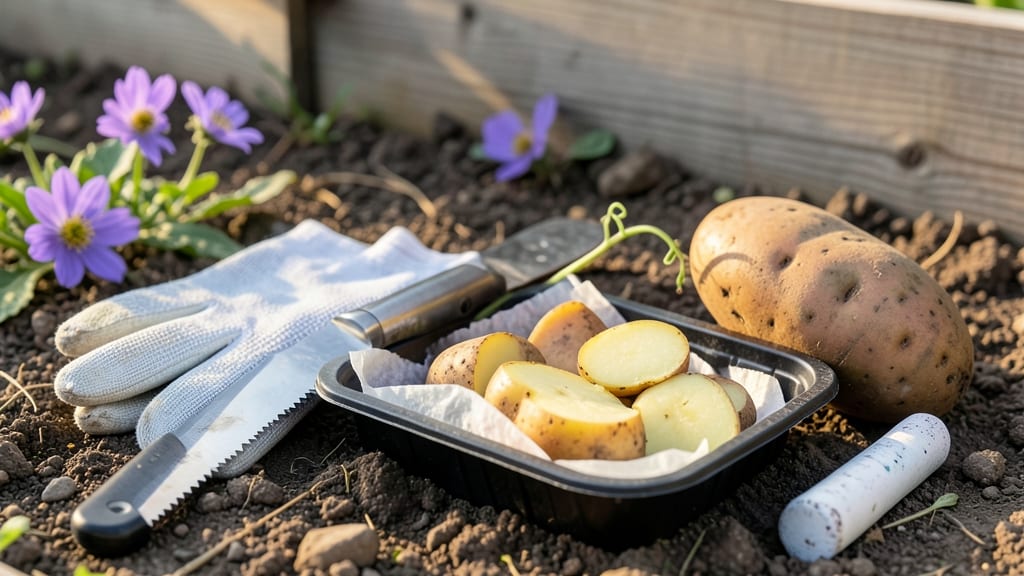
The knife-edge technique for cutting seed potatoes before planting transforms a single tuber into a high-yielding harvest. 🌱 Instead of planting whole potatoes, strategic cuts create multiple strong stems—each capable of producing its own plant.
This method isn’t just about quantity; it’s about giving your potatoes the best possible start for vigorous growth and higher yields. The process begins with a sharp knife and a clean cut—never too close to the "eyes" (those little dimples where sprouts emerge).
Each piece needs at least two eyes and a 1-inch-thick slice of potato to heal properly. After cutting, let the pieces cure for 12-24 hours in a cool, dark place to prevent rot. This drying step is critical; it’s the difference between healthy plants and mushy failures.
Once healed, plant the cut pieces eyes-up in well-draining soil, about 4 inches deep. Space them 12 inches apart in rows 3 feet apart to allow room for foliage to spread. Water lightly after planting, then keep the soil consistently moist but not soggy.
Within 2-3 weeks, you’ll see strong, uniform sprouts—proof the technique worked. Avoid common mistakes like cutting too thin or planting immediately after cutting. Overcrowding and poor soil drainage are other pitfalls that lead to weak plants.
With this method, you’ll maximize your potato yield while giving your plants the strongest possible foundation for success.
📚 In This Guide
- What you need
- Instructions
- Tips and common mistakes
- Wrapping up and next steps
What you need
- ● Seed potatoes: Certified disease-free, medium-sized potatoes (1.5–2.5 oz each). Aim for 10–15 potatoes per 10-foot row (adjust based on variety and space).
- ● Sharp knife: A clean, sterilized chef’s knife, pruning knife, or box cutter (avoid dull blades to prevent crushing the potato).
- ● Cutting surface: A clean, disinfected wooden board, plastic tray, or paper towel (to catch potato scraps).
- ● Disinfectant: Rubbing alcohol (70% isopropyl) or a 10% bleach solution (for sterilizing tools and surfaces).
- ● Healing tray: A shallow tray, cardboard box, or mesh bag (to let cut potatoes dry for 1–3 days before planting).
- ● Garden soil or potting mix: Well-draining, fertile soil (pH 5.0–6.5 ideal for potatoes). Add compost or aged manure if needed.
- ● Planting location: A sunny spot (6–8 hours of sunlight daily) with loose, weed-free soil. Raised beds or containers work too!
- ● Horticultural chalk or cinnamon powder (to dust cuts and prevent rot).
- ● Plant markers or labels (to track varieties if growing multiple types).
- ● Garden twine or stakes (for trellising if growing fingerling or long varieties).
- ● Organic fungicide (like copper spray) for high-risk areas.
Step-by-Step instructions for cutting seed potatoes before planting
The knife-edge technique transforms whole seed potatoes into multiple strong plants. Here's how to do it right.
✂️ Step 1: Select and Prepare Healthy Seed Potatoes
Choose certified disease-free seed potatoes with at least 2-3 eyes each. Avoid potatoes that have sprouted excessively or show signs of rot. I like to work with medium-sized tubers—they're easier to handle and cut cleanly. Place them in a bright, cool spot for 4-6 weeks before cutting to encourage early sprouting.
Wash the potatoes gently to remove dirt, then let them dry completely. This prevents the knife from slipping and ensures cleaner cuts. I use a sharp chef's knife for precision—dull blades crush the potato tissue and invite rot. Place the potato on a clean cutting board and identify the eyes (small dimples) that will become stems.
🪴 Step 2: Cut Potatoes into Sections with Knife-Edge Precision
Make cuts 1/4 inch below the eyes to ensure each section retains at least 1-2 healthy sprouts. I draw a faint pencil line first to guide my cuts—this keeps sections uniform and prevents uneven pieces. Angle the blade slightly to create a clean, sloped cut that exposes more surface area for faster healing.
Each section should be roughly 2-3 ounces in weight. Larger pieces may produce multiple stems but take longer to establish. Smaller pieces with just one eye often fail to grow. After cutting, let the sections dry on a clean surface for 1-2 hours until the cut edges form a callus—a thin, dry layer that prevents rot.
🌱 Step 3: Cure and Chit Before Planting
Place the cut sections in a shallow tray or egg carton with the cut side up. Store them in a cool, bright location (around 50-60°F) for 1-2 weeks. This curing period allows the cut edges to harden and encourages the sprouts to grow 1-2 inches long before planting. I check daily for signs of moisture or mold—if any section feels damp, I gently pat it dry.
Once the sprouts reach 1 inch in length and the cut edges have callused over, your potatoes are ready for planting. The chitting process gives your plants a head start, resulting in earlier and more vigorous growth. I like to plant chitted potatoes 2-3 weeks before the last frost date to maximize the growing season.
☀️ Step 4: Plant Cut Sections at Proper Depth and Spacing
Dig holes 4-6 inches deep and place each section cut-side down with the sprouts facing up. Space rows 24-30 inches apart for adequate airflow and sunlight penetration. I use a garden trowel to create small trenches for efficiency, especially when planting multiple sections. Cover the sections with 2-3 inches of soil, leaving the sprouts exposed.
Water gently after planting to settle the soil without disturbing the sprouts. Avoid overwatering—soggy soil can rot the cut edges before roots establish. Mulch with 2-3 inches of straw after emergence to retain moisture and suppress weeds. The key is patience: roots take 2-3 weeks to establish, so keep the soil consistently moist but not waterlogged.
⏰ Step 5: Monitor Growth and Adjust Planting Depth
When the sprouts reach 4-6 inches tall, add more soil around the base to bury the lower stems. This encourages stronger root development and prevents the plant from toppling. I do this in stages—about 1 inch of soil every 7-10 days—until the plant is fully established. This gradual process, called "hilling," also protects against late-season blight by keeping foliage off the ground.
Watch for signs of stress like yellowing leaves or stunted growth. These often indicate overwatering, poor drainage, or insufficient sunlight. Adjust your care routine immediately—reduce watering if soil stays wet, or move plants to a sunnier spot if leaves pale. With proper technique, each cut section will yield a robust potato plant ready for a bountiful harvest.
Tips & tricks for perfect seed potato cutting
Mastering the knife-edge technique ensures healthy, vigorous potato plants. These precision tips will help you avoid common pitfalls and maximize your harvest.
Precision Cutting: When making your 1/4-inch cuts below the eyes in Step 2, use a ruler or measuring tape to verify depth. I find that a slight downward pressure on the knife while cutting prevents crushing the potato tissue. The angled cut isn't just aesthetic—it increases surface area for faster callusing, which is crucial for preventing rot during the 1-2 hour drying period.
Sprout Viability: After cutting, examine each section carefully for at least 1-2 healthy sprouts. Discard any pieces with weak or damaged sprouts—they won't establish properly. For larger potatoes with multiple eyes, you can sometimes create two viable sections, but never sacrifice sprout quality for quantity. The 2-3 ounce weight guideline ensures each section has enough energy reserves for strong root development.
Chitting Environment: Maintaining the 50-60°F temperature during the 1-2 week chitting period is more critical than most gardeners realize. I've found that placing trays on a seedling mat set to 55°F eliminates temperature fluctuations that can cause uneven sprouting. Check daily for moisture—condensation on the tray or damp sections indicates you need better airflow, which can be achieved by spacing sections slightly apart in the tray.
Planting Timing: The 2-3 weeks before last frost recommendation assumes average spring conditions. In colder climates, plant chitted potatoes 4-5 weeks before last frost to account for slower soil warming. Conversely, in warmer regions, you can plant up to 6 weeks early. The key is ensuring soil temperatures reach at least 45°F before planting—cold soil significantly delays root establishment.
Pro Tips for Cutting Seed Potatoes Before Planting
- Mastering the knife-edge technique ensures healthy, vigorous potato plants. These precision tips will help you avoid ...
- Precision Cutting: When making your 1/4-inch cuts below the eyes in Step 2, use a ruler or measuring tape to verify d...
- Sprout Viability: After cutting, examine each section carefully for at least 1-2 healthy sprouts. Discard any pieces ...
Frequently asked questions
Got questions about cutting seed potatoes before planting? You’re not alone—this technique can feel tricky at first! Below, we’ve answered the most common questions to help you grow like a pro.
Do I have to cut seed potatoes before planting?
Nope! You can plant whole seed potatoes, but cutting them can boost yields by encouraging multiple stems. If you’re short on space or want faster growth, cutting is worth it. For beginners, start with whole potatoes to practice timing and soil prep first.
How long before planting should I cut seed potatoes?
Cut your potatoes 1–2 weeks before planting and let the cut sides cure (dry out) for 24–48 hours. This prevents rot and helps them root faster. Store them in a cool, dark, humid spot (like a basement) until planting day.
What’s the best way to cut seed potatoes for maximum stems?
Use a sharp, sterilized knife to slice each potato into pieces with at least 2–3 “eyes” (buds) per section. Avoid cutting through eyes—this weakens growth. For extra vigor, aim for 3–4 stems per cut piece by spacing eyes evenly.
Can I cut seed potatoes too early or too late?
Yes! Cutting too early (more than 2 weeks ahead) can dry out the pieces or encourage rot. Cutting too late (right before planting) gives them less time to root. Aim for 1–2 weeks pre-planting, and adjust based on your climate—warmer areas may need a shorter cure time.
What if my cut potatoes turn mushy or rot?
Mushy or rotting cuts usually mean too much moisture or poor airflow. Let them cure in a well-ventilated, dry space (like a cardboard box with holes). If rot starts, toss the affected pieces and replant healthy ones. Overcrowding during storage can also cause issues—keep them spaced apart!
Are there alternatives to cutting seed potatoes?
If cutting feels risky, try these methods:
- Whole potatoes: Plant uncut, but expect fewer stems.
- Seed potato “chits”: Pre-sprout potatoes indoors under grow lights for 4–6 weeks, then plant with sprouts intact.
- Certified organic seeds: Buy disease-free seed potatoes from nurseries to skip cutting altogether.
Will cutting seed potatoes work for all potato varieties?
Most varieties (like Russets, Yukons, or fingerlings) respond well to cutting, but some heirlooms or rare types may not. Check your seed packet or ask a local garden center—some potatoes prefer whole planting for better tuber formation. When in doubt, start with a few cut pieces and a few whole ones to compare!
Wrapping up and next steps
Cutting seed potatoes before planting with the knife-edge technique is a game-changer for healthier, more vigorous plants! By following the right steps—like using a sharp knife, curing the cuts, and planting eye-side up—you’ll give your potatoes a strong start.
This method isn’t just about more yield; it’s about smarter gardening that saves time and effort.
Now that you’re armed with the know-how, grab those seed potatoes and get planting! 🌱 Start small if you’re new, or expand your garden with confidence. Happy growing—your future harvest (and your future self) will thank you!