
Lawn
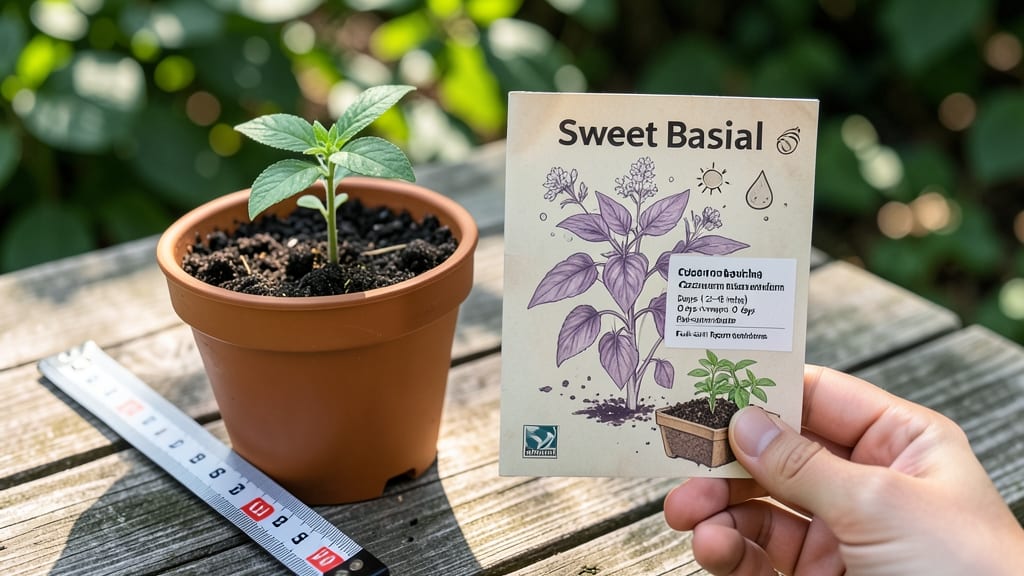
The back of a seed packet holds the foolproof planting dates and care instructions that turn guesswork into guaranteed success. 🌱 I used to ignore those tiny print details—until my basil sprouted too late one spring and my tomatoes bolted before fruiting.
That’s when I learned to trust the packet’s wisdom like a gardening GPS. Look for days to germination, light requirements, and spacing needs—these numbers tell you exactly when to start seeds indoors, when to transplant, and how to arrange them in your garden.
My heirloom tomatoes now thrive because I planted them 6-8 weeks before last frost (not when I felt like it). The packet also reveals depth (like ¼ inch for tiny seeds) and soil temperature preferences—critical for warm-season crops like peppers.
Once you decode these clues, you’ll avoid common mistakes like overcrowding (which stunts growth) or planting too early (which invites rot). My zucchini patch went from scraggly to bushy and productive the year I followed the 1-inch spacing recommendation.
The packet even hints at companion plants—like marigolds deterring pests—that multiply your harvest effortlessly. This isn’t just about dates; it’s about confidence. Next time you hold a packet, read it like a recipe for success—because every gardener’s secret starts with those tiny, often-overlooked words.
📚 In This Guide
- What you need
- Instructions
- Tips and common mistakes
- Wrapping up and next steps
What you need
- ● Seed packet (1 per variety—check the back for planting zones, days to maturity, and spacing!)
- ● Garden soil or potting mix (5–10 lbs, depending on container size; ensure it’s well-draining 🌍)
- ● Containers or garden bed (size based on seed spacing—see packet for specifics!)
- ● Watering can or hose with a gentle spray nozzle (avoid over-saturating seeds!)
- ○ Plant labels & marker (optional but helpful—track varieties easily!)
- ○ Gloves (optional but recommended) for handling soil and seeds comfortably.
- ● Seed starting tray (for indoor germination, if needed)
- ● Heat mat (for slow-germinating seeds—check packet for ideal temps!)
- ● Planting calendar or app (to cross-reference frost dates with seed packet guidelines)
- ● Organic fertilizer or compost (boost growth after seedlings sprout!)
- ● Row covers or cloches (protect young plants from pests or chilly nights)
How to decode planting dates from seed packet backs
Here's how I use those tiny charts to plan foolproof planting—no guesswork, no wasted seeds.
📅 Step 1: Locate Your Hardiness Zone and Last Frost Date
First, find your USDA hardiness zone (usually 5-10 for most gardeners) and your average last frost date—check local weather records or ask your county extension office. These two numbers are the foundation. The seed packet's planting chart assumes you know them, so jot them down first.
I always double-check my zone (I'm in 7b) and last frost (April 15th) because these dates shift slightly each year. If you're new to gardening, use the conservative date—planting too early is safer than rushing. The chart's "weeks before last frost" counts backward from this date.
📊 Step 2: Read the "Weeks Before/After Last Frost" Chart
Look for the bolded planting dates under "Direct Sow" or "Start Indoors." These tell you when to plant seeds directly in the garden or when to start them inside for transplanting. For example, if a packet says "Start indoors 8 weeks before last frost," and your frost is April 15th, you'd begin seeds on February 15th.
Pay attention to whether it says "Direct Sow" or "Start Indoors"—this determines if you're planting seeds directly in the soil or nurturing them under lights first. I always highlight these numbers with a marker so I don't misread them later. The chart also often includes a "Harvest" column—this is just for reference, not planting.
⏰ Step 3: Adjust for Your Local Conditions
Seed packets use average frost dates, but your microclimate might differ. If your garden sits in a frost pocket or gets extra heat from a south-facing wall, adjust the planting window by 1-2 weeks earlier or later. For example, if your area tends to warm up faster than the average, you might plant lettuce 7 days before the packet suggests.
I keep a garden journal to track when my plants actually germinate and thrive—this helps me fine-tune future years. Note if certain plants bolt (flower prematurely) or struggle in your zone, even if the packet says they're cold-hardy. Some seeds, like tomatoes, are heat-lovers and need warmer soil to germinate, so I wait until the soil hits 60°F before planting them outdoors.
🌱 Step 4: Plan for Succession Planting
Many seed packets include a "Succession Planting" column—this tells you when to sow additional seeds for a continuous harvest. For example, if you plant lettuce on March 1st and the packet says "Every 2 weeks," you'd plant again on March 15th, March 31st, and so on. This ensures you're always eating fresh greens instead of getting one big harvest and then nothing.
I use a simple calendar system: I mark the first planting date, then set reminders for each succession interval. For fast-growing crops like radishes, I might plant every 10 days, while slower crops like carrots get spaced 3 weeks apart. This keeps my garden productive all season long without overwhelming me with too many plants at once.
⚠️ Step 5: Watch for Special Instructions
Some seed packets include additional notes like "Soak seeds overnight" or "Needs warm soil to germinate." These aren't just suggestions—they're critical for success. For example, beans and peas often have a "Soak 4-6 hours" note because their hard outer shells need to soften before sprouting. Ignoring these can mean waiting weeks for germination.
I also pay attention to light requirements for indoor starts. If a packet says "Needs light to germinate," I use a grow light immediately after planting—these seeds won't sprout in darkness. For others, like tomatoes, I wait until the first true leaves appear before moving them under lights. These details make the difference between thriving plants and failed experiments.
Tips & tricks for decoding seed packet planting dates
These insider tricks will help you turn those tiny seed packet charts into a foolproof planting schedule—no more guessing games or wasted seeds.
Zone and Frost Date Double-Check: Don't rely on memory for your hardiness zone or last frost date. Use the USDA Plant Hardiness Zone Map and check your local cooperative extension service's frost records—these are more accurate than online calculators. I keep a printed zone map by my planning table and highlight my zone (7b) in yellow. For frost dates, I mark both my average last frost (April 15th) and a conservative backup date (April 1st) in case of early cold snaps. This prevents the classic mistake of planting tender crops too soon.
Chart Reading Clarity: The bolded numbers in the "Weeks Before/After Last Frost" section are your planting timeline, but the column headers ("Direct Sow" vs. "Start Indoors") determine where you plant. I use a highlighter to mark these columns differently—yellow for direct sowing and green for indoor starts. For example, if a packet says "Start indoors 8 weeks before last frost," I calculate February 15th (for my April 15th frost date) and write it on my garden calendar. Pro tip: The "Harvest" column is just reference—ignore it for planting decisions.
Microclimate Adjustments: Those 1-2 week adjustments for local conditions can make all the difference. I test my garden's warmth by burying a thermometer in a shady spot and sunny spot for a week before planting. If my shady soil hits 60°F (the threshold for tomatoes) a week earlier than average, I plant my tomatoes accordingly. For frost pockets, I plant heat-lovers like peppers a week later than the packet suggests. This simple soil temperature check prevents the disappointment of seeds that won't germinate in cold soil.
Succession Planting System: The "Every 2 weeks" or "Every 3 weeks" notes in succession planting columns are your secret to continuous harvests. I use a wall calendar where I mark planting dates with colored dots (red for lettuce, blue for radishes) and set phone reminders for each interval. For fast growers like radishes (10-day intervals), I use sticky notes on my fridge. This visual system keeps me from missing planting windows—no more bolting lettuce or gaps in my harvest schedule.
Pro Tips for Back Of A Seed Packet
- These insider tricks will help you turn those tiny seed packet charts into a foolproof planting schedule—no more gues...
- Zone and Frost Date Double-Check: Don't rely on memory for your hardiness zone or last frost date. Use the USDA Plant...
- Chart Reading Clarity: The bolded numbers in the "Weeks Before/After Last Frost" section are your planting timeline, ...
Frequently asked questions
Got questions about decoding the back of a seed packet? You’re not alone—those tiny details hold the key to gardening success! Here are answers to the most common queries to help you plant with confidence.
What does "days to maturity" mean, and why does it matter?
"Days to maturity" tells you how long it takes from planting (or transplanting) until harvest. For example, if a packet says 60 days, count backward from your first expected frost date to avoid late-season surprises. Pro tip: Adjust for your climate—cooler regions may need earlier starts!
How do I figure out the best planting time based on the packet?
Check the packet for terms like "direct sow after last frost" or "start indoors X weeks before." Use a frost chart for your zone (found online or in seed catalogs) to pinpoint dates. For warm-season crops (e.g., tomatoes), wait until soil is at least 60°F—cold soil stunts growth!
Can I plant seeds from an old packet, or do they expire?
Most seeds stay viable for 1–5 years, depending on the type (check the packet for a "use by" date). Store them in a cool, dry place (like a sealed jar in the fridge) to extend shelf life. Test germination: Plant 5–10 seeds in damp paper towels—if 50%+ sprout, they’re good to go!
What if my seed packet doesn’t have planting instructions?
No worries! Default to these rules: Sow at 2–3x the seed’s depth (tiny seeds = shallow; large seeds = deeper). Space seedlings per packet guidelines or thin to 2–3 inches apart. For blank packets, research the plant online—most databases list ideal conditions.
My seeds sprouted, but the packet said "slow germinators"—what now?
Slow germinators (like parsley or carrots) may take 2–4 weeks to sprout. Keep soil consistently moist (not soggy) and warm (70–80°F for most). Avoid replanting—just wait! If nothing emerges after 4 weeks, try again with fresh seeds.
Wrapping up and next steps
The back of a seed packet isn’t just fine print—it’s your gardening GPS! 🌱 From planting dates to sunlight needs, those details help you grow thriving plants with confidence. Whether you’re a beginner or a seasoned green thumb, trusting the packet’s guidance takes the guesswork out of gardening.
Ready to turn those seeds into a lush garden? Start small—pick one packet, follow the steps, and watch your plants flourish. Happy planting! 🌿