
Lawn
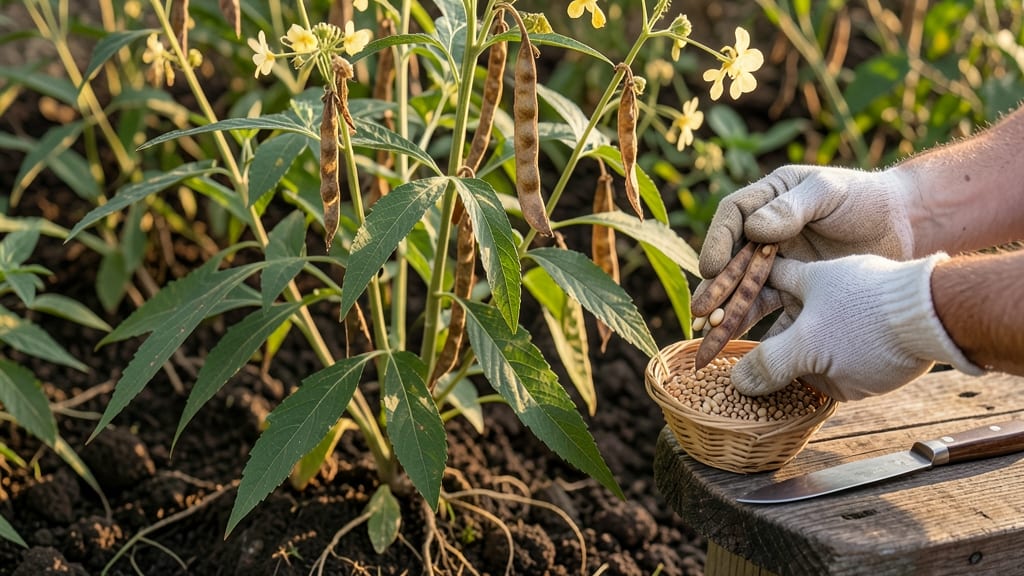
Growing sesame seed pods that crack open with golden seeds is easier than you think—just give them the right timing and patience. 🌱 The key isn’t fancy soil or constant fussing; it’s understanding how sesame plants naturally thrive in warm seasons with minimal interference.
My first attempt nearly failed when I overwatered, but once I learned their dry-loving ways, I harvested enough seeds to fill small jars.
Sesame plants love well-draining soil and full sun, but they’re surprisingly low-maintenance once established. Start seeds indoors 8-10 weeks before your last frost, then transplant seedlings when soil reaches 70°F.
Water only when the top inch of soil is dry—these plants hate soggy roots. The real magic happens when you let the pods dry fully on the plant before harvesting.
By mid-summer, you’ll see those signature papery pods forming along the stems. They’ll turn from green to tan when ready, and a gentle twist will release the seeds inside. A single healthy plant can yield ½ pound of seeds, enough for homemade tahini or sharing with neighbors.
The drying process is the trickiest part—rush it, and the seeds won’t pop open properly.
Works best in warm climates (Zones 7-11), but even cooler regions can grow sesame with a head start indoors. The secret? Let nature handle the rest after planting. Here’s how to nail every step from seed to harvest without the guesswork.
📚 In This Guide
- What you need
- Instructions
- Tips and common mistakes
- Wrapping up and next steps
What you need
- ● Sesame seeds: Certified organic, non-GMO (1–2 packets, ~50–100 seeds). Look for varieties like Bunsi or Tift-23 for best results.
- ● Cold-stratification setup: Refrigerator (34–40°F / 1–4°C)
- ● Moist paper towels or damp peat moss
- ● Ziploc bag or airtight container
- ● Growing containers: Seed trays (3–4 inches deep) or small pots with drainage holes (2–3 per seedling).
- ● Potting mix: Lightweight, well-draining blend (e.g., 50% coco coir + 50% perlite or a seed-starting mix).
- ● Watering can or spray bottle: With a fine mist nozzle for gentle hydration.
- ● Garden gloves (to protect hands from prickly pods later!).
- ○ Heat mat (optional, for faster germination if indoors).
- ○ Grow lights (12–16 hours/day, optional for indoor setups).
- ● Plant labels & markers (to track varieties and planting dates).
- ● Pruning shears (for trimming leggy seedlings or harvesting pods).
How to grow sesame plants from seed to pod in a small space
Sesame thrives with minimal fuss—here’s how to coax those fragrant pods from seed in just two months.
🌱 Step 1: Start Seeds Indoors Under Warmth
Sesame seeds need warmth to germinate, so begin indoors 8-10 weeks before your last frost date. Fill 2-inch-deep seed trays with sterile potting mix (not garden soil) and press it down lightly—just firm enough to hold shape when tapped. Moisten the soil until it feels like a damp sponge, but not dripping.
Plant 2-3 seeds per cell, spacing them ½ inch apart—they’ll compete for space if crowded. Cover them with ¼ inch of soil (no deeper, or they’ll rot before sprouting). Place the tray in a seedling heat mat set to 80-85°F—this mimics tropical soil temperatures where sesame originates. Without warmth, germination can take 3+ weeks; with it, you’ll see sprouts in 7-10 days.
☀️ Step 2: Move to Bright Light and Harden Off
Once seedlings have 2 true leaves (not the tiny first leaves), remove the heat mat and place them under 14+ hours of bright light daily. A grow light positioned 4 inches above the plants works best—a south-facing window alone won’t provide enough intensity. You’ll know light is insufficient if seedlings stretch toward the source with pale, leggy stems.
After 2 weeks under lights, start hardening off by moving trays outside for 1 hour daily in a sheltered spot. Gradually increase outdoor time over 7-10 days until they’re acclimated. Sesame plants handle heat well, but sudden cold snaps will stunt growth—wait until nighttime temps stay above 50°F.
🪴 Step 3: Transplant to Warmth and Watch for Blooms
Transplant seedlings 3-4 inches apart in well-draining soil (sesame hates soggy roots). Choose a spot with full sun—at least 6+ hours daily—and warm soil (65°F+). If your climate is cool, use black plastic mulch to raise soil temperature. Water deeply once after transplanting, then let the soil dry slightly between waterings—overwatering causes root rot.
Sesame flowers appear 4-6 weeks after transplanting, triggered by warm nights. The blooms open in the morning and close by afternoon, so check plants early in the day for tiny white or purple flowers. Once pollinated, pods form in 2-3 weeks. Harvest when pods turn brown and dry—they’ll shatter if left too long, scattering seeds everywhere.
✂️ Step 4: Harvest and Dry for Maximum Yield
Cut entire plants at the base with clean shears when 80% of pods have turned brown. Hang bundles upside down in a dry, well-ventilated area (like a garage or shed) for 1-2 weeks. Pods should rattle when shaken—this means seeds are fully dry. If humidity is high, spread plants on a screen to speed drying.
Once dry, rub pods between your hands to release seeds. Store in an airtight container away from light—sesame seeds stay fresh for 6+ months this way. Save some seeds for next year’s crop; they retain viability for 2-3 years if stored properly. For extra yield, pinch off early flowers to encourage more pods to form later in the season.
Tips & tricks for growing sesame seed pods
Sesame plants might seem finicky, but these simple tricks will help you grow fragrant pods with minimal stress.
Warmth is Non-Negotiable: That 80-85°F heat mat temperature in Step 1 is crucial—sesame seeds won't germinate properly below 70°F. I've tried skipping the heat mat in cooler homes, and germination took nearly three weeks instead of 7-10 days. If you don't have a heat mat, place the tray on top of your fridge (not inside) for gentle warmth. The goal is to mimic tropical soil conditions where sesame naturally thrives.
Light Intensity Matters: In Step 2, those 14+ hours of bright light are non-negotiable. A south-facing window alone won't cut it—you'll end up with leggy, weak seedlings. I use a full-spectrum LED grow light on a timer for consistency. If your seedlings start stretching toward the light source with pale stems, you need stronger light immediately. The 4-inch distance from the light is perfect for most LED setups.
Transplanting Strategy: When moving seedlings outdoors in Step 3, choose a cloud-free day for the first outdoor session. Sesame plants handle heat well once established, but sudden temperature drops can shock them. I've found that transplanting on a warm afternoon (afternoon temps above 70°F) gives them the best start. Water deeply before transplanting to reduce shock, then let the soil dry slightly between waterings—sesame roots rot easily in soggy conditions.
Harvesting Timing: The 80% brown pods rule in Step 4 is key—waiting until 100% brown means you'll lose seeds to shattering. I harvest when about 80% are brown and the rest are turning color. Hang bundles in a well-ventilated garage or shed where temperatures stay between 65-75°F—this prevents mold while allowing proper drying. If humidity is high, spread plants on a screen to speed the process.
Pro Tips for Sesame Seed Pod
- Sesame plants might seem finicky, but these simple tricks will help you grow fragrant pods with minimal stress.
- Warmth is Non-Negotiable: That 80-85°F heat mat temperature in Step 1 is crucial—sesame seeds won't germinate properly below 70°F.
- Light Intensity Matters: In Step 2, those 14+ hours of bright light are non-negotiable.
Frequently asked questions
How long does it take for sesame seed pods to mature after flowering?
Sesame seed pods typically take 60–90 days to mature after flowering, depending on the variety and growing conditions. Warm temperatures (70–85°F) and full sun speed up the process. If your pods aren’t forming, check for pests or underwatering—both can delay maturity.
Do sesame seed pods need cold stratification before planting?
No! Unlike some seeds, sesame seed pods do not require cold stratification. They germinate best in warm soil (70°F+). Direct-sow after the last frost or start indoors 4–6 weeks early in biodegradable pots for a head start. Well-draining soil is key to prevent rot.
Can I grow sesame seed pods in containers, or do they need a garden bed?
Sesame plants thrive in 5–7 gallon containers with drainage holes. Use a light, sandy loam mix and place them in full sun. Just ensure pots are at least 12 inches deep—shallow roots need room to stretch. Containers also make it easier to monitor pests like aphids or spider mites.
How often should I water sesame seed pods, and what’s the ideal moisture level?
Water sesame plants moderately—about 1 inch per week, letting the top inch of soil dry between waterings. Overwatering causes fungal issues (like powdery mildew), while drought stress stunts pod development. Mulch lightly to retain moisture without suffocating roots.
What pests or diseases commonly affect sesame seed pods, and how do I prevent them?
Watch for aphids, spider mites, and whiteflies, which suck plant sap. Use neem oil or insecticidal soap for mild infestations. Fungal diseases (like rust) thrive in humidity—space plants for airflow and avoid overhead watering. Harvest pods early if they show signs of stress!
What’s the best temperature range for growing sesame seed pods?
Sesame plants love warmth—ideal temps are 70–85°F during the day and 60°F+ at night. They won’t germinate in cold soil (<50°F). If your climate cools below 60°F, grow sesame in containers and move them indoors or under grow lights during chilly spells.
Wrapping up and next steps
Growing sesame seed pods from scratch is a rewarding journey that combines patience with nature’s bounty! 🌱 Whether you’re drawn to their nutritional benefits, ornamental appeal, or the satisfaction of nurturing a plant from seed, you now have all the tools to succeed.
With cold stratification and consistent care, you could be harvesting vibrant blooms—or even pods—in just 60 days.
Ready to take the next step? Start by planting your pre-stratified seeds this week and keep an eye on their progress. Share your gardening wins with fellow enthusiasts, or experiment with companion plants to boost your sesame’s growth. Happy growing—your garden (and taste buds!) will thank you. 🌟