
Picking
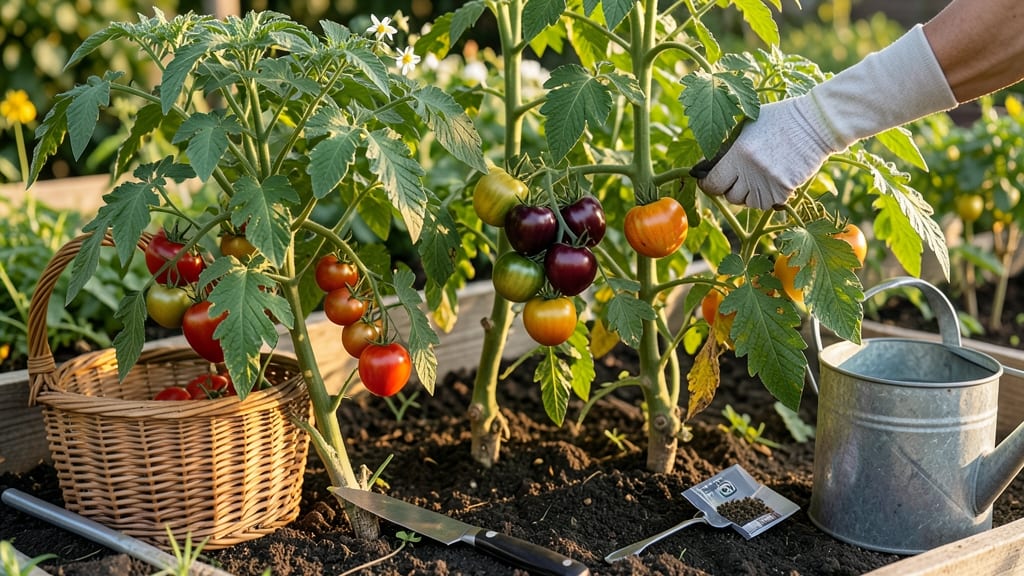
Growing from seed to harvest turns your garden into a living timeline of growth. 🌱 There’s nothing quite like watching a tiny seed transform into a plant heavy with fruit or blooms—it’s the ultimate gardening reward, and it’s easier than you think when you follow the right steps.
The magic starts with seed selection and soil prep, but the real satisfaction comes in the middle: nurturing those first leaves, troubleshooting pests, and pruning for better yields.
My first tomato plant last summer went from a wobbly seedling to a bush loaded with fruit, and I’ve been hooked ever since. By harvest time, you’ll be picking produce that tastes better than anything store-bought, with the pride of knowing you grew it yourself.
The process teaches patience, and the results—whether it’s crisp lettuce, fragrant herbs, or vibrant flowers—make every effort worthwhile. This guide covers every step, from seed to harvest, so you can grow with confidence, no matter your experience level. Let’s get those seeds started!
📚 In This Guide
- What you need
- Instructions
- Tips and common mistakes
- Wrapping up and next steps
What you need
- ● Seeds: Choose disease-resistant, heirloom, or hybrid varieties based on your climate and harvest goals. Pro tip: Start with easy-to-grow options like tomatoes, lettuce, or basil! (Quantity: 1–5 lbs, depending on garden size)
- ● Seed Starting Mix: Lightweight, sterile potting soil (avoid garden soil—it’s too dense!). Pro tip: Look for mixes labeled "seed starting" or "organic." (Quantity: 1–3 bags, ~1–3 cubic feet)
- ● Containers: Seed trays or cell packs (for seedlings)
- ○ Biodegradable pots (optional but eco-friendly!)
- ● Garden beds or raised planters (for transplanting)
- ● Fertilizer: Balanced organic fertilizer (e.g., 10-10-10) or compost. Pro tip: Start with a slow-release option to avoid overfeeding young plants. (Quantity: 1–2 lbs)
- ● Watering Can or Hose: With a gentle spray nozzle for seedlings.
- ○ Grow Lights (Optional): LED or fluorescent lights for indoor seed starting (12–16 hours/day). (Quantity: 1–2 lights, depending on setup)
- ● Hand Trowel: For planting and soil prep.
- ● Pruners or Scissors: For trimming seedlings or harvesting.
- ● Gloves: To protect your hands from soil and thorns.
- ● Measuring Tape or Ruler: For spacing plants correctly.
- ● Mulch: Straw, wood chips, or shredded leaves to retain moisture and suppress weeds. (Quantity: 1–2 bags)
- ● Pest Control: Neem oil, diatomaceous earth, or row covers (organic options preferred!).
- ● Sunlight: At least 6–8 hours of direct sunlight daily (or grow lights for indoor setups).
- ● Temperature Control: Ideal seed-starting temp: 65–75°F (20–24°C). Use a heat mat if needed for slow germinators.
- ● Water: Access to clean, room-temperature water (avoid tap water high in chlorine).
- ● Space: Dedicated area for seedlings (windowsill, greenhouse, or garden plot).
- ● Calendar: Know your last frost date to time plantings perfectly!
- ● Soil pH test kit (ideal range: 6.0–7.0 for most veggies)
- ● Trellis or stakes (for climbing plants like cucumbers or peas)
- ● Journal or app to track planting dates and progress
Step-by-step instructions for growing plants from seed to harvest
Here's how I turn tiny seeds into a thriving garden—no shortcuts, just steady progress.
🌱 Step 1: Start Seeds Indoors with Warmth and Moisture
Fill small seedling trays with sterile seed-starting mix and moisten until damp but not soggy. Press the mix down lightly so it's firm enough to hold seeds in place. Plant seeds at a depth of twice their diameter—too deep and they’ll struggle to break through. Cover with a thin layer of soil and mist gently with water.
Place the tray in a warm spot, ideally on a seedling heat mat set to 70-75°F. Cover with plastic wrap or a humidity dome to trap warmth and moisture. Check daily for condensation—if you see water droplets, remove the cover for 10 minutes to prevent mold. Germination usually takes 5-14 days, depending on the plant.
☀️ Step 2: Provide Light and Prevent Leggy Growth
Once seedlings emerge, remove the cover immediately to avoid damping-off. Move them under a grow light or to a south-facing window where they’ll get 12-16 hours of light daily. If leaves start stretching toward the light (a sign of legginess), lower the light closer—2-3 inches above the plants is ideal. Rotate the tray daily so seedlings grow straight, not lopsided.
Watch for first true leaves (the second set after the initial cotyledons). This is your cue to start fertilizing lightly with a diluted balanced liquid fertilizer. Overwatering now is easy—just keep the soil lightly moist, never soggy. You’ll know it’s right when the top inch feels damp but not wet.
🪴 Step 3: Harden Off and Transplant Outdoors
About 2-3 weeks before your last frost date, begin hardening off seedlings. Place them outside in a sheltered spot for 1-2 hours the first day, gradually increasing time each day. By day 7, they should tolerate a full day outdoors. Choose a cloudy day for transplanting to reduce stress on the plants.
Dig holes slightly larger than the root ball and space plants according to their mature size. Fill gaps with soil, firm gently, and water deeply at the base. Mulch with 1-2 inches of organic mulch to retain moisture and suppress weeds. Avoid transplant shock by keeping newly moved plants shaded for the first few days.
💧 Step 4: Maintain Consistent Care Through Growth
Water deeply 1-2 times per week, depending on rainfall, ensuring moisture reaches 6-8 inches down. Most plants need 1 inch of water weekly, but check soil—if the top inch feels dry, it’s time to water. Avoid wetting leaves to prevent fungal diseases. Use a soaker hose or drip irrigation for even moisture without splashing.
Fertilize every 4-6 weeks with a balanced fertilizer or compost tea. Watch for pests like aphids or spider mites—treat early with insecticidal soap or neem oil. Prune leggy stems or overcrowded growth to encourage bushier plants. You’ll know you’re on track when plants show steady new growth and vibrant color.
✂️ Step 5: Harvest at Peak Ripeness
Harvest herbs when leaves are fully developed but before they flower—this concentrates their flavor. For vegetables like tomatoes or peppers, pick when fully colored and slightly soft to the touch. Cut stems cleanly with pruners or pinch off individual leaves to encourage more growth. Harvest in the morning after dew has dried for the best flavor and texture.
Continue harvesting regularly to prompt new production. If plants bolt (send up flower stalks) too early, cover them with shade cloth to delay flowering. Store fresh herbs in the fridge wrapped in a damp paper towel, or dry them in bundles for long-term use. With consistent care, your garden will keep producing well into the season.
Tips & tricks for perfect seedling growth
Real talk: The difference between thriving seedlings and sad, leggy failures often comes down to these small but crucial details.
Germination Setup: Don't skip the moisture check after planting—your seed-starting mix should feel like a damp sponge, not a dripping sponge. Too wet and you risk mold; too dry and seeds won't sprout. I like to press the mix down gently after watering to create firm contact with the seeds, which helps them anchor properly. That 10-minute daily ventilation (when condensation appears) prevents mold while keeping humidity high enough for germination.
Lighting Strategy: Those 12-16 hours of daily light aren't optional—they're the foundation for strong seedlings. If your south-facing window isn't cutting it (leggy seedlings are your clue), invest in a simple LED grow light. Position it just 2-3 inches above your seedlings and raise it as they grow. I've seen seedlings go from stretching toward light to standing tall in just 3 days after adjusting the light height.
Transplanting Wisdom: The 2-3 week hardening-off period before last frost is your secret weapon against transplant shock. Start with just 1-2 hours outside on day one, then gradually increase. I always harden off on cloudy days to reduce stress—sunlight can be too intense for tender seedlings. After transplanting, give them a good drink of water right away to help them establish roots in their new home.
Watering Technique: Deep watering isn't just about quantity—it's about consistency. Aim for that top inch of soil to feel damp but not wet when you check it. I've learned the hard way that shallow watering encourages shallow roots. Use a soaker hose or water at the base to prevent fungal diseases that come from wet leaves. That 1 inch of water weekly guideline works for most plants, but always check soil moisture first—your local climate matters more than any rule.
Pro Tips for Seed To Harvest
- Real talk: The difference between thriving seedlings and sad, leggy failures often comes down to these small but crucial details.
- Germination Setup: Don't skip the moisture check after planting—your seed-starting mix should feel like a damp sponge, not a dripping sponge.
- Lighting Strategy: Those 12-16 hours of daily light aren't optional—they're the foundation for strong seedlings.
Frequently asked questions
Got questions about growing from seed to harvest? You’re not alone! Here are answers to the most common queries to help you cultivate confidence—and a thriving garden.
How long does it take to go from seed to harvest?
The timeline varies by plant! Fast growers like radishes or leafy greens may be ready in 3–6 weeks, while tomatoes, peppers, or pumpkins can take 60–120 days. Always check seed packets for days to maturity—it’s your best guide!
What’s the fastest way to speed up germination?
Boost your seeds’ chances with these tricks:
- Warmth: Use a seedling heat mat (70–85°F is ideal for most seeds).
- Moisture: Keep soil damp (not soggy) with a spray bottle or humidity dome.
- Light: Move seedlings to a sunny windowsill or under grow lights once sprouts emerge.
Can I grow edible plants from store-bought veggies or herbs?
Many produce can regrow roots or shoots:
- Leafy greens: Place lettuce, kale, or celery bases in water—new leaves sprout in 1–2 weeks!
- Herbs: Regrow green onions, basil, or cilantro by submerging cut stems in water.
- Avocados: Plant the pit (toothpick + water) for a bonsai tree—not edible, but fun!
What do I do if my seedlings look sick or leggy?
Don’t panic! Leggy seedlings (tall, weak stems) need more light. Move them closer to a window or under grow lights (12–16 hours/day). For pests:
- Aphids/spider mites: Spray with neem oil or soapy water.
- Fungal issues (mold, damping-off): Improve airflow, reduce watering, and use sterilized soil next time.
Are there any “no-fail” seeds for beginners?
Yes! Start with these low-maintenance, high-reward seeds:
- Cherry tomatoes (sweet, prolific)
- Zucchini (one plant = endless harvests!)
- Bush beans (fast, drought-tolerant)
- Radishes (ready in 3 weeks)
- Herbs like basil or dill (forgive mistakes)
Wrapping up and next steps
From seedling to harvest, your garden journey is a testament to patience, care, and the joy of nurturing life. Every spadeful of soil, every watered seed, and every pruned leaf brings you closer to a bountiful harvest—and that’s something to celebrate! 🌱✨
Now that you’re armed with knowledge, take that first step: plant a seed (or two—or 20!). Whether you’re a beginner or a seasoned gardener, every harvest starts with a single act of faith in nature. Happy growing!