
Propagation
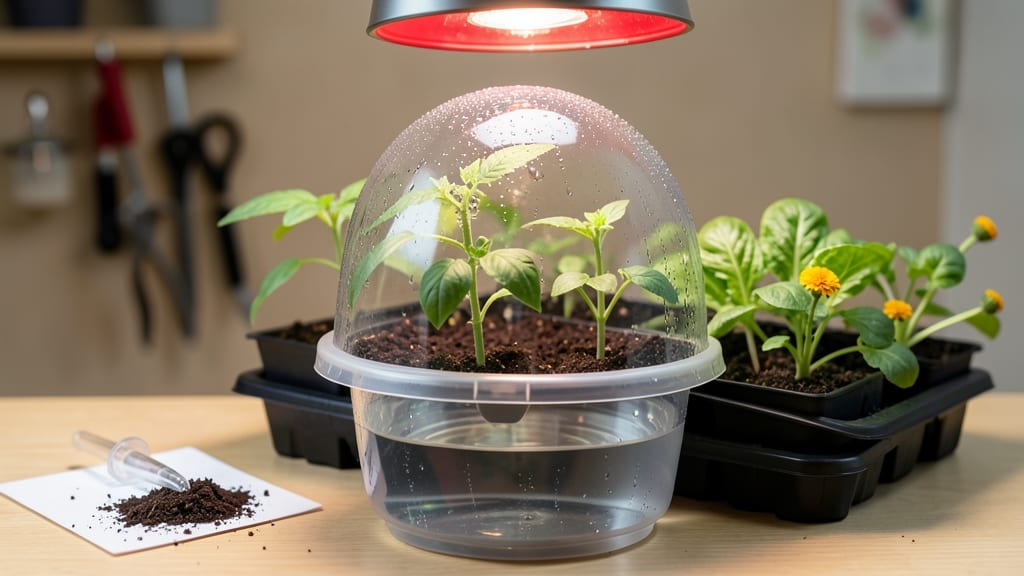
The Burpee Self-Watering Seed Starting System turns my seed-starting anxiety into reliable sprouts. 🌱 No more guessing when to water or watching seedlings dry out overnight—this system keeps roots consistently moist without drowning them, and I’ve gone from killing half my starts to having strong, uniform seedlings every time.
Setup couldn’t be simpler: just fill the bottom reservoir with water, add your seed-starting mix to the top chamber, and plant your seeds. The wicking mat does the hard work, delivering water exactly where the roots need it.
I’ve tested it with tomatoes, peppers, and herbs—even finicky seeds like parsley germinate faster and stronger than ever before.
By the time you’re ready to transplant, you’ll have stocky seedlings with deep root systems that handle the move outdoors like pros. The system’s design prevents mold and overwatering, two of my biggest past frustrations, while still giving you the control to adjust moisture levels as your plants grow.
Works perfectly for beginners and busy gardeners alike—no green thumb required. Here’s how to get the most out of your system, from seed selection to hardening off your seedlings before they hit the garden.
📚 In This Guide
- What you need
- Instructions
- Tips and common mistakes
- Wrapping up and next steps
What you need
- ● Burpee Self-Watering Seed Starting System (1 unit) Includes: 12-cell seed tray with built-in water reservoir
- ● Clear lid for humidity control
- ● High-quality seed starting mix (1 bag, ~16 qt) Lightweight, sterile, and well-draining (e.g., Burpee Bio Start or FoxFarm Ocean Forest)
- ● Seeds (quantity depends on your plants—check seed packet for spacing)
- ● Water (room-temperature, preferably filtered or distilled)
- ○ Spray bottle (optional, for gentle misting)
- ● Grow lights or sunny windowsill LED grow lights (12–16 hrs/day) or south-facing window with 6+ hrs of sunlight
- ● Tray or saucer (to catch excess water)
- ● Small hand trowel or spoon (for transplanting seedlings later)
- ● Humidity dome (if not included with your system)
- ● pH testing kit (to monitor soil acidity, ideal: 5.8–6.2)
- ● Fertilizer (balanced liquid fertilizer, diluted to half-strength after 2 weeks)
- ● Thermometer/hygrometer (to track temperature and humidity, ideal: 65–75°F)
- ● Label markers & tags (to track seed varieties)
Step-by-Step instructions for using the Burpee self-watering system
This system takes the guesswork out of seed starting—no more drying out or drowning your seedlings.
🌱 Step 1: Assemble and Fill the Reservoir
Start by filling the reservoir with room-temperature water until it reaches the maximum fill line—this ensures consistent moisture without overflow. I like to use filtered water because tap water can sometimes contain chlorine that may slow germination. The reservoir lid should snap securely into place, creating an airtight seal that prevents evaporation.
Here's the thing—don't overfill. If water spills into the growing chamber, it can drown seeds before they even sprout. The wick system draws moisture up as needed, so the reservoir should stay full but not sloshing. Once filled, place the entire setup on a stable, level surface where you can easily access it daily.
💧 Step 2: Prepare the Growing Tray and Add Soil
Remove the growing tray from the base and fill it with Burpee seed-starting mix (or a high-quality potting soil amended with perlite). Press the soil down lightly so it's firm but not compacted—this helps roots establish without floating away when watered. Fill the tray to just below the rim to avoid spillage when you water.
I always tap the tray gently on the table after filling to settle the soil evenly. Uneven soil levels can cause water to pool in low spots, which may lead to mold or uneven germination. Once settled, smooth the surface with your fingers, removing any large clumps that could block moisture flow through the wick.
☀️ Step 3: Sow Seeds and Place the Tray
Follow the seed packet instructions for depth and spacing, but here's my trick: Use a toothpick or pencil to make small holes in the soil—this prevents seeds from being buried too deeply or unevenly. Place 1-2 seeds per cell (if using a modular tray) or 1 seed every inch in a flat tray. Cover lightly with a thin layer of soil, just enough to hide the seeds but not smother them.
Once seeds are planted, gently press the growing tray back onto the reservoir. The wick system will automatically draw moisture up as needed, so you won’t need to water for at least 3-5 days. Place the setup in a warm, bright location (around 70-75°F), but avoid direct sunlight until germination begins—this prevents the soil from drying out too quickly.
🌿 Step 4: Monitor and Maintain Moisture
After 5-7 days, check for germination. If you see tiny green sprouts, it’s time to move the tray to a sunny window or under grow lights for 14-16 hours of light daily. The self-watering system keeps soil consistently moist, but I still check the reservoir level every 2-3 days—top off with water if it drops below the fill line.
Watch for condensation on the lid. If it’s heavy, crack the lid open for 10-15 minutes daily to improve airflow and prevent fungal issues. Seedlings should have strong, sturdy stems and deep green leaves—if they look leggy or pale, they need more light. Avoid touching the seedlings; even gentle handling can stress them.
⏰ Step 5: Transplant When Ready
When seedlings develop 2-3 sets of true leaves (not just the initial cotyledons), they’re ready for transplanting. The wick system makes this easy—simply lift the tray from the reservoir, separate the seedlings, and plant them in their final containers. The roots will be well-hydrated, so they’ll handle the transition smoothly.
Here’s my pro tip: Harden off seedlings for 5-7 days before moving them outdoors. Start by placing them in a shaded, protected spot for 1-2 hours the first day, gradually increasing exposure. The self-watering system ensures they stay hydrated during this critical adjustment period, reducing shock and improving survival rates.
Tips & tricks for perfect seed starting with the Burpee system
Here's what nobody tells you about maximizing your Burpee system's potential—these little details make all the difference.
Wick System Care: The wick system is the heart of this setup, so don't let it get clogged. If you notice water isn't traveling up properly after a few weeks, gently rinse the wick with clean water and let it dry completely before reinserting. I've found that using a thin, soft wick (like the one included) works best—thicker wicks can restrict water flow. Also, avoid letting the reservoir run completely dry, as this can cause the wick to shrink and lose effectiveness.
Soil Preparation Secret: In Step 2, when adding your Burpee seed-starting mix, I recommend mixing in a small handful of perlite or vermiculite (about 10% of the total volume) for even better drainage. This helps prevent that dreaded "soggy bottom" while still maintaining moisture. Press the soil down firmly but gently—it should feel like packing snow, not concrete. This firmness helps young roots anchor properly without floating away when the wick draws up water.
Lighting Strategy: The 14-16 hours of light daily mentioned in Step 4 is crucial, but not all light sources are equal. If using grow lights, position them 2-4 inches above the seedlings and use full-spectrum bulbs. I've noticed that seedlings under regular household lights often stretch toward the light source (a condition called etiolation), becoming weak and leggy. For windowsill growing, place the tray on the sunny side but avoid the hot afternoon sun, which can overheat the soil and dry out the wick system faster than expected.
Condensation Management: That heavy condensation on the lid in Step 4 is actually a good sign—it means high humidity, which is perfect for germination. However, if you see mold or fuzzy growth on the soil surface after a few days, it's time to crack that lid. The 10-15 minutes daily ventilation I mentioned is perfect for preventing fungal issues while maintaining humidity. For extra insurance, I like to place a small fan on low setting near the tray (but not blowing directly on seedlings) to improve airflow without losing too much moisture.
Pro Tips for Burpee Self Watering Seed Starting System
- Here's what nobody tells you about maximizing your Burpee system's potential—these little details make all the differ...
- Wick System Care: The wick system is the heart of this setup, so don't let it get clogged. If you notice water isn't ...
- Soil Preparation Secret: In Step 2, when adding your Burpee seed-starting mix, I recommend mixing in a small handful ...
Frequently asked questions
Got questions about the Burpee Self-Watering Seed Starting System?
You’re not alone! Here are answers to the most common queries—from setup to troubleshooting—so you can dive in with confidence.
How often do I need to water with this system?
The beauty of this system is its self-watering design! Once you fill the reservoir, it’ll automatically wick moisture to the seeds as needed. Top off the water every 3–5 days (or when the soil feels dry to the touch). Overwatering is rare, but always check for soggy roots or mold—drain excess if you see it.
Can I use this system indoors without sunlight?
If you’re short on natural light, pair the system with grow lights (LED or fluorescent) placed 2–4 inches above the trays. Aim for 12–16 hours of light daily. South-facing windows work too, but supplement if seedlings look leggy (stretching toward light).
What if my seeds aren’t germinating?
First, check these basics:
- Temperature: Most seeds need warmth (70–85°F). Use a heat mat if your space is chilly.
- Moisture: Keep the soil damp but not waterlogged—press your finger in to test.
- Depth: Follow packet instructions (usually ¼ inch deep). Too deep = no sprouts!
Is this system reusable for multiple planting seasons?
Yes! The trays and reservoir are durable and washable. After your last harvest, scrub them with soapy water, rinse well, and let them dry. Store in a cool, dry place until your next planting. Replace the growing medium (soil) each season to avoid pests or diseases.
What’s a good alternative if I don’t have this exact system?
No problem! DIY options include:
- Plastic containers (like yogurt cups) with drainage holes + a wick (cotton string) to a water source.
- Clear plastic domes (over trays) to trap humidity.
- Peat pots with built-in watering reservoirs.
Still stumped? Drop your question in the comments—we’re happy to help!
Wrapping up and next steps
Ready to transform your seed-starting routine into a breeze? The Burpee Self-Watering Seed Starting System is your ticket to effortless sprouts—no more guesswork, no more drowned or parched seedlings! With its built-in moisture control, you’ll enjoy healthier plants and a hassle-free growing experience. 🌱
Now that you’re armed with the know-how, grab your system, fill it up, and let those seeds do the work. Watch your garden thrive with minimal effort—and soon, you’ll be reaping the rewards of your green thumb! 🌿