
Lawn
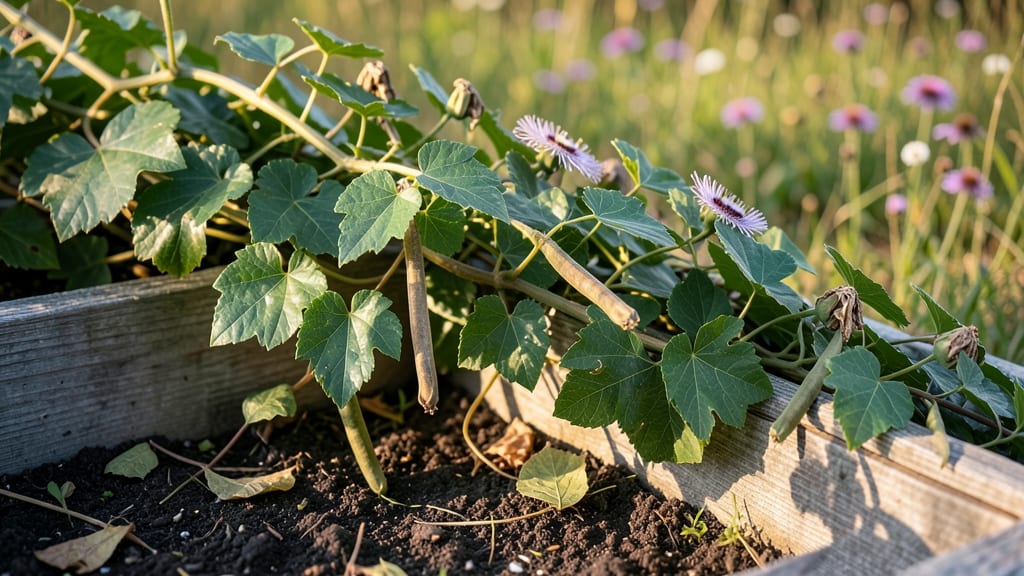
Harvesting vine seed pods turns last year’s vines into next season’s fragrant garden stars. 🌿 I’ve saved seeds from runner beans, wisteria, and passionflower—each pod holds the promise of lush growth and sweet-scented blooms if you dry and stratify them right.
The secret? Timing and patience—skimp on either, and you’ll end up with shriveled seeds or slow germination.
Start by harvesting mature pods when they turn brown and papery (usually late summer to early fall). Let them dry completely indoors for 2-3 weeks, then crack them open to extract the seeds.
For vines like wisteria that need cold stratification, toss the seeds in a damp paper towel and refrigerate them for 6-8 weeks—this mimics winter’s natural chilling period and tricks seeds into thinking spring has arrived.
By spring, you’ll have plump, viable seeds ready to plant. The payoff? Vigorous vines that climb faster, flower earlier, and fill your garden with that intoxicating scent you love. I’ve gone from buying expensive plants to growing my own fragrant varieties—all from a handful of dried pods.
Works for any vine species, from fast-growing runner beans to slow-but-sweet wisteria. Here’s how to do it without losing a single seed to mold or impatience.
📚 In This Guide
- What you need
- Instructions
- Tips and common mistakes
- Wrapping up and next steps
What you need
- ● Fresh vine seed pods: Harvested at peak ripeness (when they turn brown and papery). Aim for 50–100 pods depending on your project scale.
- ● Pruning shears or sharp scissors: For cleanly harvesting pods without damaging the vine.
- ● Paper bags or breathable mesh sacks: 2–4 bags, sized to hold pods loosely (avoid plastic to prevent moisture buildup).
- ● Drying rack or screen: A flat, elevated surface (like a wooden tray or wire mesh) to allow airflow. Minimum size: 12" x 12".
- ○ Fan or dehumidifier (optional but helpful): Speeds up drying in humid climates.
- ● Plastic storage bags or airtight containers: For long-term seed storage (e.g., quart-sized ziplock bags or glass jars with lids).
- ● Moisture control materials: Silica gel packets or uncooked rice (for absorbing excess moisture during stratification).
- ● Stratification medium: Peat moss, coconut coir, or damp paper towels (enough to cover seeds in a thin, even layer).
- ● Spray bottle with water: For lightly misting the stratification medium.
- ● Permanent marker or labels: To mark pods/containers with harvest date and vine type.
- ● Heat mat or seedling heat pad: Maintains consistent warmth (70–80°F) during stratification for faster germination.
- ● Germination tray with clear lid: Keeps humidity high while monitoring progress.
- ● Notebook or app: Track drying/stratification dates and conditions (e.g., Gardenate or Seed to Spoon).
- ● Gloves: Protects hands from sap or prickly pods (e.g., wisteria).
- ● Desiccant packs: Extra for long-term seed storage to prevent mold.
Step-by-Step instructions for harvesting, drying, and stratifying vine seed pods
Here's how I preserve fragrant vine seeds year after year—no fancy equipment needed.
🌿 Step 1: Harvest Mature Seed Pods at the Right Time
Wait until pods turn a deep brown and begin to split open naturally—this usually happens in late fall or early winter. I test readiness by gently squeezing a pod; if seeds rattle inside but the pod doesn't crumble, it's perfect. Harvest on a dry day to prevent mold from forming on freshly cut pods.
Use clean, sharp pruners to snip pods from the vine, leaving a small stem attached. This helps prevent seed loss during drying. Place harvested pods in a single layer on a clean, dry towel or paper towels. Avoid stacking them—proper airflow is critical to prevent rot during the drying process.
💧 Step 2: Dry Seed Pods Thoroughly Before Opening
Spread the pods in a warm, dry location with good air circulation. I place mine on a wire cooling rack in my garage where temperatures stay around 70-75°F during the day. Keep them out of direct sunlight—too much heat can scorch the pods and ruin the seeds inside.
Drying takes 2-4 weeks, depending on humidity levels. You'll know they're ready when the pods feel light in your hand and the outer shell makes a papery sound when tapped. If any pods develop mold or dark spots, remove them immediately to protect the rest.
✂️ Step 3: Extract and Clean the Seeds
Once fully dry, place pods in a clean paper bag and gently crush them with your hands or a rolling pin. The seeds will spill out while the papery husks remain intact. I sift the mixture through a fine-mesh strainer to separate seeds from debris—this ensures only clean seeds move forward for stratification.
Inspect seeds for any signs of damage or discoloration. Healthy seeds should be uniform in color and free of cracks. Store good seeds in an envelope labeled with the vine variety and harvest date. I keep mine in a cool, dark place until stratification begins.
⏰ Step 4: Stratify Seeds for Successful Germination
Vine seeds often need a cold period to break dormancy. Place seeds in a sealed plastic bag with a slightly damp paper towel—just enough moisture so the towel feels like a wrung-out sponge. Store the bag in your refrigerator's vegetable crisper for 4-6 weeks.
Check seeds weekly during stratification. If the paper towel feels dry, mist it lightly with water and reseal the bag. After the cold treatment, remove seeds and plant them in well-draining potting mix. Keep the soil consistently moist but never soggy until germination occurs, which typically happens in 2-4 weeks.
Tips & tricks for perfect vine seed pod preservation
Here's what nobody tells you about making this process foolproof—these are the little details that separate good seeds from great ones.
Harvesting Timing: The 2-4 week drying window in Step 2 can feel like forever, but rushing it ruins everything. If pods feel heavy or still have moisture inside, they're not ready—wait for that papery sound when tapped. I've learned this the hard way after trying to rush drying and ending up with moldy seeds that wouldn't germinate.
Drying Environment: That 70-75°F temperature in Step 2 is your sweet spot—any hotter and you risk scorching the pods, any cooler and you risk mold. I place a small fan nearby to maintain airflow without creating drafts. A dehumidifier in the room helps too, especially in humid climates where drying takes longer than the 2-4 weeks.
Seed Inspection: In Step 3, when inspecting seeds for damage, look for uniform color and shape—anything that looks shriveled or discolored won't germinate well. I use a magnifying glass to check for tiny cracks that aren't visible to the naked eye. This step is where most people lose good seeds without realizing it.
Stratification Check: During the 4-6 week cold treatment in Step 4, don't be tempted to peek too often—every time you open the bag, moisture escapes. I mark my calendar to check exactly once every two weeks. If seeds look dry, that's your cue to mist the paper towel and reseal immediately.
Pro Tips for Vine Seed Pods
- Here's what nobody tells you about making this process foolproof—these are the little details that separate good seed...
- Harvesting Timing: The 2-4 week drying window in Step 2 can feel like forever, but rushing it ruins everything. If po...
- Drying Environment: That 70-75°F temperature in Step 2 is your sweet spot—any hotter and you risk scorching the pods,...
Frequently asked questions
Got questions about working with vine seed pods? You’re not alone! Here are some common queries—and straightforward answers—to help you navigate the process like a pro.
When is the best time to harvest vine seed pods?
The ideal time to harvest vine seed pods is when they’ve fully matured but before they split open on their own. For most vines, this happens in late fall or early winter when pods turn brown and dry. Harvesting too early means underdeveloped seeds; too late means they’ll scatter and waste. Aim for firm, papery pods—they should rattle when shaken but not burst open.
How long does it take to dry vine seed pods?
Drying time depends on your climate and method. If you’re air-drying indoors, pods typically take 1–3 weeks in a well-ventilated, dry space (like a mesh bag hanging in a garage or shed). For faster results, use a dehydrator at 95–105°F (35–40°C) for 6–12 hours. Pro tip: Check for dryness by gently squeezing a pod—if it crumbles easily, it’s ready!
Do vine seed pods need stratification, and how do I do it?
Yes! Most vine seeds require stratification to break dormancy. Place dried pods in a sealed container with a mix of moist peat moss or sand, then refrigerate for 4–8 weeks. For cold stratification, keep them at 35–40°F (2–4°C). Afterward, sow seeds in well-draining soil—they’ll germinate faster and more reliably.
What if my vine seed pods won’t open or release seeds?
If pods refuse to release seeds, try these fixes:
- Soak them in warm water for 24 hours to soften the pod walls.
- Gently crush them with a hammer or rolling pin (wear gloves!).
- Check for pests—weevils or mold can ruin seeds inside.
Can I use vine seed pods from any vine, or are some toxic?
Not all vine seed pods are safe! Avoid pods from toxic vines like bittersweet nightshade (Solanum dulcamara) or black nightshade (Solanum nigrum). Stick to ornamental or edible vines like passionflower, wisteria, or grape. When in doubt, research the plant before harvesting—safety first!
Wrapping up and next steps
Harvesting, drying, and stratifying vine seed pods is a rewarding way to nurture fragrant vines year after year—without breaking the bank! 🌿 With the right tools and a little patience, you’ll unlock a sustainable way to grow your favorite climbing beauties.
Whether you’re a seasoned gardener or just starting, this process connects you deeper to nature’s cycles.
Ready to take the next step? Start small—grab a few pods, experiment with drying methods, and observe how stratification works in your climate. Before you know it, you’ll be sharing your green thumb success with neighbors (or even selling starts!). Happy growing! 🌱