
Lawn
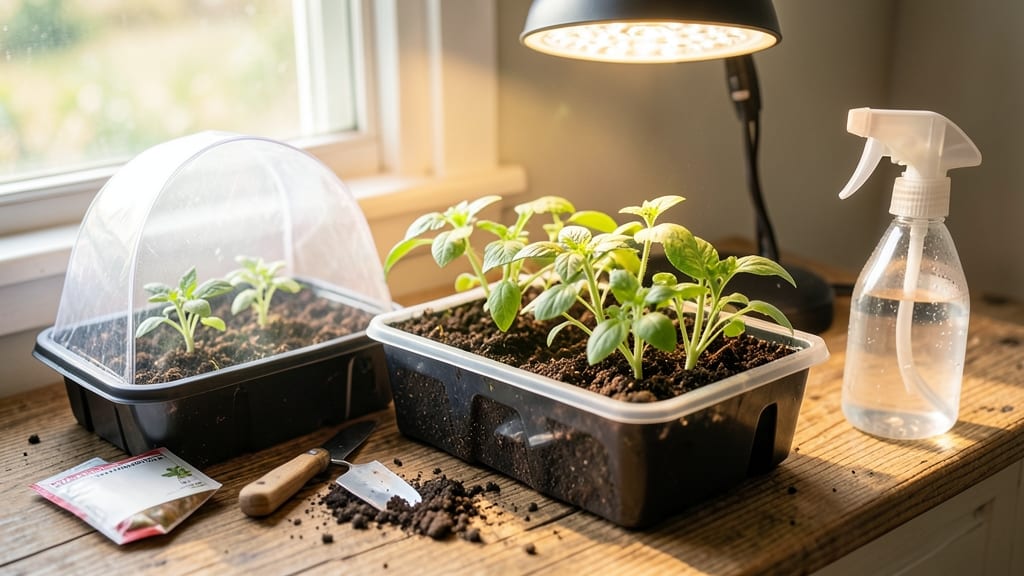
Deep seed trays double your germination success by keeping roots moist and happy. 🌱 I’ve lost count of the seedlings I’ve saved by using these—especially with fussy plants like tomatoes and peppers that hate dry starts.
The secret isn’t just depth; it’s the layered moisture control that prevents the soil from drying out between waterings.
You’ll need trays with at least 4-6 inches of depth (shallow ones just don’t cut it for most vegetables), plus a drainage system—either holes in the bottom or a tray underneath to catch excess water.
Plastic trays are durable and reusable, while biodegradable options eliminate transplant shock when you move seedlings outdoors. The right setup turns a finicky process into a foolproof one.
Once filled with your seed-starting mix, these trays let you sow seeds closer together (no more wasting space) and keep them consistently moist without drowning them. You’ll see faster germination, stronger roots, and seedlings that outpace anything started in flimsy cell packs.
The payoff? Plants that thrive from day one, not struggle to catch up.
Works for everything from tiny herbs to sprawling cucumbers—just adjust spacing and depth based on the plant. Here’s how to make the most of them without common pitfalls like overwatering or damping-off. Let’s get those seeds sprouting reliably.
📚 In This Guide
- What you need
- Instructions
- Tips and common mistakes
- Wrapping up and next steps
What you need
- ● Deep trays or containers: Choose from: Plastic seedling trays (6–12" deep, with drainage holes)
- ● Wooden crates or boxes (lined with plastic for moisture retention)
- ● Repurposed containers (e.g., takeout trays, yogurt cups—stacked or layered)
- ● Potting mix: Seed-starting mix (sterile, lightweight, and well-draining; 1–2 gallons per tray)
- ● Seeds: Your chosen variety (check seed packet for depth requirements)
- ● Drainage layer: Pebbles, perlite, or coarse sand (½–1 inch thick)
- ○ Small pieces of broken clay pots (optional, for aeration)
- ● Watering can or spray bottle: With a fine mist setting (to avoid displacing seeds)
- ○ Plastic wrap or clear lid: For humidity control (optional but helpful for high-moisture seeds)
- ● Labels & markers: To track seed types and planting dates
- ○ Gloves (optional): For handling soil or delicate seeds
- ● Grow lights or sunny windowsill: 12–16 hours of light daily for optimal germination
- ● Heating mat: For warm-season seeds (e.g., peppers, tomatoes)
- ● Fine mesh screen: To cover trays and deter pests while allowing airflow
- ● Twine or rubber bands: To secure plastic wrap if using
- ● Calibrated scale: For precise seed spacing (helpful for large batches)
How to build deep seed trays for perfect germination
Here's my foolproof method for creating seed trays that keep moisture just right—no more dry-outs or soggy messes.
🪴 Step 1: Select and Assemble Your Base Materials
Start with a sturdy 12-inch square plastic tray (the kind used for baking or seedling trays). Line the bottom with a 1-inch layer of coarse perlite or vermiculite—this creates drainage while keeping moisture near the seeds. I like to spread it evenly with my fingers so it covers the entire base without clumping.
Next, add a 2-inch layer of moistened seed-starting mix on top of the perlite. Don't pack it down—just press lightly so the mix holds its shape. You want it fluffy enough for roots to push through easily, but firm enough to support tiny seedlings. A quick tap on the tray sides helps settle it without compacting.
💧 Step 2: Create Moisture Zones for Even Germination
Here's where the magic happens: divide the tray into 4 equal sections using small wooden sticks or popsicle sticks inserted vertically. These create barriers that prevent moisture from pooling in one area while keeping it concentrated where seeds will germinate.
Now, add another 1-inch layer of moistened seed-starting mix on top of the first layer. This time, focus on keeping it slightly drier than the bottom layer—just damp to the touch. The top layer should hold together when squeezed but not drip water. This gradient helps prevent fungal issues while keeping seeds hydrated.
🌱 Step 3: Plant Seeds at the Right Depth and Spacing
Use a toothpick to poke ¼-inch deep holes in each section, spacing them 1 inch apart. Drop 2-3 seeds per hole—this gives you backup if some fail to germinate. Cover them with a thin layer of the same moist mix, just enough to hide the seeds but not bury them too deep.
Gently mist the surface with water until it looks uniformly damp but not wet. You'll know it's right when water beads form on the soil surface but disappear within a minute. This prevents seeds from floating or washing away while keeping them hydrated. Place the tray in a warm spot—70-75°F is ideal.
☀️ Step 4: Maintain Moisture Without Overwatering
Cover the tray with a clear plastic dome or plastic wrap to trap humidity. Check daily for condensation—if the inside of the cover fogs up, you're golden. If it stays clear, mist the soil lightly until you see moisture return. Remove the cover once 50% of seeds have sprouted to prevent damping-off disease.
From now on, water only when the top inch of soil feels dry to the touch. Use a spray bottle to mist evenly—never pour water directly on the seeds. The layered setup ensures moisture stays near the roots while the top stays just damp enough to encourage strong growth.
⏰ Step 5: Transition to Light and Air Circulation
When seedlings reach 2 inches tall and show their first true leaves, it's time to move them under grow lights or bright sunlight. Place the tray on a stable surface where it gets 12-14 hours of light daily. Rotate the tray a quarter turn every other day so seedlings grow straight instead of leaning toward the light.
At this stage, reduce humidity by removing the cover completely. Increase airflow by spacing trays 2 inches apart to prevent fungal issues. You'll know you've got it right when seedlings have sturdy stems and vibrant green leaves—no more leggy, weak growth.
Tips & tricks for perfect seedling trays
These little details make all the difference between sprouts that thrive and seedlings that fail. Here's what I've learned after watching hundreds of trays.
Layering is Everything: The key to this system is that bottom layer of perlite or vermiculite—don't skip it! That 1-inch drainage layer prevents root rot while keeping moisture right where seeds need it. I've seen trays without it turn into soggy disasters within days. Think of it like a moisture buffer zone for your seeds.
Moisture Gradient Matters: That second 1-inch layer should feel just damp to the touch, not dripping. Here's my test: squeeze a handful—it should hold together but not leave water on your fingers. This gradient prevents fungal issues while keeping roots hydrated. Too wet? Add more perlite. Too dry? Spritz lightly with water.
Temperature Check: Those 70-75°F instructions aren't arbitrary—they're the sweet spot for most seeds to germinate. I keep trays on top of my fridge during winter months to maintain warmth. A simple thermometer on the tray surface helps monitor this. Too cold? Germination slows dramatically. Too hot? Seeds can rot before sprouting.
Light Transition Strategy: When you're ready to move seedlings to 12-14 hours of light, do it gradually over 3-4 days. Start with just 2 hours of light daily, then increase by 2 hours each day. This prevents shock and helps seedlings develop stronger stems. I use a timer on my grow lights to automate this process.
Pro Tips for Deep Seed Trays
- These little details make all the difference between sprouts that thrive and seedlings that fail.
- Layering is Everything: The key to this system is that bottom layer of perlite or vermiculite—don't skip it!
- Moisture Gradient Matters: That second 1-inch layer should feel just damp to the touch, not dripping.
Frequently asked questions
Got questions about deep seed trays?
You’re not alone! Whether you’re a seasoned gardener or just starting out, these common queries can help you master the technique for consistent germination. Let’s dive in!
What’s the ideal depth for deep seed trays?
For most lawn seeds, aim for a depth of ¼ to ½ inch. Lighter seeds (like clover or fine fescue) need shallower coverage, while larger seeds (like ryegrass) can handle the deeper end. Press the soil gently to ensure good seed-to-soil contact—this boosts moisture retention and germination rates!
How long does it take to see sprouts in deep seed trays?
Germination time varies by seed type, but with deep seed trays, you’ll typically see sprouts in 7–21 days. Cool-season grasses (like Kentucky bluegrass) may sprout faster in warm soil (60–75°F), while warm-season grasses (like Bermuda) thrive in 75–85°F conditions. Keep the trays consistently moist (not soggy!) to speed up the process.
How do I prevent mold or fungus in deep seed trays?
Overwatering is the #1 culprit! Use a fine mist or bottom-watering method (place trays in a shallow tray of water) to keep moisture even. Elevate trays for airflow, and avoid sealing them completely. If you spot fuzzy mold, remove affected soil, increase airflow, and reduce watering slightly. A light sprinkle of perlite can also improve drainage.
Can I reuse deep seed trays for multiple plantings?
Clean trays between uses by scrubbing with soapy water and a 10% bleach solution (1 part bleach to 9 parts water) to kill pathogens. Rinse thoroughly and let them dry in the sun. Sterilizing them prevents soil-borne diseases and ensures your next batch of seeds starts fresh!
What’s a good alternative if I don’t have deep seed trays?
No trays? No problem! Use shallow seedling flats, repurposed plastic containers (like yogurt cups), or even a well-drained DIY box (line with landscape fabric for easy cleanup). Just ensure drainage holes are present and the setup mimics the layered moisture control of deep trays. A clear plastic dome can also create a mini greenhouse effect for faster germination!
Wrapping up and next steps
Deep seed trays are your secret weapon for consistent, stress-free germination—no more patchy lawns or wasted seeds! By mastering layered moisture control, you’ll give seedlings the perfect start, whether you’re reviving a patchy yard or starting a lush new lawn from scratch. 🌱
Ready to transform your seeding game? Grab your trays, gather your supplies, and get planting! Once your seedlings sprout, the next step is transplanting with care—so keep an eye out for our guide on the smoothest transition from tray to soil. Happy growing!