
Propagation
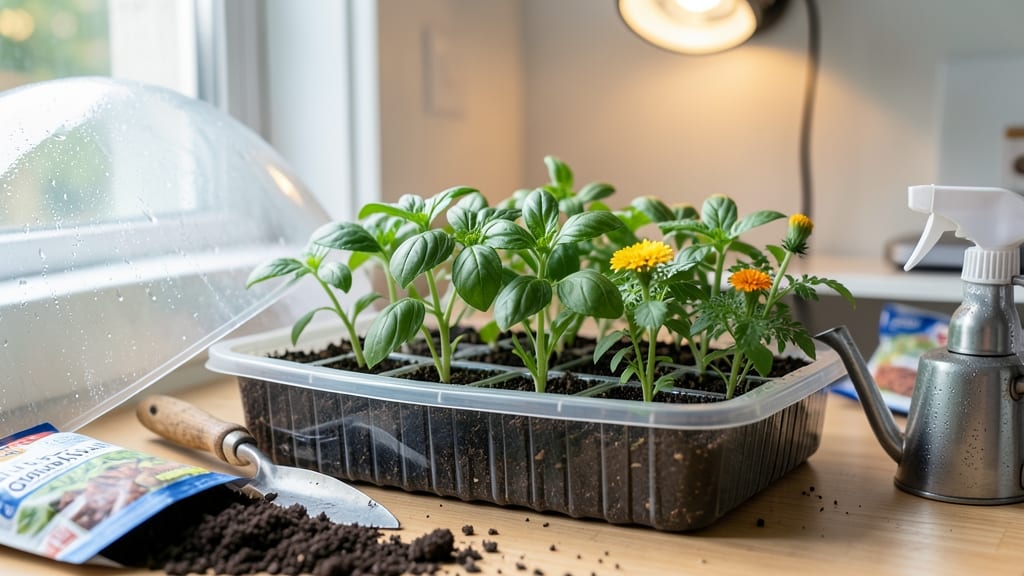
Plastic seed starting trays transformed my cramped apartment into a seedling factory. 🌱 These stackable trays cut my space needs by 75% while keeping seedlings organized—no more crowded windowsills or tangled roots. The secret? Proper drainage, consistent moisture, and knowing exactly when to move them outside.
Start with a 6-pack tray (2 inches deep) for most veggies, filled with sterile seed-starting mix. Poke tiny holes in the bottom if they don’t have drainage, then water gently—just enough to moisten, not drown.
The key is keeping soil damp but never soggy, which prevents that dreaded damping-off fungus that wipes out seedlings overnight.
By week 3, you’ll see sturdy little plants with their first true leaves—ready to graduate to individual pots. Harden them off for 5-7 days before transplanting, and watch them thrive in the garden. The best part? These trays last for years with a quick rinse and soak between seasons.
Pro tip: Label your trays immediately—those tiny seedlings look identical until they sprout! And if you’re eco-conscious, look for reusable trays or biodegradable cell packs that break down with the plants. Now let’s get those seeds growing!
📚 In This Guide
- What you need
- Instructions
- Tips and common mistakes
- Wrapping up and next steps
What you need
- ● Plastic seed starting trays – 1–3 trays (choose stackable designs for space-saving; 50–100 cells per tray is ideal).
- ● Seed starting mix – 1–2 bags (sterilized, lightweight potting mix—avoid garden soil!).
- ● Seeds – Your favorite varieties (check seed packets for spacing needs).
- ● Doming lid or plastic wrap – 1 (for humidity retention).
- ● Spray bottle – 1 (for gentle watering).
- ● Flat tray or saucer – 1 (to catch excess water).
- ● Grow lights or sunny windowsill – 1 (6–8 hours of light/day).
- ● Heat mat – 1 (speeds up germination for cool-season seeds).
- ● Plant labels & markers – 1 set (track varieties easily!).
- ● Fertilizer (low-dose) – 1 (for later-stage seedlings).
- ● Tweezers – 1 (for delicate seed placement).
- ● Humidity dome with vents – 1 (upgrades moisture control).
How to maximize your plastic seed starting trays for efficient germination
Here's the method I rely on to turn small spaces into thriving seedling stations.
🌱 Step 1: Prepare Trays and Fill Cells With Moistened Mix
Start by filling each cell of your stackable plastic seed starting trays with a quality seed-starting mix—never garden soil. Press the mix down lightly with your finger until it's firm but still loose enough to allow roots to penetrate. The goal is to eliminate air pockets while maintaining good drainage. I like to fill them to about 1/4 inch below the rim to prevent overflow when watering.
Moisten the mix thoroughly with a spray bottle until it feels evenly damp, like a wrung-out sponge. Overwatering now will cause compaction, while too little moisture creates dry pockets where seeds won't germinate. Tap the tray gently on the table to settle the soil evenly in each cell. This ensures consistent moisture levels across all seedlings.
💧 Step 2: Sow Seeds at Correct Depth and Space
Follow the seed packet instructions for depth—typically 2-3 times the seed's diameter. For tiny seeds like lettuce, a light sprinkle over the soil surface works best. I use the tip of a toothpick to create a small dimple in the soil, then place 1-2 seeds per cell (just in case one fails to germinate). Cover with a thin layer of additional mix, about 1/8 inch deep.
Label each cell immediately with the seed variety and date using a fine-tip marker. I press the labels into the tray edge so they stay put. This prevents mix-ups later when seedlings look identical. For larger seeds like beans, plant them slightly deeper—about 1 inch down—to protect them from drying out or being disturbed.
☀️ Step 3: Provide Warmth, Moisture, and Light
Place the trays in a warm location with a consistent temperature of 65-75°F. A seedling heat mat beneath the trays can boost germination rates by maintaining that ideal range. Cover the trays with a clear plastic dome or wrap to retain humidity—seeds need moisture to germinate, but don't let the soil stay soggy.
Once you see the first sprouts (usually in 5-14 days, depending on the plant), remove the dome immediately. This prevents damping-off, a fungal disease that attacks young seedlings. Move the trays to a bright location with 12-16 hours of light daily. A south-facing window or grow light works best. You'll know the light is sufficient when seedlings grow sturdy and dark green, not leggy and pale.
🌿 Step 4: Thin and Care for Seedlings
When seedlings develop their first true leaves (not the initial cotyledons), thin to the strongest plant per cell. Use scissors to snip weak seedlings at soil level—never pull them, which can damage roots. This reduces competition for nutrients and light. Water gently from below using a tray filled with 1/2 inch of water, allowing the soil to absorb moisture evenly.
After thinning, fertilize lightly with a diluted half-strength liquid fertilizer to encourage strong root and shoot growth. I wait until seedlings have 2-3 sets of true leaves before fertilizing. This timing prevents burning tender roots. Rotate the trays daily to ensure even growth toward the light source—you'll see seedlings lean toward the light if they're not getting it uniformly.
⏰ Step 5: Harden Off and Transplant
About 2 weeks before your last frost date, begin hardening off seedlings by placing the trays outside in a sheltered spot for 1-2 hours the first day. Gradually increase exposure over 7-10 days, ending with full sun and wind conditions. This acclimates seedlings to outdoor stresses, preventing shock when transplanted.
Transplant when seedlings are 3-4 inches tall and have 4-6 true leaves. Gently remove them from the trays, keeping the root ball intact. Plant at the same depth they were growing in the trays—burying too deep can suffocate stems. Water deeply after transplanting to help roots establish in their new home.
Tips & tricks for perfect seed starting trays
Common pitfalls—and how to sidestep every one when using stackable plastic seed starting trays.
Soil Depth and Drainage: The 1/4-inch gap below the rim isn't just arbitrary—it prevents overflow while allowing excess water to drain freely. If you notice water pooling after watering, gently tap the tray on the table to redistribute the soil. For extra drainage, poke a few small holes in the bottom of each cell with a toothpick if your trays don't have them. This small step prevents waterlogged cells that suffocate seeds.
Temperature Matters: That 65-75°F range is critical for germination, but don't assume your home stays perfectly consistent. Place a small thermometer near your trays to monitor temperature. If your home runs cooler, a seedling heat mat (even a simple heating pad on low) can make all the difference. For warm climates, move trays to a cooler spot like a basement to prevent overheating, which can dry out the soil too quickly.
Lighting Strategy: The 12-16 hours of daily light requirement is non-negotiable for sturdy seedlings. If your south-facing window doesn't provide enough light, supplement with a grow light placed just 2-3 inches above the trays. I've seen seedlings stretch toward weak light sources—rotate trays daily so all sides get equal exposure. For maximum efficiency, use a timer to automate your grow lights if you're not home during daylight hours.
Harden Off Gradually: The 2-week hardening process before transplanting is where many gardeners rush and end up with shock-prone seedlings. Start with just 1-2 hours of outdoor exposure on day one, then increase by 30 minutes each day. Watch for signs of stress like wilting or yellowing—these indicate you're moving too quickly. A sheltered spot like under a porch or against a fence protects seedlings from harsh winds while still acclimating them to outdoor conditions.
Pro Tips for Plastic Seed Starting Trays
- Common pitfalls—and how to sidestep every one when using stackable plastic seed starting trays.
- Soil Depth and Drainage: The 1/4-inch gap below the rim isn't just arbitrary—it prevents overflow while allowing exce...
- Temperature Matters: That 65-75°F range is critical for germination, but don't assume your home stays perfectly consi...
Frequently asked questions
Got questions about plastic seed starting trays?
You’re not alone! Here are answers to the most common ones to help you grow like a pro.
Can I reuse plastic seed starting trays?
Yes! With proper cleaning, plastic seed trays are reusable for years. After your seedlings are transplanted, soak them in warm, soapy water, scrub with a brush, and rinse thoroughly. Avoid harsh chemicals—they can leave residue that harms new seeds. Store them in a dry place until your next planting season!
When is the best time to start seeds in plastic trays?
Timing depends on your plants! For cool-season crops (like lettuce or peas), start 4–6 weeks before the last frost. Warm-season plants (tomatoes, peppers) need 6–8 weeks. Check your local frost dates and seed packets for guidance—overcrowding or premature planting can stunt growth.
Are plastic trays better than biodegradable or peat pots?
Plastic trays win for cost, durability, and stackability, but biodegradable options reduce waste. Peat pots break down but may not provide enough structure for sturdy seedlings. If sustainability is key, opt for compostable trays or reuse plastic trays for years. Both have pros—pick what fits your garden goals!
Why are my seedlings leggy or falling over in the trays?
Leggy seedlings usually mean too little light or overcrowding. Move trays to a sunny window or under grow lights (12–16 hours/day). If they’re top-heavy, bury them deeper in the tray or use a small stake for support. Thin seedlings if roots are tangled—this boosts airflow and strength!
How much do plastic seed trays cost, and where can I buy them?
Prices vary! Basic 72-cell trays cost $5–$15 for a pack, while stackable kits (with domes) run $15–$30. Check garden centers, Amazon, or hardware stores like Home Depot or Lowe’s. Pro tip: Buy in bulk if you’re starting hundreds of seeds—it saves money long-term!
Wrapping up and next steps
Plastic seed starting trays are a game-changer for gardeners looking to maximize space, control conditions, and nurture healthy seedlings with ease! 🌱 Whether you're a beginner or a seasoned pro, these stackable trays simplify the process while keeping your growing area tidy and efficient.
The key is to start small, stay consistent, and let your green thumbs shine.
Now that you’re armed with the know-how, why not give it a try? Grab your trays, gather your seeds, and watch your garden dreams take root—one seedling at a time! 🌿 For even more tips, explore our seedling care guide to keep those sprouts thriving.