
Lawn
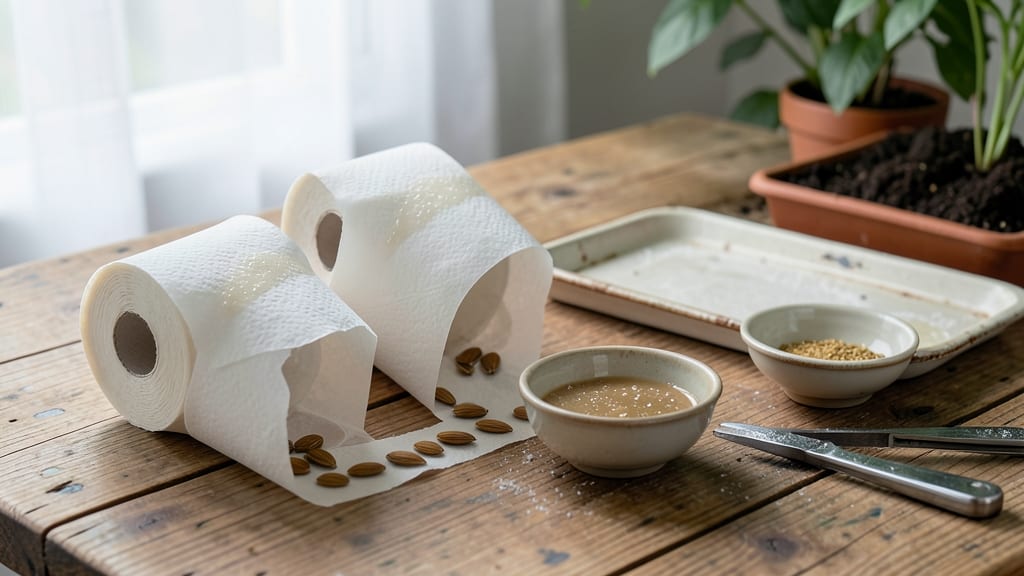
Turn empty toilet paper rolls into seed tape that grows stronger roots and saves you time. 🌱 I’ve made hundreds of these over the years, and they’ve cut my planting time by half while reducing waste—no more struggling with tiny seeds or uneven spacing.
The secret is in the spacing and moisture control, and I’ll show you exactly how to do it right.
You’ll need toilet paper rolls, non-toxic glue (like flour paste), a ruler, and your seeds—no fancy equipment required. The key is spacing seeds ¼ to ½ inch apart depending on the plant, and using a glue that won’t harm germination.
This method works best for small seeds like carrots, lettuce, or flowers, where precision matters most.
Once you’ve glued the seeds in place and let the glue dry, you’ll roll them onto a spool or directly into the soil. The toilet paper dissolves as it waters, so you get even moisture without the hassle of thinning seedlings.
By the time they’re ready to transplant, you’ll have straight, sturdy roots that outperform hand-sown seeds every time.
This hack saves money, reduces waste, and gives you neater, faster germination—perfect for beginners or anyone tired of seed messes. Try it with your next batch of seeds, and you’ll wonder how you ever planted any other way.
📚 In This Guide
- What you need
- Instructions
- Tips and common mistakes
- Wrapping up and next steps
What you need
- ● Toilet paper rolls – 2–5 rolls (depending on how many plants you’re starting)
- ● Seeds – Small, evenly sized seeds (e.g., marigolds, basil, or lettuce; avoid oversized seeds like beans)
- ● Flour or cornstarch – 2–3 tablespoons (as a natural adhesive)
- ● Water – A small bowl for mixing
- ● Scissors or a craft knife – For trimming and cutting
- ○ Tape or glue (optional but helpful) – To secure the seed tape to the roll while drying
- ● Paintbrush or popsicle stick – For spreading the glue mixture evenly
- ● Ruler or measuring tape – To mark even spacing for seeds
- ● Newspaper or parchment paper – For drying the seed tape flat
- ● Hairspray or spray bottle – Light mist to help seeds stick (if needed)
- ● Pencil or marker – To label your seed tape by plant type
Step-by-Step instructions for making seed tape from toilet paper rolls
Here's how I turn empty rolls into a zero-waste planting tool that saves time and boosts germination.
🪴 Step 1: Gather and Prepare Your Materials
You'll need 4 empty toilet paper rolls, a 1-inch wide strip of biodegradable seed tape (or make your own by soaking paper towels), seeds (like basil, lettuce, or marigolds), and a small bowl of water. I like to work on a clean kitchen counter where I can easily access everything. Cut the seed tape into 4 equal sections—each will hold one row of seeds for a small garden bed.
If you're making your own seed tape, place 2-3 seeds on a damp paper towel, then fold it like a tiny sandwich. Let it sit for 10 minutes while you prepare the rolls. The key here is keeping the seeds evenly spaced—about 1 inch apart—so they don't compete for space later.
🌱 Step 2: Apply Seeds to the Seed Tape
Unroll one toilet paper roll and lay it flat. Place your seed tape section along the center of the roll, sticky side up. Press each seed gently into the tape—no need to push hard, just enough to make contact. I tap the seeds lightly with my fingernail to ensure they stick. For 4 rolls, you'll end up with 4 seed-loaded strips, each ready for planting.
Roll the seed tape up carefully, keeping it centered so the seeds stay aligned. The roll should feel snug but not tight—you don’t want to crush the seeds. If the tape starts to unroll, press it back down gently. This step is all about precision: misaligned seeds mean uneven growth later.
💧 Step 3: Moisten and Store Until Planting
Place the 4 completed rolls in a shallow dish or tray and lightly mist them with water until the seed tape feels damp but not soaked. You want the seeds to stay hydrated without floating off. Cover the rolls loosely with a damp paper towel to keep moisture in, and store them in a cool, dark place (like a pantry or fridge) for 24-48 hours.
This pre-moistening trick ensures the seeds won’t dry out when you plant them. Check after 24 hours—if the tape feels dry, give it another light mist. The goal is to keep everything evenly damp until planting day. Overwatering now can cause mold, so avoid soaking the rolls.
☀️ Step 4: Plant the Seed Tape Directly
When you're ready to plant, unroll one seed tape and lay it 1 inch deep in the soil, seeds facing down. Gently press the soil around it to secure the tape in place. Space the rolls 6-12 inches apart, depending on the plant type—lettuce needs less space than basil. The toilet paper roll will dissolve naturally, so there’s no need to remove it later.
Water the area lightly after planting to settle the soil. You’ll see sprouts in 5-14 days, depending on the seed type. The beauty of seed tape is that it eliminates the guesswork—no thinning required, and the seeds stay perfectly spaced. Just keep the soil consistently moist (not soggy) until germination.
🌿 Step 5: Monitor and Maintain Growth
Once seedlings emerge, remove the damp paper towel covering the rolls (if still in place) and let them grow naturally. The toilet paper will break down within 4-6 weeks, leaving no trace. Watch for uniform growth—if one seedling looks weaker, it might need a little extra water or light. I often rotate my seed tape plants a quarter turn weekly to prevent them from leaning toward the sun.
Fertilize lightly after 3-4 weeks with a balanced, water-soluble fertilizer (like 10-10-10) to encourage strong root development. Avoid over-fertilizing—seed tape plants are delicate at first. By the time the rolls dissolve, your seedlings will be self-sufficient and ready for transplanting or harvesting.
Tips & tricks for perfect seed tape planting
These little details make all the difference when turning trash into thriving plants. Here's what I've learned from years of experimenting with this zero-waste method.
Precision in Step 1: For that 10-minute seed tape prep, use a ruler to space seeds exactly 1 inch apart. I learned this the hard way—crowded seeds compete for nutrients, while spaced seeds grow stronger. If you're using larger seeds like beans, you can stretch that spacing to 1.5 inches for even better results.
The 24-48 Hour Rule: Don't rush this storage time! The 24-48 hours in Step 3 lets seeds partially hydrate and start the germination process before planting. I've seen faster, more uniform sprouts when I stick to this window. If you're in a hurry, 24 hours is the minimum—any less and seeds may dry out during planting.
Planting Depth Matters: That 1-inch planting depth in Step 4 is crucial. Too shallow and seeds dry out; too deep and they struggle to break through. I use a small stick to mark planting lines in my soil before laying down the seed tape. For delicate seeds like lettuce, you can even press a thin layer of soil on top to hold them in place without burying them too deeply.
Seed Selection Strategy: Not all seeds work equally well with this method. Fast-germinating seeds like basil and lettuce thrive, while slower starters like tomatoes may need extra care. I always test a few seeds first to see how they respond to the toilet paper—some varieties dissolve too quickly, while others hold up perfectly.
Pro Tips for Seed Tape Toilet Paper
- These little details make all the difference when turning trash into thriving plants.
- Precision in Step 1: For that 10-minute seed tape prep, use a ruler to space seeds exactly 1 inch apart.
- The 24-48 Hour Rule: Don't rush this storage time!
Frequently asked questions
Got questions about repurposing toilet paper rolls into seed tape? We’ve got answers! Here are some of the most common queries—plus practical tips to make your zero-waste gardening a breeze.
How do I keep the seed tape from unraveling while planting?
Use a paperclip or mini clothespin to secure the ends of the seed tape before planting. Alternatively, roll it loosely around a pencil or dowel to prevent tangling. Once planted, the tape will dissolve naturally, releasing seeds into the soil.
How long does it take for the toilet paper to break down in the soil?
Unbleached toilet paper typically decomposes in 4–8 weeks, depending on soil moisture and temperature. For faster breakdown, choose 100% recycled, unbleached rolls—avoid dyed or scented varieties, as they may harm plants or soil microbes.
Can I use seed tape for all types of seeds, or are some better suited?
Seed tape works best with small seeds (like basil, lettuce, or marigolds) that need even spacing. Larger seeds (e.g., beans or sunflowers) may struggle to emerge through the tape. For tricky seeds, pre-sprout them on a damp paper towel first, then tape them in place.
What’s an alternative if I don’t have toilet paper rolls?
No worries! Use cardboard egg cartons, coffee filters, or even biodegradable mesh (like pantyhose!) to create seed tape. Just ensure the material dissolves or breaks down safely in soil. Repurposing newspaper strips (inked side down) is another eco-friendly option.
Why aren’t my seeds germinating with seed tape?
Check these common issues:
- Moisture: Keep soil consistently damp (not soggy) until seeds sprout.
- Depth: Plant tape just below the soil surface—too deep = no light, too shallow = drying out.
- Seed viability: Test seeds first by soaking a few in water for 24 hours.
- Tape thickness: Overlapping layers can suffocate seeds; use 1–2 thin layers max.
Wrapping up and next steps
Transforming old toilet paper rolls into seed tape isn’t just eco-friendly—it’s a game-changer for gardeners! 🌱 With this zero-waste hack, you’ll nurture stronger roots, save seeds from tangling, and cut down on planting hassles. Whether you’re a green thumb or just starting, this method makes gardening simpler and more sustainable.
Ready to grow? Start small—try a few plants this season, then expand your seed-tape projects. Your garden (and the planet) will thank you! 🌿