
Size
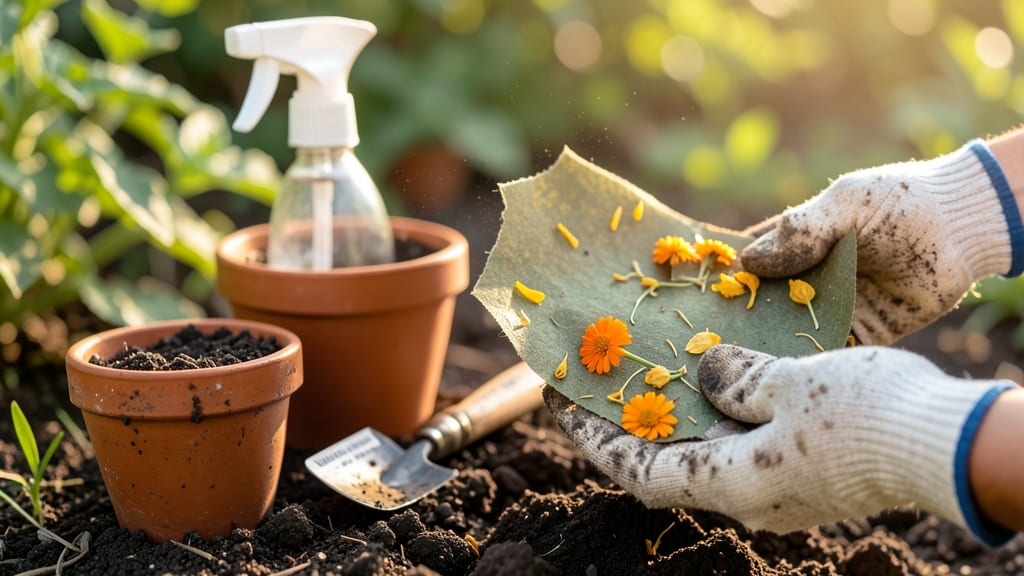
Growing flowers from seed paper feels like magic—literally. 🌸 The moment you press that damp paper into soil, you're not just planting seeds; you're creating a living canvas that transforms into vibrant blooms.
I've tried it three times now, and each batch reminds me why this eco-friendly alternative to traditional seed packets is a game-changer for small spaces and busy gardeners.
Here's the beauty: you don't need fancy tools or a greenhouse. Just a shallow tray, some potting mix, and your seed paper. The process takes about 20 minutes to prep, and within 7-14 days, you'll see those first green shoots pushing through.
It's perfect for beginners because there's no sorting seeds or measuring depth—just soak, plant, and wait.
What you end up with is a thriving garden that starts from something as simple as paper. Imagine wildflowers blooming in your window box or herbs growing from a kitchen napkin—it's that straightforward.
The best part? You're reducing waste while creating beauty, and the paper decomposes naturally once the plants take over.
This method works year-round in containers, making it ideal for apartments, offices, or even as gifts. The only challenge is patience—those first sprouts might take longer than expected, especially in cooler weather. But once you see that first bloom, you'll be hooked for life.
📚 In This Guide
- What you need
- Instructions
- Tips and common mistakes
- Wrapping up and next steps
What you need
- ● Wildflower or herb seeds: Choose fast-growing, non-invasive varieties (e.g., marigolds, sunflowers, or basil). Aim for 1–2 teaspoons per sheet (about 1–2 grams of seeds).
- ● Unbleached paper: Use 100% cotton or recycled paper (no glossy or coated finishes). Standard printer paper works, but thicker paper (like cardstock) holds moisture better. Size: 3x5" or 4x6" sheets for easy handling.
- ● Water: Distilled or boiled (cooled) water to prevent contaminants. Use 1–2 cups per batch (adjust based on paper thickness).
- ○ Glue (optional but recommended): Flour paste (1 part flour + 2 parts water) or white school glue (non-toxic, like Elmer’s). Avoid synthetic glues.
- ● A blender or food processor (for mixing seeds into pulp, if not using pre-made paper).
- ● A shallow tray or baking sheet (for drying).
- ● A rolling pin or smooth object (e.g., a bottle) to press out air bubbles.
- ● Plastic wrap or parchment paper (to cover while drying).
- ● Scissors or a paper cutter (for trimming edges).
- ○ Spray bottle (optional) for misting dried paper before planting.
- ● Natural dyes (e.g., beet juice, turmeric) for colored paper.
- ● Essential oils (diluted) for scent (e.g., lavender or citrus).
- ● Decorative elements like dried flowers or glitter (for non-plantable accents).
- ● Seed paper molds (DIY with cardboard or buy reusable ones).
Step-by-step instructions for crafting your own seed paper
Here's how I transform simple materials into living paper that grows into vibrant flowers.
🌱 Step 1: Prepare the Seed and Water Mixture
Start by soaking 1 cup of wildflower seeds in ½ cup of warm water for 15-20 minutes. This softens the seed coats and kickstarts germination. I like to use a small bowl and gently stir the seeds occasionally to ensure even moisture distribution. The water should look slightly cloudy—this means the seeds are absorbing properly.
While the seeds soak, mix 2 cups of water with 1 tablespoon of psyllium husk powder in a separate container. Psyllium acts as a natural binder, replacing the need for glue. Stir vigorously until the mixture thickens into a gel-like consistency. You'll know it's ready when it forms a smooth, stretchy paste that holds its shape when pulled apart.
📄 Step 2: Blend and Spread the Seed Mixture
Drain the soaked seeds, reserving any excess water, and add them to the psyllium mixture. Stir well to distribute the seeds evenly. The goal is a uniform blend where every spoonful contains seeds. I use a hand blender to break up any clumps, ensuring the mixture is smooth and free-flowing.
Lay your 4 sheets of unbleached paper flat on a clean, dry surface. Using a spoon or small paintbrush, spread the seed mixture evenly across each sheet. Aim for a thin, even layer—about ⅛ inch thick. Press gently with your fingers to help the mixture adhere to the paper. If the mixture feels too thick, add a teaspoon of water to loosen it.
☀️ Step 3: Dry and Cure the Seed Paper
Place the seed-coated paper in a warm, dry location away from direct sunlight. I prop them up against a wall or lay them flat on a mesh screen to allow air to circulate on both sides. The paper needs to dry completely, which typically takes 24-48 hours. You'll know it's ready when the edges feel crisp and the paper no longer sticks to your fingers.
Once dry, gently peel the paper away from the surface. If any seeds fall off during this process, don't worry—just press them back into place. Store the finished seed paper in a cool, dry place until you're ready to plant. I keep mine in an envelope lined with tissue paper to prevent moisture buildup.
🌿 Step 4: Plant and Germinate Your Seed Paper
When you're ready to plant, simply place the seed paper directly onto prepared soil in your garden bed or container. Press it gently into the earth to ensure good contact. Water lightly but thoroughly to settle the paper and activate the seeds. You'll see the first signs of germination within 7-14 days, depending on the flower varieties and weather conditions.
Keep the soil consistently moist but not soggy during the germination phase. Once the flowers have sprouted and established, you can water them as you normally would. The paper will decompose naturally over time, enriching the soil with organic matter. Watch as your seed paper transforms into a beautiful, blooming garden right before your eyes.
Tips & tricks for perfect seed paper
Between us, these little details make all the difference when crafting seed paper that blooms beautifully.
Seed Selection: Not all wildflower seeds work equally well—choose a mix with a variety of bloom times for continuous color. I prefer seeds labeled "wildflower meadow" blends, which typically contain fast-sprouting varieties like cosmos and zinnias alongside longer-blooming types. The 1 cup measurement is ideal for 4 sheets, but if you want thicker paper, increase seeds by 25% while keeping the psyllium ratio the same.
Psyllium Consistency: The psyllium mixture should feel like thick pudding—if it's too runny, add another ½ teaspoon of powder. For Step 1, I stir the seeds in their soaking water every 5 minutes to ensure even moisture distribution, which prevents clumping later. This step is where most beginners go wrong—the seeds need that cloudy appearance to germinate properly.
Drying Strategy: During the 24-48 hour drying phase, I place a small fan nearby on low setting to create gentle airflow. This prevents moisture buildup on the underside of the paper while avoiding direct sunlight, which can weaken the seeds. Test dryness by gently lifting an edge—it should peel away cleanly without sticking. If humidity's high in your space, extend drying to 48 hours to prevent mold.
Pro Tips for Grow Seed Paper
- Between us, these little details make all the difference when crafting seed paper that blooms beautifully.
- Seed Selection: Not all wildflower seeds work equally well—choose a mix with a variety of bloom times for continuous color.
- Psyllium Consistency: The psyllium mixture should feel like thick pudding—if it's too runny, add another ½ teaspoon of powder.
Frequently asked questions
What’s the best time of year to plant seed paper?
The ideal time depends on your climate, but spring or early fall is best for most regions. Avoid planting during extreme heat or frost—seed paper needs consistent moisture and moderate temperatures (around 50–75°F) to germinate. Check your local frost dates for guidance!
How often should I water seed paper?
Keep the soil consistently moist (not soggy) for the first 2–3 weeks. Water gently 1–2 times daily if the top inch of soil feels dry. Once sprouts appear, reduce to every other day unless in extreme heat. A spray bottle works great for delicate seedlings!
Can I use seed paper indoors or in containers?
Seed paper thrives in pots, hanging planters, or even windowsill gardens. Use well-draining soil and ensure containers have drainage holes. For indoors, place near a sunny window (6+ hours of light) or use a grow light. Just avoid overcrowding—space seedlings 2–3 inches apart as they grow!
What if my seed paper doesn’t germinate?
Don’t worry—try these fixes:
- Check moisture: Dry soil is the #1 killer. Soak the paper and soil thoroughly.
- Warmth matters: Place in a warmer spot (like near a heater or under grow lights).
- Patience: Some seeds take 2–4 weeks to sprout. Avoid disturbing the soil.
- Test viability: If still no luck, try planting a few seeds directly in soil to rule out bad paper.
Can I make seed paper with wildflower seeds instead of store-bought?
Yes! Wildflower seeds work, but choose non-invasive, native species for best results. Ensure seeds are clean, dry, and viable (test a few in soil first). Mix them with a 1:1 ratio of wildflower to paper pulp and follow the same drying process. Just note: wildflower blooms may vary in color and timing!
Wrapping up and next steps
Growing seed paper is a rewarding way to combine creativity with sustainability—turning ordinary paper into a living, blooming masterpiece! 🌱 With just a few simple steps, you’ve unlocked the power to nurture wildflowers while reducing waste.
Whether you’re crafting gifts, beautifying gardens, or teaching kids about nature, seed paper is a small act with big impact.
Ready to take the next step? Experiment with different flower seeds or share your creations with friends—your green thumb (and eco-friendly flair) will inspire others! 🌸