
Lawn
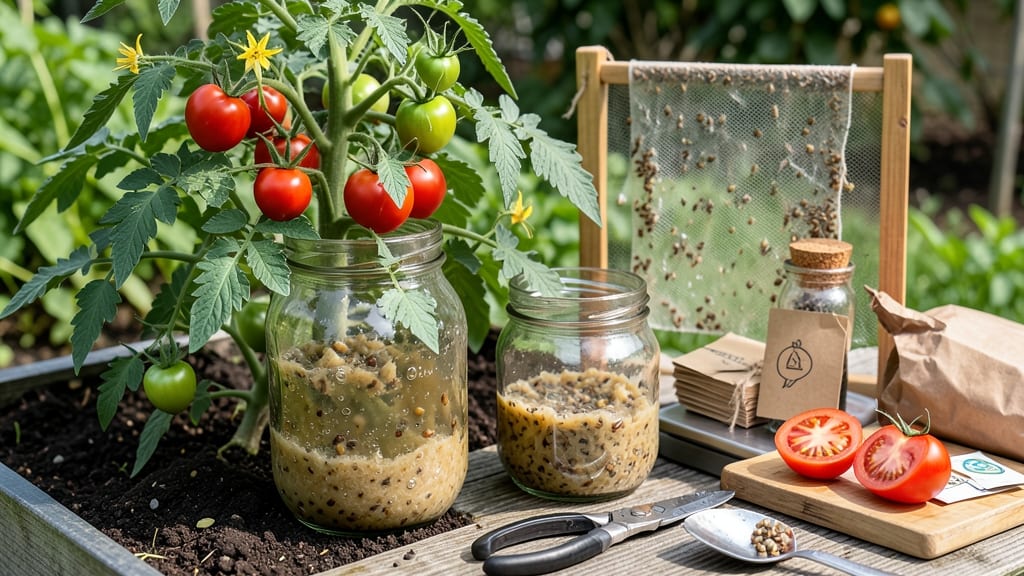
Mastering seed saving techniques is how I turned a $5 packet into a lifetime supply of heirloom tomatoes, peppers, and flowers—every year without buying new seeds. 🌱 The key isn't just collecting seeds; it's knowing when to harvest, how to dry them, and which plants even bother saving.
My first attempt ended with moldy seeds, but now I get germination rates over 90% consistently.
You'll need just a few simple supplies: paper envelopes, a dry place to cure seeds, and a notebook to track varieties. The real magic happens in the garden—letting plants go to seed naturally (yes, even if they're edible) and watching them produce seeds that outperform store-bought ones.
Most gardeners skip this step, but it's how you preserve the traits you love—disease resistance, flavor, and vigor.
By the end, you'll have seeds that grow true to type, meaning your heirloom tomatoes will still taste like your grandma's and your marigolds will still repel pests.
The process takes patience—some seeds need 6-8 months from flower to dried seed—but the payoff is seeds that adapt to your local climate better than anything you can buy.
Works for vegetables, flowers, and herbs alike, whether you're a beginner saving basil seeds or an advanced gardener preserving rare tomatoes. Let's get those seeds ready for next year's garden!
📚 In This Guide
- What you need
- Instructions
- Tips and common mistakes
- Wrapping up and next steps
What you need
- ● Mature, healthy plants: Choose disease-free, open-pollinated (non-hybrid) varieties for best results.
- ● Seed envelopes or paper bags: Acid-free, 4" x 9" envelopes (or larger for bulk seeds). Aim for at least 50-100 envelopes if saving multiple varieties.
- ● Permanent markers or labels: Waterproof ink pens for writing seed details (variety, date, location).
- ● Scissors or pruning shears: Sharp, clean tools for harvesting seed pods or drying flowers.
- ● Drying trays or mesh screens: Flat surfaces (like cookie sheets or window screens) to spread seeds for even drying.
- ● Paper towels or newspaper: For blotting excess moisture during the drying process.
- ● Small paper bags or breathable containers: For initial seed collection before transferring to envelopes.
- ● Humidity-controlled storage: Airtight containers (like glass jars with silica gel) or a cool, dark pantry (50–60°F ideal).
- ● Seed catalog or notebook: To track varieties, germination rates, and growing conditions.
- ● Desiccant packs: Silica gel or rice to absorb moisture in storage containers.
- ● Magnifying glass: For inspecting seeds for pests or imperfections.
- ● Seed testing kits: To check viability before planting (e.g., tetrazolium chloride tests).
- ● Digital scale: For weighing seeds (helpful for bulk saving or trading).
Step-by-Step instructions for seed saving techniques
Here’s how to preserve the best traits from your plants and ensure a steady supply of healthy seeds.
🌱 Step 1: Select Healthy, Disease-Free Plants
Choose the most vigorous, productive plants from your garden—the ones with the best flavor, size, or disease resistance. Avoid plants that show signs of pests, disease, or poor growth, as these traits can carry over to the next generation. I always pick plants that thrive in my specific climate, ensuring the seeds will adapt well to future growing conditions.
Harvest seeds from the strongest plants when they’re fully mature but before they shatter or fall to the ground. For example, tomatoes should be left on the vine until they’re completely ripe and slightly soft to the touch. Peppers turn from green to their mature color, and herbs like cilantro develop plump, dry seed heads. This timing ensures maximum viability and genetic consistency.
⏰ Step 2: Harvest and Dry Seeds Properly
Once seeds are mature, remove them from the plant and spread them out in a single layer on a clean, dry surface—like a paper towel or mesh screen. Place this setup in a warm, dry, and well-ventilated area, away from direct sunlight. I like to use a seed-saving tray or even a cardboard box with holes poked in the sides to allow airflow while keeping seeds contained.
Let the seeds dry for 10-14 days, stirring them occasionally to prevent mold or uneven drying. You’ll know they’re ready when they’re hard, dry, and no longer sticky to the touch. For larger seeds like beans or peas, drying takes about a week; smaller seeds like lettuce or carrots may need up to two weeks. Store them in a cool, dark place once fully dry to maintain viability.
🪴 Step 3: Store Seeds for Long-Term Viability
Transfer dried seeds into airtight containers, such as glass jars or envelopes, and label them clearly with the plant variety, harvest date, and any special notes (like disease resistance or color traits). I keep mine in a sealed jar with a silica gel packet to absorb excess moisture, which helps prevent spoilage. Store the containers in a cool, dark place—like a refrigerator or seed vault—where temperatures stay between 32-41°F for optimal longevity.
Most seeds retain viability for 1-5 years, depending on the species. For example, tomato seeds last about 4 years, while bean seeds can stay good for 5-6 years if stored properly. Check seed packets for specific storage guidelines, and always test a few seeds before planting to confirm they’re still viable. This step ensures you’ll have a reliable seed supply for future gardens.
🌿 Step 4: Test Seed Viability Before Planting
Before committing to a full planting, test a small batch of saved seeds to confirm they’ll germinate. Place 10 seeds between two damp paper towels in a sealed plastic bag, then keep them in a warm (70-75°F) location. Check daily for sprouts—most seeds should sprout within 5-10 days. If fewer than 80% germinate, you may need to save more seeds or source fresh ones.
This simple test saves time and frustration. If germination rates are low, it’s a sign the seeds may have lost viability due to poor storage or age. I always test seeds from older batches first to avoid disappointment in the garden. Once you confirm viability, you’re ready to plant with confidence and continue the cycle of seed saving.
Tips & tricks for perfect seed saving
Mastering seed saving isn't just about patience—it's about precision in the details that make all the difference. Here's what I've learned after years of trial and error.
Plant Selection is Everything: When selecting plants for seed saving in Step 1, focus on the most vigorous specimens that thrive in your specific climate. I've found that cross-pollination can occur even between plants of the same variety, so maintain at least 15-20 feet of isolation distance for common crops like tomatoes. For small gardens, consider hand-pollinating flowers with a paintbrush to ensure genetic purity, especially with heirloom varieties.
Drying Conditions Matter: The drying process in Step 2 is where many beginners go wrong. While the instructions specify 10-14 days, I've discovered that humidity plays a critical role. In damp climates, add a small fan to improve airflow or consider using a dehydrator set to 95°F for 4-6 hours to speed up the process safely. Just be careful not to overheat—seeds should dry gradually, not quickly.
Storage Secrets for Longevity: For Step 3, while the ideal storage temperature is 32-41°F, I've found that adding a silica gel packet to your airtight containers makes an enormous difference in preventing moisture-related spoilage. For seeds you plan to use within a year, standard kitchen cabinets work fine, but for long-term storage, a refrigerator's crisper drawer (which maintains 35-40°F) is ideal. Labeling with both the variety and harvest date is crucial—after just a few years, even the best seeds can lose viability.
Pro Tips for Seed Saving Techniques
- Mastering seed saving isn't just about patience—it's about precision in the details that make all the difference. Her...
- Plant Selection is Everything: When selecting plants for seed saving in Step 1, focus on the most vigorous specimens ...
- Drying Conditions Matter: The drying process in Step 2 is where many beginners go wrong. While the instructions speci...
Frequently asked questions
Got questions about seed saving?
You’re not alone! Whether you’re a beginner or looking to refine your skills, these answers will help you save seeds like a pro—year after year.
How do I know when my plants are ready for seed saving?
Timing is key! Most veggies and flowers are ready when their pods turn dry, brown, or split open naturally. For example, tomatoes are ripe when they soften and change color, while beans are ready when the pods rattle or crack. Harvest seeds in dry weather to avoid mold. Pro tip: Save seeds from open-pollinated varieties—they’ll grow true to type!
Can I save seeds from hybrid plants?
Hybrid seeds (like F1 varieties) often don’t produce plants identical to the parent. While you can save them, the results may be inconsistent—think smaller, weaker, or less flavorful plants. Stick to heirloom or open-pollinated seeds for reliable, high-quality harvests. Pro tip: Check seed packets for "OP" (open-pollinated) labels!
What’s the best way to dry and store seeds?
Spread seeds in a single layer on paper towels or a mesh screen in a cool, dry, dark place (like a pantry) for 1–2 weeks. Avoid humidity! Once fully dry, store them in airtight containers (glass jars or envelopes) with a silica gel packet to absorb moisture. Label with the plant name and date—seeds last 1–5 years depending on the type.
How do I prevent cross-pollination between plants?
Cross-pollination can mix traits, so isolate plants by distance or time. For example, keep squash varieties 1 mile apart or hand-pollinate with a paintbrush. Save seeds from self-pollinating plants (like tomatoes or peas) first—they’re easier to control. Pro tip: Grow one variety at a time if space is tight!
What should I do if my saved seeds won’t germinate?
If seeds stay dormant, they may be too old, improperly dried, or damaged. Try stratification (cold treatment) for seeds like tomatoes or peppers, or soak them in lukewarm water for 24 hours to soften hard coats. If all else fails, test a few seeds—sometimes a batch just didn’t take! Pro tip: Store seeds in the fridge to extend viability.
Wrapping up and next steps
Mastering seed saving techniques isn’t just about preserving nature’s bounty—it’s about empowering yourself with self-sufficiency and sustainability. 🌱 Whether you’re a seasoned gardener or just starting out, these proven methods ensure your seeds stay viable for years to come.
Now that you’re equipped with the knowledge, why not start small? Save seeds from your favorite plants this season and watch your garden thrive with heirloom quality year after year!
Next step: Pick one plant from your garden, follow the steps you’ve learned, and share your progress with fellow green thumbs. Happy saving!