
Lawn
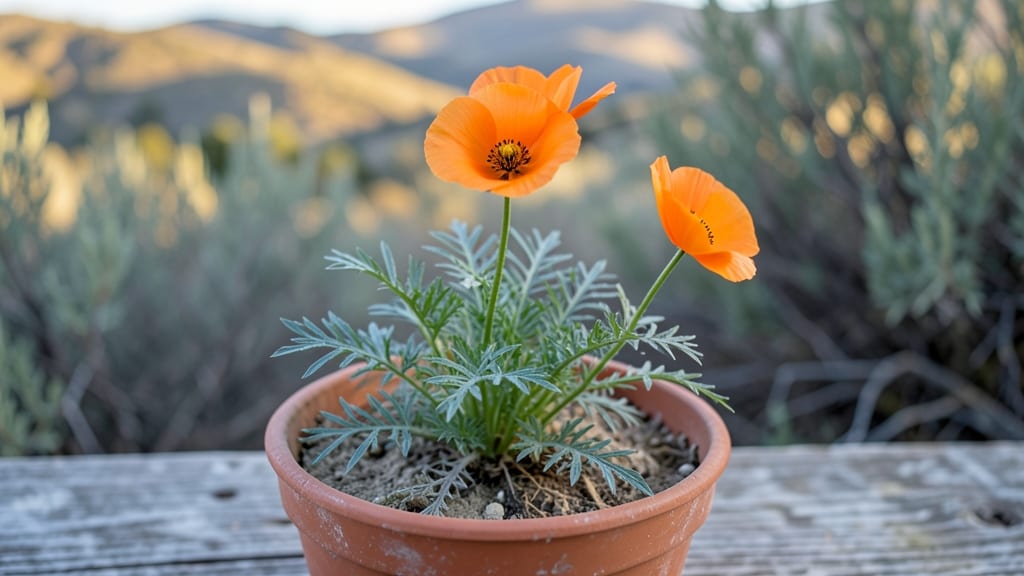
California poppy seed pods hold the secret to next year’s golden blooms. 🌻 I’ve learned that waiting for the right moment—when pods turn from green to papery brown—makes all the difference between viable seeds and dust. The timing is everything, and missing it means starting over from scratch.
These delicate pods split open at the slightest touch, so you’ll need to act fast once they’re ready. A dry, sunny day is your best friend here—gather them gently, before the wind or rain steals your harvest. The reward?
A stash of seeds that’ll bring back those cheerful orange blooms come spring. Once dried properly, stored seeds stay fresh for years, ready to scatter across your garden. You’ll watch those first tender shoots push through the soil, knowing you’ve preserved the magic of California poppies yourself.
No need to buy expensive packets when nature provides. The key is patience—both in harvesting and in waiting for germination. But trust me, the sight of those bright blooms popping up where you scattered seeds last fall is worth every step.
Let’s get those pods dried and stored the right way!
📚 In This Guide
- What you need
- Instructions
- Tips and common mistakes
- Wrapping up and next steps
What you need
- ● California poppy seed pods: Fully mature, brown, and dry pods (typically late summer to early fall). Aim for at least 50–100 pods for a good yield.
- ● Pruning shears or sharp scissors: For cleanly cutting stems without damaging the pods.
- ● Brown paper bags or breathable fabric sacks: 2–3 medium-sized bags (12x18 inches) to hold pods while drying.
- ● Newspaper or cardboard: To line a flat drying surface (e.g., a tray or table).
- ● Small paintbrush or soft toothbrush: For gently removing seeds from dried pods.
- ● Air-tight storage containers: Glass jars, plastic bins with lids, or resealable bags (quart-sized or larger).
- ● Magnifying glass: For inspecting pods for pests or damage.
- ● Fine-mesh sieve: To separate seeds from chaff or debris.
- ● Humidity monitor: If storing in a climate-controlled space (ideal humidity: 30–50%).
- ● Labeling tags & permanent marker: To note the harvest year and variety.
- ● Wait until pods are completely dry and brown—green or moist pods won’t store well.
- ● Harvest on a dry, sunny day to minimize mold risk.
- ● Ensure pods are pest-free (check for spider mites or aphids).
Step-by-step guide to harvesting, drying, and storing California poppy seed pods
Here’s how to rescue those delicate seed pods before they scatter—turning last year’s blooms into next year’s garden magic.
🌿 Step 1: Identify and Harvest Mature Seed Pods
Wait until the pods turn from green to a dry, papery brown—this means they’re ready for harvest. California poppies release seeds easily, so work on a dry day when humidity is low. Hold a small mesh bag or paper envelope under each pod and gently twist it off the stem. Avoid pulling too hard, or you’ll snap the stem instead of the pod.
I like to harvest in the morning when dew has evaporated but before the afternoon heat dries the pods too quickly. If you miss the pods turning brown, they’ll split open and scatter seeds on their own—so keep an eye on them! Collect only fully mature pods; green ones won’t produce viable seeds.
💧 Step 2: Dry the Pods Properly
Spread the harvested pods in a single layer on a clean, dry surface like a baking sheet or mesh screen. Place them in a warm, dry, and well-ventilated spot—ideally 70-75°F with good airflow. Avoid direct sunlight, which can overheat and dry them too fast, making the seeds hard to extract later.
Check the pods every 2-3 days and gently shake them. If seeds rattle inside, they’re ready. If not, leave them another day or two. The drying process usually takes 7-10 days, but humidity levels will affect this. If your home feels damp, prop a small fan nearby to speed things up.
✂️ Step 3: Extract the Seeds
Once the pods are completely dry and brittle, place them in a clean paper bag and gently crush them with your hands or a rolling pin. The seeds will spill out while the empty pod husks stay behind. Sift the mixture through a fine-mesh strainer to separate seeds from chaff. Store the seeds in a labeled envelope or small jar.
Don’t rush this step—take your time to avoid crushing seeds along with the pods. If you’re impatient, you’ll end up with broken seeds that won’t germinate. A quiet afternoon with a cup of tea works perfectly for this task. Label your seeds with the year and variety if you’re saving multiple types.
🪴 Step 4: Store Seeds for Next Year
Keep the extracted seeds in a cool, dark place like a sealed jar or envelope in your fridge. California poppy seeds stay viable for 2-3 years if stored properly, but they germinate best when fresh. For best results, plant them within 6-12 months of harvest.
Moisture is the enemy—make sure your storage container is airtight to prevent mold. I like to add a small packet of silica gel to the jar for extra dryness. In spring, test a few seeds by planting them in a small pot to confirm they’re still good before committing to your garden beds.
Tips & tricks for perfect California poppy seed pod harvesting
A few simple strategies will help you maximize your seed yield and avoid common pitfalls that turn harvest day into frustration.
Harvest Timing Secret: The color change from green to papery brown is your only indicator—no other trick works. I’ve learned the hard way that even slightly green pods won’t produce viable seeds. If you’re unsure, crack one open: if it’s still green inside, wait a few more days. Morning harvests are ideal because the pods are firmest after dew evaporates but before the afternoon heat accelerates drying.
Drying Environment Matters: That ideal 70-75°F range isn’t just a suggestion—it’s critical for even drying. I’ve seen pods dry too fast in direct sunlight and become brittle husks with no usable seeds inside. A well-ventilated spot with indirect light (like a covered porch or basement) works perfectly. If your home feels damp, add a small fan to create gentle airflow—this can cut drying time by nearly half without risking overheating.
Seed Extraction Technique: The gentle crushing method isn’t just about avoiding broken seeds—it’s about preserving seed quality. I’ve tried using food processors, but they pulverize everything. Instead, use a rolling pin wrapped in a clean towel to protect delicate seeds while still releasing them from the pods. For stubborn pods, gently tap them against the counter before crushing—this often releases seeds without damaging them.
Storage Wisdom: The 2-3 year viability window is only true if you maintain complete dryness. I’ve ruined batches by storing seeds in containers that weren’t truly airtight. For extra protection, place a small packet of silica gel or even a few uncooked rice grains in your storage container—they’ll absorb any moisture that sneaks in. Labeling with the harvest year isn’t just helpful—it’s essential when you’re testing viability months later.
Pro Tips for California Poppy Seed Pods
- A few simple strategies will help you maximize your seed yield and avoid common pitfalls that turn harvest day into f...
- Harvest Timing Secret: The color change from green to papery brown is your only indicator—no other trick works. I’ve ...
- Drying Environment Matters: That ideal 70-75°F range isn’t just a suggestion—it’s critical for even drying. I’ve seen...
Frequently asked questions
Got questions about harvesting, drying, or storing California poppy seed pods? You’re not alone! Here are answers to the most common queries to help you save those seeds for next year’s vibrant blooms.
When is the best time to harvest California poppy seed pods?
Harvest seed pods when they’ve turned tan or light brown and are starting to dry out but before they split open. This usually happens in late summer to early fall (August–October in most of California). Avoid harvesting if pods are still green or already cracked—those seeds won’t store well!
How long does it take for California poppy seed pods to dry completely?
With proper drying, pods take 1–3 weeks to fully dry indoors. Spread them in a single layer on newspaper or a mesh screen in a cool, dry, and well-ventilated spot (like a garage or basement). Avoid direct sunlight or humidity, which can cause mold. Patience is key—rush it, and you risk poor seed viability!
What do I do if my seed pods are already splitting open?
Don’t worry—you can still save seeds! Gently shake or tap the pods over a tray or paper to catch the seeds before they scatter. If the pods are too far gone, try hand-pollinating healthy flowers next year to ensure better pod formation. Pro tip: Harvest in the morning when humidity is lower to minimize premature splitting!
Can I store California poppy seeds in the fridge or freezer for longer shelf life?
Yes! For optimal freshness, store dried seeds in an airtight container (like a glass jar or resealable bag) in the fridge (35–40°F) for up to 2–3 years. Freezing (0°F or below) can extend viability to 5+ years, but label containers with the date to track freshness. Keep seeds cool and dry—moisture is their enemy!
What’s an alternative if I don’t want to deal with seed pods?
If harvesting seems tricky, consider buying fresh seeds from a nursery or online retailer (like Baker Creek Heirloom Seeds) for the next planting season. Alternatively, propagate from cuttings or divide mature plants in early spring. Just know that store-bought seeds may lack the localized adaptability of home-harvested ones!
Wrapping up and next steps
Harvesting, drying, and storing California poppy seed pods is a rewarding way to ensure next year’s vibrant blooms while embracing sustainable gardening. By following these simple steps, you’ll preserve nature’s beauty and extend the life of your poppies effortlessly.
Ready to try? Grab your gloves and get started—your garden will thank you! 🌸
💡 Next Step: Share your success with fellow gardeners or explore creative ways to use dried poppy pods in floral arrangements or crafts!