
Lawn
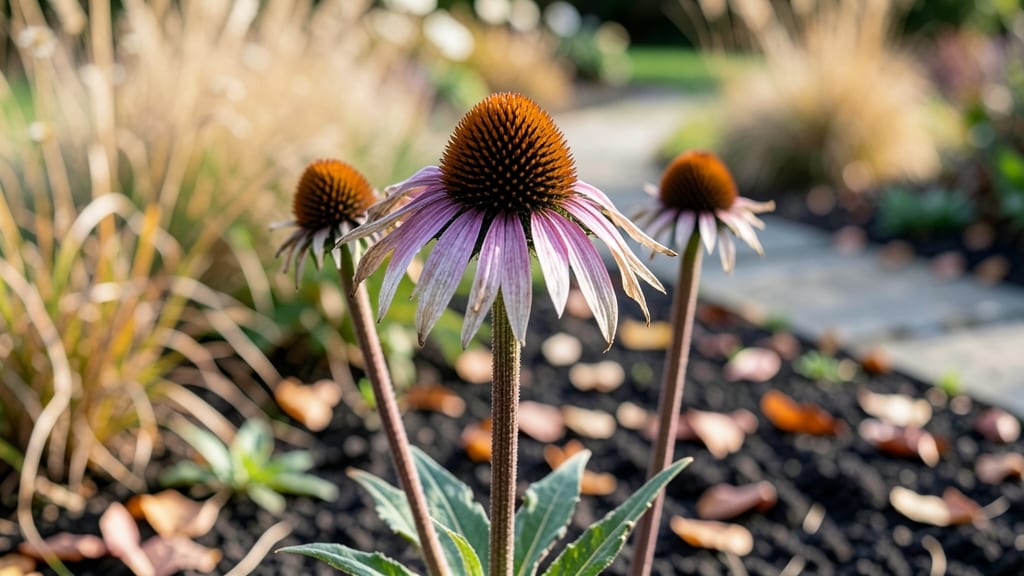
Those coneflower seed heads are nature’s winter masterpiece—drying them right turns them into year-round beauty while saving seeds for next season’s blooms. 🌻 I’ve turned my late-summer spent flowers into dried arrangements, bird feeders, and even next year’s garden starters, all with the same simple techniques.
The best time to harvest is when the seed heads turn light brown and papery, usually in late September or October. Cut stems long (12-18 inches) to dry upright in bundles—hang them upside down in a dry, dark spot for 2-4 weeks.
For cold stratification, place dried heads in a paper bag with damp sand and refrigerate for 60-90 days before planting.
Once dry, you’ll have two free gifts: seeds for next year’s garden and sturdy, rustic decorations that last through winter. The dried seed heads add texture to bouquets, bird feeders, or even wreaths—while the saved seeds give you free, hardy plants that thrive with minimal care.
This method works for any coneflower variety, from classic purple to white or orange. Whether you’re drying for crafts or saving seeds, you’ll end up with less waste and more beauty—all from what most gardeners would toss.
📚 In This Guide
- What you need
- Instructions
- Tips and common mistakes
- Wrapping up and next steps
What you need
- ● Mature coneflower seed heads: Harvest fully dried heads (late summer/fall) with brown, papery petals and plump seed cones.
- ● Pruning shears or clean scissors: 1 pair (sterilized with rubbing alcohol to prevent disease).
- ● Paper bags (brown kraft or breathable): 5–10 bags (1–2 heads per bag).
- ● Drying location: A dry, well-ventilated space (e.g., garage, shed, or indoor shelf with airflow).
- ● Plastic zip-top bags: 1–2 gallon-sized bags (for long-term storage).
- ● Permanent marker: 1 (to label bags with plant variety/year).
- ○ Cold stratification setup (optional for faster germination): Refrigerator with a crisper drawer (or a cool, dark basement).
- ● Small paper towels or dampened sphagnum moss (for moisture).
- ● Seed-saving envelope: 1–2 (for small-scale storage before bagging).
- ● Desiccant packets: 1–2 (to absorb moisture in storage bags).
- ● Garden journal: 1 (to note seed head traits or germination dates).
- ● Plant labels: 5–10 (if saving multiple coneflower varieties).
Step-by-Step guide for harvesting, drying, and stratifying coneflower seed heads
Here’s how to rescue next year’s blooms from this season’s spent coneflower heads—simple steps that save you money and time.
🌱 Step 1: Harvest Mature Seed Heads at the Right Time
Wait until the seed heads turn a deep, papery brown and the petals have completely fallen away. This usually happens in late fall or early winter, depending on your climate. Gently twist the stems to detach the heads—don’t cut them, as this can damage the base plant.
I like to harvest on a dry day so moisture doesn’t cling to the seeds. Place the heads in a paper bag or breathable mesh bag to allow airflow. Avoid plastic bags—they trap humidity and encourage mold. If rain is forecast, bring them indoors immediately to dry.
🌿 Step 2: Dry Seed Heads Thoroughly Before Storage
Spread the harvested seed heads in a single layer on a clean, dry surface like a wire rack or cardboard box. Choose a warm, dry, and well-ventilated spot—think of a sunny windowsill or a garage shelf with good airflow. This prevents mold and ensures seeds remain viable.
Drying takes 2-4 weeks, depending on humidity levels. You’ll know they’re ready when the seed heads feel light and brittle, and the seeds rattle inside when shaken. If you rush this step, seeds may not germinate properly or could develop fungal issues.
💧 Step 3: Remove Seeds from Dried Heads
Once completely dry, place a seed head over a clean bucket or bowl and gently rub the dried florets between your fingers. The seeds will fall out while the chaff remains behind. I like to do this outdoors or over newspaper to contain any stray seeds.
Sift the collected seeds through a fine-mesh strainer to separate them from debris. Store the clean seeds in a labeled paper envelope or small glass jar. Labeling is critical—coneflower varieties can vary, and you’ll want to remember what you’re planting next spring.
❄️ Step 4: Cold Stratify Seeds for Better Germination
Coneflower seeds benefit from a 60-90 day cold stratification period to mimic winter conditions. Place the seeds in a sealed plastic bag with a damp paper towel—just enough moisture to keep the towel damp, not soggy. Seal the bag and refrigerate it at 34-40°F.
Check the seeds monthly to ensure the paper towel remains damp. After 2-3 months, remove them from the fridge and let them sit at room temperature for a week before sowing. This stratification trick boosts germination rates significantly, especially in warmer climates where seeds might otherwise struggle.
⏰ Step 5: Store Remaining Seeds Properly for Long-Term Viability
If you’re not sowing immediately, store the stratified seeds in a cool, dark place like a seed vault or the back of your refrigerator. Keep them in their labeled envelopes or jars with a desiccant packet to absorb excess moisture. Coneflower seeds stay viable for 3-5 years when stored properly.
Before planting, test a few seeds by sowing them in a small pot. If they germinate within 10-14 days, the rest of your batch is likely still good. If germination is slow or patchy, it may be time to collect fresh seeds for next season.
Tips & tricks for perfect coneflower seed preservation
Here’s what I’ve learned the hard way about saving seeds that’ll actually sprout next spring.
Timing is Everything: Harvest those seed heads only when they’ve fully matured—deep papery brown with no lingering petals. I’ve learned this the hard way by collecting too early and ending up with mostly chaff. If you’re unsure, wait another week; patience here pays off with better germination rates. The 2-4 weeks drying time in Step 2 is non-negotiable—humidity is your enemy, so if your climate is damp, consider using a small fan on low to speed up the process safely.
Seed Extraction Technique: When removing seeds from dried heads in Step 3, I’ve found that gently tapping the heads over a bowl works better than rubbing for delicate varieties. The seeds are fragile, and aggressive handling can damage them. For large batches, try placing heads in a paper bag and shaking gently—this catches more seeds while keeping them intact. Always work outdoors or over newspaper to contain any stray seeds that might escape.
Cold Stratification Secrets: The 60-90 day cold stratification in Step 4 is where many gardeners go wrong. I’ve seen people skip this step entirely or do it for too short a time, leading to poor germination. Pro tip: Use a clear plastic bag for your refrigerator setup so you can easily check moisture levels without opening the bag. If condensation forms on the inside, your seeds are too wet—open the bag for a few hours to dry out before resealing.
Storage Wisdom: For long-term viability, I’ve found that small glass jars with tight-sealing lids work better than envelopes for seed storage. They’re less prone to moisture intrusion and easier to label. When testing germination in Step 5, use a small pot with well-draining soil—coneflower seeds need good airflow to prevent rot. If you’re storing seeds for more than a year, consider adding a silica gel packet to your storage container to absorb any moisture that might develop over time.
Pro Tips for Coneflower Seed Heads
- Here’s what I’ve learned the hard way about saving seeds that’ll actually sprout next spring.
- Timing is Everything: Harvest those seed heads only when they’ve fully matured—deep papery brown with no lingering pe...
- Seed Extraction Technique: When removing seeds from dried heads in Step 3, I’ve found that gently tapping the heads o...
Frequently asked questions
Got questions about preserving coneflower seed heads for next season? You’re not alone!
Here are the most common queries—and their answers—to help you master seed-saving like a pro.
When is the best time to harvest coneflower seed heads?
Harvest seed heads once they’ve turned brown and dried on the plant—usually late summer to early fall. Wait until the seed fluff (pappus) is visible but hasn’t scattered yet. Cut stems with 2–3 inches of stalk attached for easier handling. Pro tip: Harvest on a dry day to avoid mold!
Why do coneflower seeds need cold stratification?
Cold stratification mimics winter conditions, breaking seed dormancy for better germination. Coneflower seeds often need 60–90 days at 33–41°F (1–5°C). Place harvested heads in a paper bag in the fridge (not the freezer) or bury them in a protected outdoor spot. Skip this step? Germination may be slow or uneven.
How should I store dried coneflower seed heads?
Store seed heads in a cool, dry place (like a breathable paper bag or envelope) away from direct sunlight. Avoid plastic containers to prevent moisture buildup. Label them with the variety and harvest date! For long-term storage, remove seeds from heads and keep them in an airtight container with a silica gel packet to absorb humidity.
Can I reuse dried coneflower seed heads for crafts?
Once seeds are removed, the dried heads make stunning dried arrangements, potpourri, or rustic décor. Soak them in warm water for 10–15 minutes to soften before arranging. For extra durability, spray with clear acrylic sealer. Just avoid using heads that show signs of mold or pests.
What if my coneflower seeds won’t germinate?
Try these fixes:
- Check freshness: Older seeds (over 1 year) may need re-stratification.
- Test viability: Fill a glass with water—floaters are likely non-viable.
- Adjust conditions: Some varieties prefer light exposure during germination.
- Use a fungicide: Damp seeds? Sprinkle with cinnamon powder to prevent rot.
Wrapping up and next steps
Coneflower seed heads are nature’s gift to gardeners—packed with potential for next year’s vibrant blooms! 🌼 By mastering drying, storing, and cold stratification, you’ve unlocked the secret to effortless propagation. Your patience today ensures a garden bursting with color tomorrow.
Ready to take the next step? Plant those seeds in well-draining soil, keep them moist, and watch your coneflowers thrive! Happy gardening—your future blooms are waiting! 🌱