
Propagation
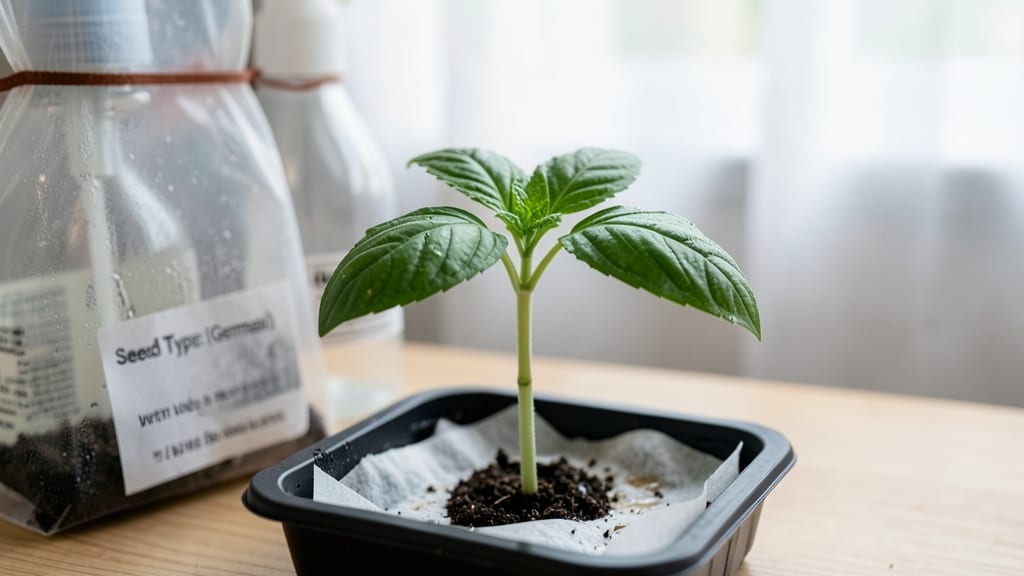
A plastic bag creates the perfect humidity cocoon for fussy seeds. 🌱 I've used this trick to coax germination from stubborn seeds that refused to sprout in open containers—especially my finicky heirloom tomatoes and peppers.
The secret lies in trapping moisture while keeping seeds warm and protected from drying winds or drafts.
All you need is a clear plastic bag (like a gallon-sized grocery bag), a seed-starting tray or small container, some moist seed-starting mix, and your seeds. The bag acts like a greenhouse, maintaining 90% humidity without requiring a fancy setup.
Just poke a few tiny holes for airflow, seal it loosely, and place it in a warm spot—like on top of your fridge or near a sunny window.
Within 5-14 days, you’ll see tiny sprouts pushing through the soil, safe from the drying effects of indoor air. The best part? No more watching your seeds turn into sad, shriveled husks.
This method works especially well for slow-to-germinate seeds like okra, parsley, or even delphiniums, which can take weeks to break dormancy.
Once sprouts appear, unzip the bag gradually for 10-15 minutes a day to acclimate them before removing it completely. For seeds that love warmth, like peppers, place the bag on a seedling mat.
For cooler crops like lettuce, keep it near a bright window but avoid direct heat. The key is patience—some seeds need extra time to adjust to the open air.
📚 In This Guide
- What you need
- Instructions
- Tips and common mistakes
- Wrapping up and next steps
What you need
- ● Seeds: Choose fresh, high-quality seeds (e.g., herbs, veggies, or flowers). Quantity: 1–5 seeds per bag (adjust based on seed size).
- ● Plastic bag: A quart-sized (32 oz) resealable, zip-top bag (e.g., Ziploc). Tip: Poke 2–3 small holes (with a toothpick) for airflow!
- ● Paper towels or coffee filters: 2–3 sheets (cut to fit the bag). Why? They hold moisture without suffocating roots.
- ● Spray bottle: With water (or a damp cloth) to mist the towels.
- ● Scissors or knife: For trimming towels/bags.
- ○ Ruler or measuring tape: Optional but helpful for marking seed placement.
- ● Grow light or sunny windowsill: For seedlings needing extra light.
- ● Planting tray or egg carton: To transfer sprouted seeds later.
- ● Hairpin or clothespin: To loosely close the bag (keeps it breathable).
- ○ Seedling heat mat (optional): For cold-weather germination boosts.
Step-by-Step instructions for germinating seeds in a plastic bag
Here's how to create a mess-free, humidity-controlled environment that speeds up sprouting.
🌱 Step 1: Prepare Your Seeds and Growing Medium
Start by placing a small amount of your chosen seed-starting mix in a shallow container—think a seed tray or even a repurposed plastic takeout container with drainage holes punched in the bottom. Moisten the mix until it feels like a damp sponge, not dripping wet. This is crucial because too much water creates anaerobic conditions that rot seeds before they sprout.
Scatter your seeds evenly across the surface, following the spacing guidelines on the seed packet. I like to use a toothpick to gently press each seed into the soil just deep enough to cover it—usually about twice the seed's diameter. This ensures consistent contact with moisture without burying them too deep, which can delay germination.
💧 Step 2: Create the Humidity Dome
Once seeds are planted, place the container inside a clear, resealable plastic bag—like a gallon-sized zip-top bag. This creates a greenhouse effect that retains moisture and warmth, which are critical for germination. Seal the bag loosely, leaving just enough room for a little airflow to prevent mold. You'll see condensation form on the inside, which is perfect—it means the humidity level is ideal.
I like to use a plastic knife or chopstick to prop open one corner of the bag slightly if condensation gets too heavy. Too much trapped moisture can lead to fungal issues, so a tiny gap prevents that while still maintaining humidity. Place the bag in a warm spot, ideally between 70-85°F, like on top of a refrigerator or near a sunny window.
☀️ Step 3: Monitor and Maintain Conditions
Check your seeds daily for signs of sprouting, which should appear within 3-14 days, depending on the plant type. You'll notice tiny green shoots pushing through the soil first—this is your signal that germination is underway. Once you see the first sprouts, remove the plastic bag immediately to prevent damping-off, a fungal disease that attacks tender seedlings.
At this stage, move the container to a bright location with indirect light. If you're using a sunny windowsill, place it where the light is gentle but consistent. Avoid direct sunlight, which can overheat the soil and stress the young plants. You'll know the light is right when the seedlings grow upright rather than stretching toward the light.
🌿 Step 4: Transition to Independent Growth
After the seedlings have their first set of true leaves—those are the second set that appear after the initial cotyledons—it's time to transition them out of the bag environment. Gradually reduce humidity by opening the bag for a few hours each day, then remove it entirely after 3-5 days. This acclimates the seedlings to normal air conditions without shocking them.
Water gently from the bottom by placing the container in a shallow tray of water for 10-15 minutes. This method ensures the roots absorb moisture without disturbing the soil. Once the top inch of soil feels dry to the touch, it's time to water again. Avoid overhead watering, which can spread disease and wash away delicate seedlings.
Tips & tricks for perfect humidity-controlled seed sprouting
Here's what I've learned after watching hundreds of seeds sprout successfully—and how to avoid the common pitfalls that derail beginners.
Soil Moisture Secret: The "damp sponge" test in Step 1 is critical—your seed-starting mix should hold together when gently squeezed but not drip water. Too wet creates anaerobic conditions that suffocate seeds before they even begin to sprout. I like to use a spray bottle for the final misting to control moisture precisely, especially with delicate seeds like lettuce or basil.
Temperature Matters: The 70-85°F range in Step 2 is ideal, but consistency is key. If your kitchen runs cooler, place the bag on top of your refrigerator (not inside) where it stays warm from the compressor. For faster germination, you can also place the bag near a sunny window during the day and move it to a warmer spot at night. Just avoid direct sunlight—it can overheat the soil.
Visual Cues for Germination: In Step 3, look for these three signs that sprouting is underway: 1) condensation on the bag's interior, 2) tiny cracks in the soil surface, and 3) the first green shoots pushing through. Once you see those first sprouts, remove the bag immediately—this prevents damping-off disease that can kill seedlings overnight. I check my seeds twice daily to catch this moment just in time.
Transition Technique: The 3-5 day gradual transition in Step 4 is where many beginners rush and shock their seedlings. Start by opening the bag for just 30 minutes on day 1, then increase by 30 minutes each day. This mimics natural weather changes and prevents transplant shock. For sensitive plants like tomatoes, I extend this to 7 days to be extra gentle.
Pro Tips for Seed Germination Plastic Bag
- Here's what I've learned after watching hundreds of seeds sprout successfully—and how to avoid the common pitfalls th...
- Soil Moisture Secret: The "damp sponge" test in Step 1 is critical—your seed-starting mix should hold together when g...
- Temperature Matters: The 70-85°F range in Step 2 is ideal, but consistency is key. If your kitchen runs cooler, place...
Frequently asked questions
Got questions about using a seed germination plastic bag to kickstart your plants? You’re not alone—this method is game-changing but can feel tricky at first. Below, we tackle the most common queries to help you sprout like a pro!
Why use a plastic bag for seed germination instead of soil?
A plastic bag creates a humidity dome that mimics a greenhouse, keeping seeds moist and warm without overwatering soil. This speeds up germination (often 2–3x faster!) and prevents mold or damping-off. Plus, it’s mess-free and lets you monitor progress easily. Perfect for fussy seeds like lettuce or herbs!
How long should seeds stay in the plastic bag before transplanting?
Most seeds germinate in 3–14 days (check seed packets for specifics!). Once sprouts emerge and have 1–2 true leaves, it’s time to transplant. Leave them in the bag too long, and roots may tangle. Pro tip: Poke tiny holes in the bag after germination to harden off seedlings gently!
What’s the ideal temperature and light for germination in a plastic bag?
Keep bags in a warm spot (65–85°F)—a sunny windowsill or seedling heat mat works best. Avoid direct sunlight (which can overheat them) but provide indirect light for 12+ hours daily. Darker seeds (like beans) may prefer warmth over light, while veggies like peppers need both!
My seeds aren’t sprouting—what went wrong?
Troubleshoot with this checklist:
- Moisture: Check if the bag is foggy (too wet) or dry. Mist seeds lightly if needed.
- Temperature: Move to a warmer spot (e.g., near a heater or under a grow light).
- Age/Viability: Old seeds may fail—test with a float test (fill a glass with water; viable seeds sink).
- Depth: Some seeds (like tomatoes) need ¼-inch depth; others (like chives) just need light.
Can I reuse plastic bags for germination?
Yes! Clean, sterilized bags (rinse with vinegar or bleach solution) can be reused for multiple batches. Just ensure they’re dry and free of mold before reusing. For hygiene, dedicate bags to specific seed types (e.g., keep herbs separate from veggies) to avoid cross-contamination.
What’s a good alternative if I don’t have plastic bags?
No worries—try these DIY humidity hacks:
- Clear plastic domes (like those for salad greens).
- Glass jars with a damp paper towel lid.
- Zip-top bags with a tiny air hole (use a toothpick to poke it).
- Seedling trays with lids (often sold at garden centers).
Wrapping up and next steps
Mastering seed germination with a plastic bag is a game-changer—it’s simple, mess-free, and effective for controlling humidity while keeping your seeds cozy. Whether you’re growing herbs, veggies, or flowers, this method saves space and speeds up sprouting with minimal effort.
Now that you’re equipped with the right tools and tips, there’s no better time to start experimenting!
🌱 Next steps:
- Pick your favorite seeds and give this technique a try—watch those roots pop in days!
- Share your sprouting wins (or bloopers!) with fellow gardeners for extra motivation.