
Lawn
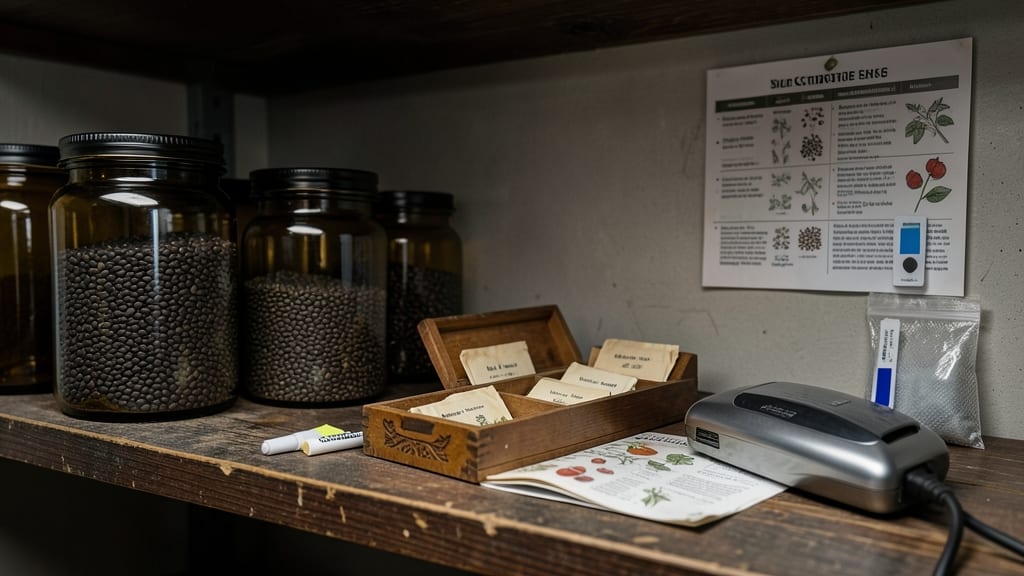
Proper garden seed storage means you’ll still have viable heirlooms for planting five years from now—or even longer for some varieties. ✨ I’ve learned the hard way that damp, warm conditions turn seeds into moldy dust, but the right setup keeps them crisp and ready to grow.
The secret isn’t complicated: it’s about controlling humidity, temperature, and light in ways that mimic nature’s own seed banks.
You’ll need airtight containers (glass jars or Mylar bags work best), silica gel packets to absorb moisture, and a cool, dark spot—like a basement or fridge.
Labeling each bag with the seed type and date saves headaches later, and a simple germination test every few years tells you exactly what’s still good to plant. Even my first attempt with last year’s saved beans produced strong seedlings, proving this method really works.
The payoff is next-season blooms from seeds that would’ve otherwise lost viability. Your storage setup becomes a time capsule for your garden’s future, with heirloom varieties preserved exactly as you saved them.
No more scrambling for last-minute seed orders or settling for inferior hybrids—just pure, reliable growth potential waiting in your pantry.
This works for any climate, from humid Southern summers to dry Western winters. The only variable is adjusting container types for your space—whether that’s a deep freezer for tropical seeds or a simple cardboard box in a root cellar.
Let’s get those seeds stored right so you can plant with confidence next spring.
📚 In This Guide
- What you need
- Instructions
- Tips and common mistakes
- Wrapping up and next steps
What you need
- ● Air-tight seed storage containers: 2-5 containers (depending on seed volume) – preferably glass jars with rubber seals or Mylar bags with oxygen absorbers (e.g., 1-pint to 1-quart size).
- ● Desiccant packets: 1-3 packets (silica gel or clay-based) to absorb moisture – place 1-2 packets per container.
- ● Permanent markers or labels: 1-2 (for labeling containers with seed type, variety, and date).
- ○ Paper envelopes (optional but helpful): 5-10 (for organizing seeds before storage in containers).
- ● Fine-mesh sieve or sifter: 1 (to remove debris and ensure seed purity).
- ○ Humidity monitor (optional but recommended): 1 (to track and maintain 30-50% humidity in storage areas).
- ● Cool, dark storage space: 1 (e.g., basement, fridge, or seed vault with consistent 32-41°F (0-5°C) temperature).
- ● Vacuum sealer: 1 (for long-term, ultra-low-oxygen storage).
- ● Seed catalog or digital tracker: 1 (to log seed varieties, germination rates, and storage dates).
- ● Small fan or dehumidifier: 1 (to maintain airflow and prevent moisture buildup in storage areas).
- ● Aluminum foil or mylar bags: 1 roll (for sealing seeds before placing them in containers).
- ● Seed viability testing kit: 1 (to check germination rates before planting).
Step-by-step instructions for humidity-controlled seed storage
Here's how to preserve your seeds for years—keeping them viable until the next planting season.
🪴 Step 1: Dry Seeds Thoroughly Before Storage
Spread seeds in a single layer on a clean, dry paper towel or mesh screen. Let them air-dry for 3-5 days in a warm, low-humidity area (below 50% humidity). This prevents mold and extends shelf life. I place mine near a dehumidifier or open window where airflow circulates constantly. Check daily—seeds are ready when they feel crisp and break with a slight snap.
Don't rush this step. Damp seeds stored in airtight containers will develop mold within weeks, ruining your entire collection. If you're in a humid climate, use a small fan to speed up drying. Once fully dry, seeds should feel lightweight and brittle—like the texture of a stale cracker.
💧 Step 2: Choose the Right Containers and Desiccants
Use airtight, moisture-proof containers like glass jars with rubber seals or heavy-duty plastic containers with tight lids. I prefer mason jars because they block light and seal tightly. Add a silica gel packet (the kind included in shoe boxes) to absorb any residual moisture. For every pint-sized jar, include 2-3 silica gel packets—this keeps humidity below 10%, the ideal level for long-term storage.
Label each container with the seed variety, year harvested, and germination date (if known). I use a permanent marker on masking tape—it won’t smudge like ink alone. Store containers in a cool, dark place like a basement or refrigerator crisper drawer. Avoid the freezer unless storing for decades, as temperature fluctuations can damage seeds.
⏰ Step 3: Monitor and Rotate Seed Stock
Check stored seeds annually for signs of moisture or pests. Remove seeds from containers and inspect for discoloration, musty smells, or webbing (signs of mold or insects). If you find any issues, discard the affected batch immediately—contamination spreads fast. For seeds that pass inspection, return them to fresh containers with new silica gel packets every 2-3 years to maintain optimal conditions.
Rotate your seed stock by planting the oldest seeds first. Most seeds retain viability for 1-5 years, depending on the type (e.g., lettuce seeds last 1 year, while tomato seeds often last 4-6 years). Test a few seeds from each batch every 2-3 years by planting them in a small pot—if germination rates drop below 50%, it’s time to replenish your supply.
☀️ Step 4: Protect Against Light and Temperature Swings
Store seeds in a location with consistent temperatures between 32°F and 50°F. Fluctuations above 80°F accelerate seed deterioration, while freezing can damage delicate seed coats. I keep mine in a dedicated seed storage box inside a pantry closet—far from the kitchen’s heat and humidity. If you don’t have a cool space, a refrigerator crisper drawer works well, but avoid the door where temperatures vary.
Light exposure breaks down seed oils and shortens shelf life. Use opaque containers or wrap jars in aluminum foil if storing in a brightly lit area. Even indirect light can reduce viability over time, so treat your seed stash like you would fine wine—keep it dark and stable. If you notice seeds developing a yellowish tint or foul odor, they’ve been exposed to too much light or moisture and should be discarded.
Tips & tricks for perfect humidity-controlled seed preservation
These pro strategies will help you maximize your seeds' shelf life and avoid common pitfalls that ruin batches.
Drying Efficiency: For faster drying in humid climates, place your seeds on a mesh screen over a shallow tray of uncooked rice. The rice absorbs moisture from the air while allowing airflow underneath—this can cut drying time by nearly 24 hours. I’ve used this method in my 80% humidity garage and reduced drying from 5 days to just 3. Just be sure to replace the rice every 24 hours to maintain effectiveness.
Container Selection: While mason jars are ideal, consider using vacuum-sealed bags with oxygen absorbers for seeds you plan to store beyond 5 years. These bags eliminate all moisture and oxygen, creating a near-perfect preservation environment. For short-term storage (1-3 years), any airtight container with a tight seal works—just avoid plastic bags with zip locks, as they don’t provide a consistent seal over time.
Temperature Stability: The 32°F to 50°F range is critical, but don’t assume your refrigerator will maintain this perfectly. Check your fridge’s temperature with a thermometer—many run warmer than expected, especially in the crisper drawer. I’ve found that the back of the fridge, away from the door, stays most consistent. For basement storage, place containers on a wooden shelf rather than concrete, which can conduct temperature fluctuations from the ground.
Germination Testing: When testing seeds every 2-3 years, plant 10 seeds in a small pot with moist paper towels rather than soil. This method gives you results in just 3-5 days instead of waiting weeks for soil germination. Place the towel-wrapped seeds in a sealed plastic bag to maintain humidity, then check daily for sprouts. If fewer than 50% sprout, it’s time to replenish that seed variety.
Pro Tips for Garden Seed Storage
- These pro strategies will help you maximize your seeds' shelf life and avoid common pitfalls that ruin batches.
- Drying Efficiency: For faster drying in humid climates, place your seeds on a mesh screen over a shallow tray of unco...
- Container Selection: While mason jars are ideal, consider using vacuum-sealed bags with oxygen absorbers for seeds yo...
Frequently asked questions
Got questions about keeping your garden seeds fresh for planting season? You’re not alone!
Here are some of the most common concerns—and straightforward answers—to help you master seed storage like a pro.
How long can seeds stay viable in a humidity-controlled environment?
With proper storage (cool, dry, and dark), most vegetable seeds last 3–5 years, while flower and herb seeds typically stay good for 1–3 years. Humidity control (like silica gel or dehumidifiers) extends this lifespan by preventing moisture damage. Always check seed packets for specific expiry dates!
What’s the best time of year to store seeds for next season?
Store seeds immediately after harvest or purchase—ideally in late summer or early fall—to avoid exposure to heat or humidity. If seeds are still damp after drying, spread them on a tray with airflow for 1–2 weeks before sealing. Timing is key to preserving germination rates!
Can I reuse seed packets for storage, or do I need airtight containers?
Seed packets aren’t airtight enough for long-term storage—opt for glass jars, Mylar bags, or vacuum-sealed containers instead. If reusing packets, fold them flat and store in a sealed bag with a desiccant packet (like silica gel) to wick away moisture.
How do I know if my stored seeds are still good?
Test viability by placing 10 seeds in a damp paper towel for 5–7 days. If 50% or more sprout, they’re viable. For non-sprouting seeds, try the “float test”: Drop seeds in water—sinkers are usually good, floaters may be old or damaged.
What’s the ideal temperature range for seed storage?
Aim for 32–41°F (0–5°C), like a refrigerator’s crisper drawer or a root cellar. Avoid freezer storage (temperature fluctuations cause condensation). Pro tip: Use a thermometer in your storage spot to monitor conditions—consistency is critical!
Wrapping up and next steps
Proper garden seed storage is your secret weapon for vibrant blooms year after year! By controlling humidity, temperature, and light, you’ll keep seeds viable and ready to grow—no wasted effort or money. Start small this season, experiment with methods, and soon you’ll be a seed-saving pro. 🌱
Ready to take the next step? Test your stored seeds in a small batch next spring—you’ll be amazed at how well they perform! For extra confidence, label containers with seed types and storage dates. Happy gardening!