
Planting
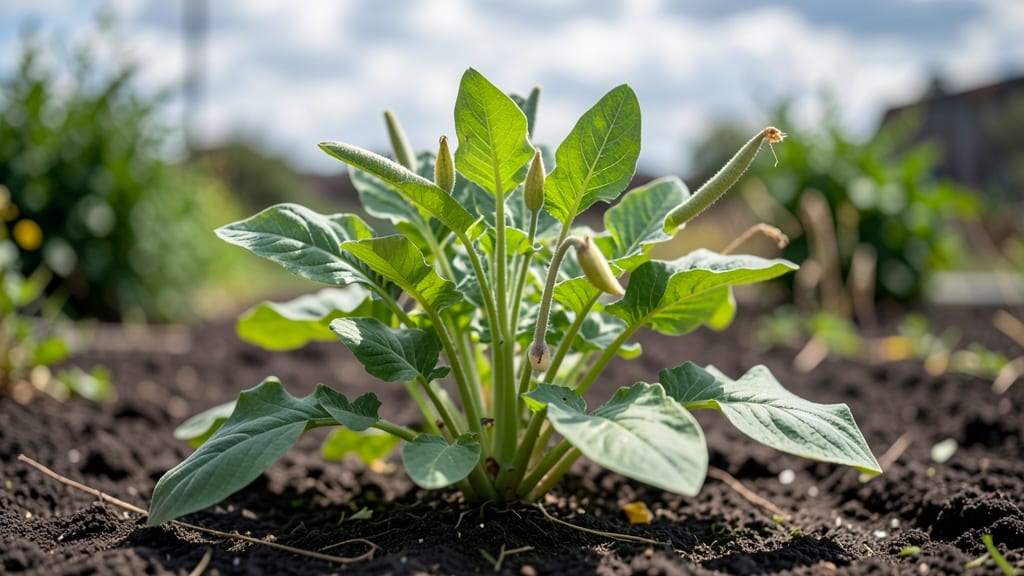
Harvesting radish seed pods turns last year's scraps into next season's harvest. 🌱 I used to toss those dried pods after the radishes were gone—until I discovered how easy it is to save seeds for fresh, homegrown plants.
The process is simpler than you'd think, and the payoff is worth every minute. You'll need just three things: mature seed pods, a paper bag, and a dry spot. Once you collect the pods, drying them properly ensures the seeds stay viable for years.
The key is patience—seeds need time to fully mature before storage, and a little extra care keeps them ready for planting. By the end of this, you'll have a stash of seeds that produce vibrant, crisp radishes just like the ones you grew this year.
The first batch of seedlings will be ready in as little as 3 weeks, and you'll never have to buy radish seeds again. Works for any radish variety, whether you're growing in a garden bed or containers. Here's how to do it right the first time!
📚 In This Guide
- What you need
- Instructions
- Tips and common mistakes
- Wrapping up and next steps
What you need
- ● Mature radish plants: Choose healthy, disease-free plants with fully developed seed pods (typically after flowering). Aim for at least 3-5 plants to ensure a good seed yield.
- ● Pruning shears or sharp scissors: For cleanly harvesting seed pods without damaging the plant.
- ● Paper bags (brown kraft or breathable): 5-10 bags, one per pod or small cluster, to allow airflow during drying.
- ● Drying rack or mesh screen: A flat, elevated surface (like a wooden rack or window screen) to promote even air circulation.
- ● Labeling tags & permanent marker: To label pods by variety and harvest date (e.g., "Cherry Belle – 2024").
- ● Air-tight storage containers: 2-3 containers (glass jars with lids or resealable plastic bags) for long-term seed storage.
- ○ Desiccant packets (optional but helpful): To absorb moisture and extend seed viability.
- ● Seed drying tray with mesh: Speeds up drying and reduces mold risk.
- ● Humidity monitor: Ideal drying conditions are 30-40% humidity and 60-70°F.
- ● Fine-mesh sieve: For separating seeds from dried pod debris after harvest.
- ● Notebook or seed-saving journal: To track varieties, germination rates, and storage notes.
- ● Sunlight or grow light: If drying indoors, ensure indirect light to prevent overheating.
How to harvest, dry, and store radish seed pods for next year
Here's how to save your best radish varieties from year to year—no fancy equipment needed.
🌱 Step 1: Identify and Harvest Mature Seed Pods
Let your radish plants bolt and flower naturally—they'll produce long, slender seed pods that start green and turn brown when ready. Harvest pods when they're dry and papery to the touch, usually 60-90 days after planting, depending on variety. Pinch pods gently—they should snap easily when mature, not feel crisp.
Use clean, sharp scissors to cut pods from the stem, leaving 1 inch of stem attached. This helps the seeds stay attached during drying. Harvest on a dry, sunny morning when dew has evaporated—this prevents mold from forming on freshly cut pods. I always work in small batches to avoid overcrowding my drying space.
☀️ Step 2: Dry the Seed Pods Properly
Spread pods in a single layer on a clean, dry screen or mesh tray in a warm, well-ventilated area with indirect sunlight. A 70-80°F spot works best—too hot and the pods may crack, too cool and they'll develop mold. I use a window sill with sheer curtain coverage to diffuse light without overheating.
Turn pods every 2-3 days to ensure even drying. They're ready when the pod walls crinkle slightly when touched and the seeds rattle inside. This usually takes 2-3 weeks, depending on humidity. If your home feels damp, place a small fan nearby to circulate air without blowing pods around.
✂️ Step 3: Extract and Clean the Seeds
Once pods are completely dry, gently crush them by hand over a clean sheet of paper or white towel. The seeds will spill out while the pod debris stays behind. Avoid using a mortar and pestle—it can damage the seed coats. I like to do this outside or over a large tray to contain any seed spills.
Sift the seeds through a fine mesh strainer to remove chaff and tiny debris. Spread seeds on the paper again and let them sit for 24 hours to air-dry completely. Store only the plump, uniformly shaped seeds—discard any that look shriveled or damaged. This ensures strong germination next season.
🪴 Step 4: Store Seeds for Optimal Viability
Transfer clean seeds to a small, airtight container like a glass jar or seed envelope. Label with the variety name and harvest date—radish seeds stay viable for 2-3 years when stored properly. Place containers in a cool, dark pantry (around 50-60°F) where they won't freeze or overheat.
For extra protection, add a small silica gel packet to absorb moisture if storing in humid climates. Check seeds annually—if they smell musty or look dull, they've lost viability. I test a few seeds each year by planting them in moist paper towels to confirm germination before committing to a full garden planting.
Tips & tricks for perfect radish seed pod preservation
Saving radish seed pods for next year doesn't require fancy tools—just these clever strategies that'll keep your seeds viable and ready for planting.
Harvest Timing: The 60-90 day window after planting is crucial for radish seed pods. I've learned to mark planting dates on my calendar so I don't miss the harvest window—some varieties bolt faster than others! Watch for pods to turn completely brown and develop that papery texture before harvesting. This dryness is your signal that seeds are ready to collect.
Drying Environment: That 70-80°F range for drying is non-negotiable—any hotter and pods crack, any cooler and you risk mold. I've had success using a simple mesh screen over my kitchen table with a small fan circulating air. The key is indirect sunlight—direct rays can scorch the pods. If your home feels humid, place a small bowl of rice near your drying pods to absorb excess moisture.
Seed Selection: When you're sifting seeds after extraction, pay special attention to size and shape. Store only the plump, uniformly shaped seeds—they'll have the highest germination rates. I've found that discarding any seeds with dark spots or irregular shapes saves me from planting weak varieties next season. The extra 24 hours of air-drying after sifting makes a noticeable difference in seed quality.
Storage Strategy: For long-term viability, I've found that glass jars with tight-sealing lids work better than paper envelopes. The cool, dark pantry at 50-60°F is ideal—just make sure it's not near appliances that generate heat. I always test a few seeds annually by planting them in moist paper towels to confirm they're still viable before committing to a full garden planting.
Pro Tips for Radish Plant Seed Pods
- Saving radish seed pods for next year doesn't require fancy tools—just these clever strategies that'll keep your seeds viable and ready for planting.
- Harvest Timing: The 60-90 day window after planting is crucial for radish seed pods.
- Drying Environment: That 70-80°F range for drying is non-negotiable—any hotter and pods crack, any cooler and you risk mold.
Frequently asked questions
Got questions about saving radish seed pods?
You’re not alone! Here are answers to the most common queries to help you master the process—from harvest to storage—so you can grow radishes for years to come.
How do I know when radish seed pods are ready to harvest?
Radish seed pods mature after the radish roots are harvested! Look for pods that turn from green to brown and dry out slightly (but don’t shatter). The best time is late summer or early fall, when pods feel papery and seeds rattle inside. Harvest on a dry day to prevent mold—just twist or snip them off the stem!
Can I save seeds from store-bought radishes?
Probably not! Most commercial radishes are hybrid varieties (like ‘Cherry Belle’ or ‘French Breakfast’) and won’t produce true-to-type seeds. For seed-saving success, stick to heirloom or open-pollinated varieties labeled “seed-saving friendly.” Check seed packets or ask local nurseries for reliable options!
What’s the best way to dry radish seed pods?
Spread pods in a single layer on a mesh screen or paper towel in a warm, dry spot (60–70°F) with good airflow—avoid direct sunlight or humidity. Stir them gently every few days to prevent mold. Fully dried pods will rattle like maracas when shaken. Pro tip: A fan on low can speed up drying!
How long do radish seeds stay viable in storage?
Properly dried and stored seeds last 2–4 years in a cool, dark place (like a sealed jar in the fridge or freezer). Test viability yearly by planting a few seeds—if germination drops below 50%, it’s time to replenish your stash. Label pods with the variety and harvest date to stay organized!
Why are my radish seed pods cracking open before I can harvest them?
Pods crack when they’re overripe or too dry—or if humidity spikes during drying. Harvest pods as soon as they turn brown but are still firm. If cracking happens mid-season, try harvesting pods earlier (even if not fully brown) and dry them indoors. Bonus fix: Use a dehumidifier if your climate is damp!
Can I use radish seed pods for anything else besides seeds?
Once seeds are removed, pods can be composted or used as natural mulch in gardens. Some gardeners even brew a fermented radish pod tea (steep pods in water for 24 hours) as a mild fungicide for soil. Just avoid eating them—they’re tough and bitter!
Wrapping up and next steps
Growing and saving your own radish plant seed pods is a rewarding way to ensure next year’s garden thrives with the same vibrant blooms—and maybe even tastier harvests! 🌱 With the right timing, tools, and patience, you can turn this year’s leftover pods into fresh starts for future seasons.
Whether you’re a seasoned gardener or just beginning, every seed you save is a step toward self-sufficiency and joy in the dirt.
Ready to take the next step? Start small—try saving seeds from just a few radish plants this year, and soon you’ll be sharing your homegrown treasures (or swapping with fellow gardeners!). Happy planting! 🌟