
Lawn
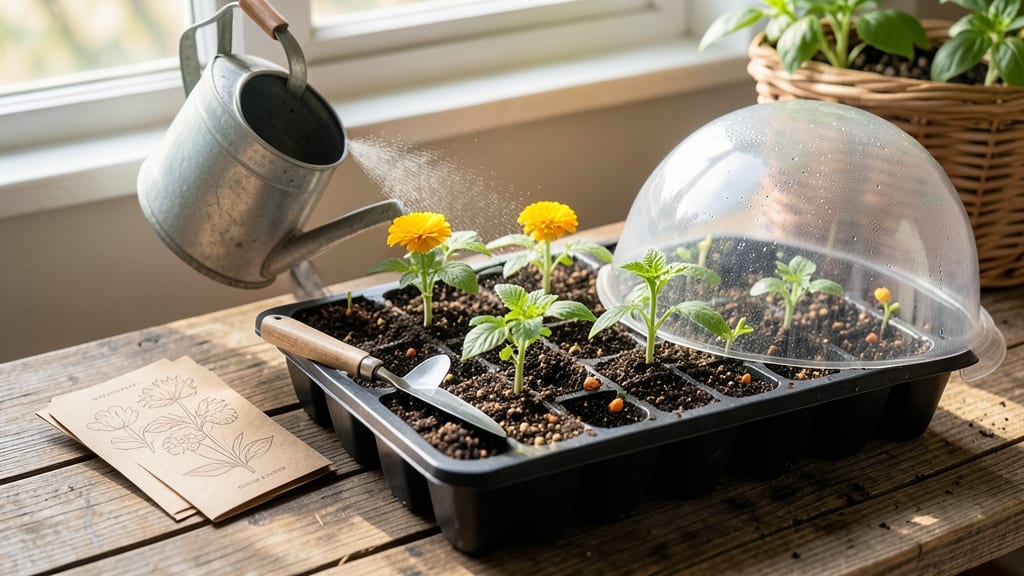
My organic seed starter soil is the secret weapon behind my 95% germination rate—lighter than potting mix, packed with the perfect balance of moisture and air. 🌱 The difference between a tray of sad, leggy seedlings and a forest of sturdy green sprouts often comes down to this one ingredient: a mix designed to cradle tiny roots while keeping them from drowning or suffocating.
Most potting soils are too dense for seeds, compacting roots and trapping moisture that causes damping-off. This starter blend stays fluffy and fast-draining, with coconut coir or peat moss holding just enough water while perlite or vermiculite creates air pockets.
The organic matter—usually compost or worm castings—feeds those first fragile roots without overwhelming them, and the pH is already balanced for most seeds. You’ll see the first true leaves in half the time compared to regular soil, and seedlings that don’t flop over when you transplant them.
The trick is keeping the surface moist (not soggy) and providing gentle warmth—just a heat mat or sunny windowsill makes all the difference. For outdoor sowing, use it in seedling trays or even directly in the garden for delicate starts like tomatoes or peppers.
The key is consistency: whether you’re starting in March or September, this mix gives seeds the head start they need to outpace weeds and pests.
📚 In This Guide
- What you need
- Instructions
- Tips and common mistakes
- Wrapping up and next steps
What you need
- ● Peat moss or coconut coir: 50% of the mix (2 parts) – retains moisture while staying lightweight.
- ● Vermiculite or perlite: 20% of the mix (1 part) – improves aeration and drainage.
- ● Compost or worm castings: 20% of the mix (1 part) – adds organic nutrients for seedling growth.
- ○ Sand (optional but helpful): 10% of the mix (½ part) – enhances drainage in heavier mixes.
- ● A large bucket or wheelbarrow for mixing.
- ● A hand trowel or garden fork for blending ingredients.
- ● A spray bottle (for moisture control).
- ● Seed trays or small pots (4–6 inches deep) for planting.
- ○ Optional: A pH testing kit (to ensure soil is slightly acidic, pH 6.0–7.0).
Step-by-Step guide to mixing organic seed starter soil
Here's how to create a fluffy, nutrient-rich blend that speeds up germination and gives seedlings a strong start.
🌱 Step 1: Combine Base Materials for Lightweight Texture
Start with 4 parts peat moss—this gives your mix that airy, moisture-holding quality that seeds need to break through easily. Add 3 parts perlite to create pockets for roots to spread into without compacting. I sift these together first to break up any clumps, because fine particles help seeds make contact with moisture evenly.
Next, mix in 2 parts coconut coir—this replaces traditional peat while holding water better and providing microbial food. The coir fibers will feel slightly rough compared to peat, but that texture actually helps young roots anchor. Spread everything on a clean tarp or large tray to keep it contained while you work.
🌿 Step 2: Add Nutrients for Strong Seedling Growth
Stir in 1 part compost (well-aged, no chunks) to introduce beneficial microbes and early nutrients. I like to use worm castings here—they're gentle on tender seedlings and packed with soluble nutrients. Add ½ cup of kelp meal for trace minerals that boost cell division during germination.
For extra insurance, sprinkle 1 tablespoon of alfalfa meal over the mix. This adds nitrogen in a form that won't burn young roots, and the fine powder distributes evenly. Combine everything with a garden fork or your hands until you see uniform color—no dry spots or powdery residue should remain.
⏰ Step 3: Test and Adjust Moisture Levels
Squeeze a handful of the mix—it should hold together when pressed but not drip water. If it feels dry, mist with lukewarm water until evenly damp (not soggy). The goal is a texture like a wrung-out sponge: moist enough to support germination but with enough air for roots to breathe.
Here's the thing—if your mix feels too dense after adding water, mix in an extra ½ cup perlite to lighten it. You'll know it's right when a seedling pushed through would find both moisture and air at its roots. Store any unused mix in a sealed container for up to 2 weeks.
💧 Step 4: Use Immediately for Fast Germination
Fill your seed trays or pots with the mix, pressing down gently to eliminate air pockets. The lightweight nature means you won't need to compact it heavily—just enough to create a stable surface for seeds. I like to use a 2-inch deep tray for most seeds, as deeper planting can delay germination.
Water gently from the bottom by placing the tray in ¼ inch of water for 10 minutes. This prevents surface compaction while ensuring even moisture. Once the mix looks uniformly damp at the surface, you're ready to sow. The secret to fast germination is keeping this mix consistently moist but never waterlogged—check daily and water when the top ¼ inch feels dry.
Tips & tricks for perfect organic seed starter soil
Here's what I learned the hard way about creating the ideal mix for speedy seed growth.
Texture is Everything: The 4:3:2 ratio of peat moss, perlite, and coconut coir is critical for that perfect balance. I've found that pre-sifting these ingredients eliminates clumps that can create air pockets where seeds might rot. For an even lighter texture, pulse the sifted mix in a food processor for just 5 seconds—this breaks up any remaining clumps without compacting the structure.
Nutrient Layering: When adding the 1 part compost and ½ cup kelp meal in Step 2, I recommend mixing them separately first. The compost introduces beneficial microbes while the kelp meal provides essential trace minerals. Sprinkling the 1 tablespoon alfalfa meal last ensures it distributes evenly without clumping—think of it like dusting powdered sugar on a cake.
Moisture Mastery: That 10-minute bottom-watering technique in Step 4 works wonders, but here's the secret: use room-temperature water. Cold water can shock the delicate mix and cause uneven moisture distribution. After watering, let the tray sit for 5 minutes before sowing—this allows excess water to drain while maintaining that perfect wrung-out sponge consistency.
Pro Tips for Organic Seed Starter Soil
- Here's what I learned the hard way about creating the ideal mix for speedy seed growth.
- Texture is Everything: The 4:3:2 ratio of peat moss, perlite, and coconut coir is critical for that perfect balance.
- Nutrient Layering: When adding the 1 part compost and ½ cup kelp meal in Step 2, I recommend mixing them separately first.
Frequently asked questions
Got questions about organic seed starter soil? You’re not alone! Here are answers to the most common queries to help you get your seeds off to a flying start.
What’s the best ratio of organic seed starter soil to other materials?
A lightweight mix typically uses 50% organic seed starter soil (for moisture retention and nutrients) and 50% perlite or vermiculite (for aeration). Adjust based on your seeds—delicate flowers may need more soil, while veggies like tomatoes thrive with a slightly grittier blend.
How long can I store unused organic seed starter soil?
Store it in a cool, dry place (like a sealed container) for up to 6 months. Over time, it may lose moisture retention, so add a bit of compost or coconut coir before reuse. Avoid humidity to prevent mold.
Is homemade starter soil cheaper than buying it?
Yes! Mix 50% peat moss or coconut coir, 30% compost, and 20% perlite for a budget-friendly alternative. Pre-mixed organic starter soil costs ~$10–$15 per bag, while DIY costs pennies per batch. Just ensure sterility by baking ingredients at 200°F for 30 minutes.
What should I do if my seeds aren’t germinating in starter soil?
Check these first:
- Moisture: Keep soil damp (not soggy) with a spray bottle.
- Temperature: Most seeds need 65–75°F. Use a heat mat if needed.
- Depth: Tiny seeds (like lettuce) need ¼-inch coverage; larger ones (beans) can go 1-inch deep.
- Light: Place trays near a sunny window or under grow lights.
Can I reuse organic seed starter soil for multiple plantings?
With caution! After the first use, sift out debris and replenish nutrients by adding 10% fresh compost or worm castings. Sterilize again if reusing for the same seed family (e.g., tomatoes) to prevent disease. For best results, compost old soil and start fresh.
Wrapping up and next steps
Creating your own organic seed starter soil is a game-changer for gardeners—it’s lightweight, nutrient-rich, and designed to give your seeds the perfect start! 🌱 With just a few simple ingredients, you’ll boost germination rates and nurture healthy seedlings in no time.
Whether you’re a seasoned gardener or just starting out, this DIY mix saves money and ensures your plants thrive from day one.
Ready to take the next step? Grab your supplies, mix up a batch, and watch your garden grow with confidence! Happy planting! 🌿