
Lawn
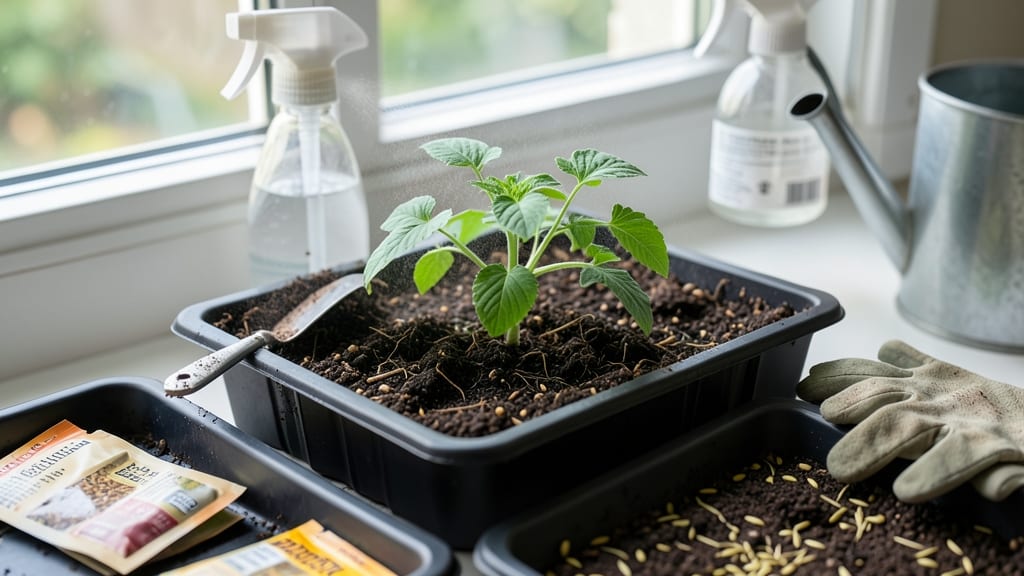
Your organic seed starter mix could be the reason your seedlings pop up in 3-5 days instead of weeks. 🌱 I used to struggle with slow germination—until I switched to a lightweight, nutrient-packed mix designed just for seeds.
The difference is night and day compared to regular potting soil, which can be too dense and compacted for tiny roots.
This specialized blend holds moisture without drowning roots while providing the perfect balance of nutrients to fuel early growth. Unlike generic mixes, it’s sterilized (so no hidden pests or diseases) and often includes mycorrhizal fungi to boost root development.
For beginners, it’s the secret weapon that turns finicky seeds like parsley or snapdragons into reliable performers.
You’ll see seedlings emerge stronger, with better root systems that translate to healthier transplants. The mix breaks down quickly once roots outgrow it, so you won’t need to repot as often. Perfect for tomatoes, peppers, herbs, and even flowers that need a head start—like petunias or marigolds.
Want to DIY? A simple combo of 50% peat moss or coconut coir, 30% perlite or vermiculite, and 20% compost mimics the commercial version. Just avoid garden soil—it’s too heavy and can introduce weeds. For fastest results, though, pre-made organic starter mixes cut prep time to minutes.
📚 In This Guide
- What you need
- Instructions
- Tips and common mistakes
- Wrapping up and next steps
What you need
- ● Peat moss or coco coir (organic): 4 parts (8 cups for a 1-gallon mix)
- ● Perlite or vermiculite: 1 part (2 cups) – for aeration and moisture control
- ● Compost or well-aged compost: 1 part (2 cups) – adds nutrients without overpowering
- ○ Worm castings (optional but recommended): ½ part (1 cup) – boosts microbial activity
- ● Seed starter trays or small pots: With drainage holes (4-6" deep works best)
- ● Seeds of choice: Organic, untreated seeds (follow packet instructions for depth)
- ● Mixing container: A clean bucket, wheelbarrow, or large bowl
- ● Garden trowel or small shovel: For blending components
- ● Spray bottle: To mist the mix (gentle hydration is key!)
- ● Plastic wrap or humidity dome: To retain moisture while seeds germinate
- ○ Heat mat (optional): For speeding up germination in cooler climates
- ● Gloves: To keep things clean and hands protected
How to use organic seed starter mix for fast germination
This lightweight loam works magic—here’s how to harness its speed and efficiency for your seedlings.
🌱 Step 1: Sterilize Your Mix to Prevent Disease
First, spread the organic seed starter mix in a shallow tray and bake it at 200°F for 30 minutes to kill pathogens. I use a clean baking sheet lined with parchment paper—this prevents cross-contamination and ensures your seeds start in a clean environment. Let it cool completely before handling; the mix should feel warm to the touch but not hot.
If you’re short on time, microwave the mix in 1-minute bursts (stirring between each) until it reaches 160°F. The goal is to eliminate damping-off risks while preserving the mix’s airy structure. Once cooled, it’s ready for sowing—just don’t skip this step. I’ve lost entire seed trays to fungal infections before sterilizing, and it’s a heartbreak you can avoid.
💧 Step 2: Moisten the Mix to the Right Consistency
Add warm water to the sterilized mix gradually, stirring gently until it reaches the texture of a damp sponge—not soggy, not dry. You’ll know it’s perfect when a handful compresses slightly but holds its shape. Overwatering now will suffocate seeds, while too little moisture delays germination. I like to use a spray bottle for precision, misting until the surface looks uniformly dark but not glistening.
Let the mix sit for 10 minutes to evenly distribute moisture. Tap the tray lightly to settle any air pockets, then fluff the surface with your fingers. This ensures seeds make direct contact with damp soil, which is critical for fast germination. If the mix feels clumpy, break it apart with a fork—seeds need loose, oxygen-rich soil to sprout efficiently.
☀️ Step 3: Sow Seeds at the Correct Depth and Space
Press seeds into the mix at a depth of twice their diameter—no deeper, or they’ll struggle to reach the light. I use a toothpick to create small holes, then drop seeds in one by one. Cover lightly with a fine sprinkle of additional mix, just enough to obscure the seeds. This prevents them from drying out while still allowing light penetration.
Space seeds ¼ inch apart in rows, leaving 1 inch between rows for easy thinning later. Label your trays immediately with the seed type and date—after a week, identical seedlings can look confusing. Once sowed, mist the surface again with water until the top layer feels uniformly damp. Place the tray in a warm, dark spot (70-75°F) to encourage germination. You’ll see sprouts in 3-7 days, depending on the seed type.
⏰ Step 4: Provide Optimal Light and Airflow After Germination
The moment you spot first true leaves (not the initial seed leaves), move the tray to bright, indirect light for 12-14 hours daily. I use a grow light on a timer to avoid leggy seedlings. Keep the mix moist but never soggy—water from the bottom by placing the tray in a shallow dish of water for 10 minutes, then drain excess. This prevents fungal issues while ensuring roots get hydration.
Once seedlings have 2-3 sets of true leaves, thin them to 1 plant per cell if using trays. Use clean scissors to snip at soil level, not pull, to avoid disturbing roots. This might seem harsh, but crowded seedlings compete for nutrients and light, slowing growth. After thinning, fertilize lightly with a diluted organic liquid feed to support their next growth phase.
Tips & tricks for perfect organic seed starter mix
Here's what nobody tells you—these small tweaks will turn your seed starting into a foolproof success.
Sterilization Safety: When using the microwave method in Step 1, stir the mix between each 1-minute burst to ensure even heating to 160°F. I've seen uneven heating create cold spots where pathogens can survive—always test the temperature with a food thermometer in the thickest part of the mix. This 30-minute bake at 200°F is your insurance policy against damping-off, but the microwave shortcut requires extra vigilance.
Moisture Mastery: In Step 2, the 10-minute resting period after adding water is where the magic happens. This allows the mix to absorb moisture evenly without creating waterlogged pockets. I've learned the hard way that rushing this step leads to uneven germination—patience here pays off with consistent sprouting. Use a spray bottle for precision, especially with delicate seeds like lettuce or herbs.
Lighting Strategy: For Step 4, that 12-14 hours of bright, indirect light is non-negotiable for preventing leggy seedlings. I've found that positioning trays 6-12 inches below grow lights creates the perfect balance—closer than 6 inches can scorch tender leaves, while farther than 12 inches leads to weak stems. Rotate trays daily to ensure even growth on all sides.
Thinning Technique: When you reach the 2-3 sets of true leaves stage, use clean scissors to snip at soil level rather than pulling seedlings. This preserves root integrity and prevents disturbing neighboring plants. I've seen gardeners accidentally uproot entire seedlings while trying to thin, so take your time and make clean cuts. The resulting stronger plants will reward your patience with vigorous growth.
Pro Tips for Organic Seed Starter Mix
- Here's what nobody tells you—these small tweaks will turn your seed starting into a foolproof success.
- Sterilization Safety: When using the microwave method in Step 1, stir the mix between each 1-minute burst to ensure e...
- Moisture Mastery: In Step 2, the 10-minute resting period after adding water is where the magic happens. This allows ...
Frequently asked questions
Got questions about using an organic seed starter mix? You're not alone!
Here are some of the most common concerns—and their easy answers—to help you get growing with confidence.
What’s the best time to use seed starter mix?
Use your organic seed starter mix indoors 4–6 weeks before your last frost date (check your USDA zone). For outdoor seeding, apply it when soil temps hit 60–70°F (spring/fall) and moisture is consistent. Avoid extreme heat—seeds may dry out before germinating!
How often should I water seed starter mix?
Keep the mix consistently moist (like a damp sponge) but never soggy. Water gently from the bottom (use a tray) to avoid disturbing seeds. Mist lightly daily if indoors, or every 1–2 days outdoors, adjusting for humidity. Overwatering = mold; underwatering = failed sprouts!
Can I make my own seed starter mix at home?
Blend 50% peat moss or coco coir, 30% perlite/vermiculite, and 20% compost for a lightweight, nutrient-rich mix. For extra oomph, add a handful of worm castings or a slow-release organic fertilizer. Sterilize by baking the mix at 200°F for 30 minutes to kill pathogens.
Why aren’t my seeds germinating in the starter mix?
Check these fixes:
- Temperature: Too cold (<50°F)? Use a heat mat (70–85°F is ideal for most seeds).
- Moisture: Dry mix = dormant seeds. Bottom-water or cover with plastic wrap (remove once sprouts appear).
- Depth: Plant too deep? Tiny seeds (like lettuce) need ¼-inch coverage; larger seeds (beans) can go 1-inch deep.
- Light: No light? Move trays to a sunny window or under grow lights (12–16 hours/day).
Is organic seed starter mix better than regular potting soil?
Yes—for seeds! Organic starter mixes are lighter (better drainage), sterile (fewer pathogens), and nutrient-dense (promotes fast germination). Regular potting soil can compact, retain too much moisture, or lack the fine texture seeds need. Think of starter mix as a launchpad for your seedlings!
Wrapping up and next steps
Creating your own organic seed starter mix is a rewarding way to kickstart your gardening journey with healthy, thriving plants! 🌱 With just a few simple ingredients—like coconut coir, vermiculite, and compost—you’ll have a lightweight, nutrient-rich blend that promotes fast germination and strong root development.
Whether you're a seasoned gardener or just beginning, this mix gives you control over what goes into your soil, ensuring the best start for your seeds.
Ready to take the next step? Grab your supplies, follow the steps, and watch your seeds sprout into vibrant seedlings! Happy planting! 🌿