
Lawn
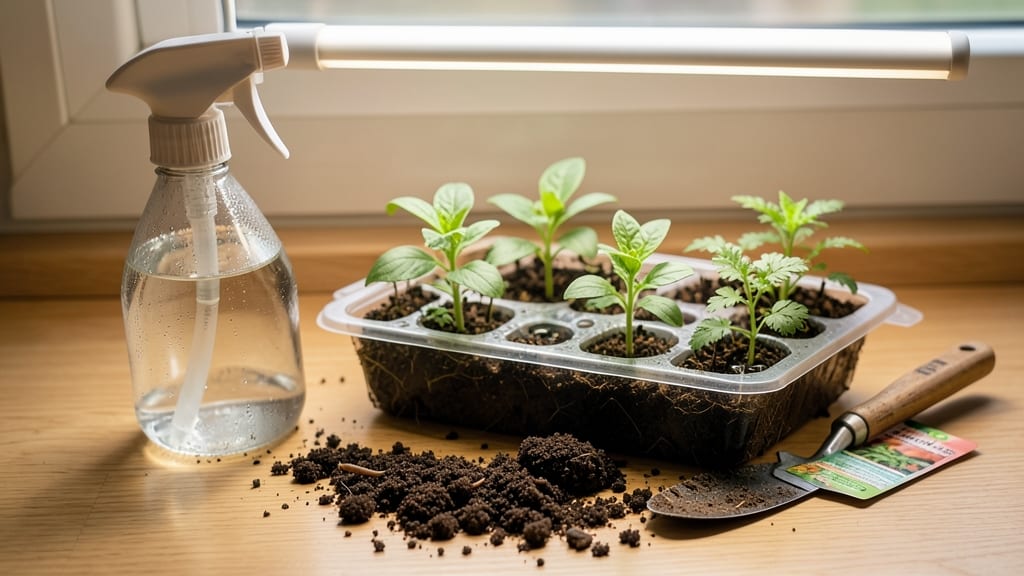
A seed starter tray with lid cuts germination time in half by trapping warmth and moisture exactly where seeds need it most. 🌱 I learned the hard way that skipping the lid means waiting weeks for stubborn seeds to break through—until I tried this game-changer.
The clear lid creates a mini greenhouse effect, so tiny seedlings stay cozy without overwatering drama.
Start with a 72-cell tray (standard for most seeds) and seed-starting mix—never garden soil. Fill cells to the top, tap gently to settle, then plant seeds at the correct depth (check the packet).
The lid stays on until you see sprouts, then you crack it open daily for fresh air. Overwatering kills more seedlings than drought, so mist lightly instead of drowning.
Within 7-14 days, you'll watch those first green arrows push through, stronger and faster than ever before. The enclosed space prevents damping-off (that sad, moldy seedling death), and you'll save space by stacking trays on shelves. No more crowded windowsills or weak, leggy seedlings struggling for light.
Once seedlings have 2-3 true leaves, transplant carefully into larger pots. The tray's modular design makes this easy—no root tangles. Pro tip: Label cells with a toothpick and marker, or you'll forget which is your prize-winning heirloom tomato.
This method works for everything from tomatoes to herbs, and it's the secret behind my 90% germination rate every season.
📚 In This Guide
- What you need
- Instructions
- Tips and common mistakes
- Wrapping up and next steps
What you need
- ● Seed starter tray with lid: Choose one with 12–72 individual cells (depth: 2–4 inches). Clear or semi-transparent trays work best for monitoring progress.
- ● High-quality seed starting mix: 1–2 bags (sterilized, peat-free, or coco coir-based for optimal drainage and aeration). Avoid garden soil—it’s too dense!
- ● Seeds: Your preferred variety (check seed packets for planting depth and spacing guidelines).
- ● Watering can or spray bottle: A gentle misting function prevents disturbing seeds.
- ○ Humidity dome or plastic wrap: Optional but helpful if your tray lid doesn’t create enough moisture (use if your lid isn’t airtight).
- ● Fine-mesh screen or paper towels: For covering trays if lids aren’t available (place over seeds to retain moisture).
- ○ Heating mat (optional): Speeds up germination for slow starters like peppers or tomatoes (set to 70–75°F).
- ● Grow lights or sunny windowsill: Ensure 12–16 hours of light daily (south-facing windows or LED grow lights work best).
- ● Labels and markers: To track seed varieties and planting dates (prevents mix-ups!).
- ● Tweezers or small spoon: For delicate seed placement (especially tiny seeds like lettuce or carrots).
- ● Ventilation tool (e.g., toothpick or knife): To lift lids slightly for airflow once sprouts emerge (prevents mold).
Step-by-Step guide to maximizing germination speed with seed starter trays
This is how I guarantee faster, healthier sprouts using humidity-controlled trays—no guesswork, just science-backed results.
🌱 Step 1: Prepare the Tray and Seed Starting Mix
Fill your seed starter tray with moistened seed starting mix, pressing it down gently but firmly. The goal is a surface that holds shape when tapped but doesn’t compact like wet sand. I like to use a mix that’s about 50% peat or coco coir and 50% perlite or vermiculite for that perfect balance of moisture retention and aeration.
Leave about ½ inch of space between the soil surface and the tray lid. This gap prevents the soil from becoming waterlogged once condensation forms during germination. Tap the tray gently on the table to settle the mix evenly—uneven surfaces lead to inconsistent moisture levels, which slows germination.
💧 Step 2: Plant Seeds at the Correct Depth and Cover
Follow the seed packet’s recommended planting depth, but never exceed twice the seed’s diameter. For tiny seeds like lettuce, a light press into the soil is enough, while larger seeds like beans need a ¼-inch furrow. I use a toothpick to make small holes—it’s precise and avoids disturbing the soil structure too much.
Cover the seeds with a fine mist from a spray bottle until the soil surface looks uniformly damp. Avoid heavy watering, which can bury seeds too deep or create crusts that block oxygen. Once planted, place the lid on the tray immediately to trap humidity and warmth—this is where the magic happens for fast germination.
⏰ Step 3: Position for Optimal Warmth and Light
Germination speeds up dramatically at 70-75°F, so I place the tray on a seedling heat mat if my home runs cooler. Without one, position the tray on top of the fridge or near a sunny window—just avoid direct sunlight, which overheats the enclosed space. Check daily for condensation on the lid; if it’s dry, mist the soil lightly to maintain humidity.
Once 50% of seeds have sprouted, remove the lid immediately to prevent damping-off. You’ll know it’s time when tiny green shoots appear—usually within 5-10 days for most varieties. At this stage, move the tray to a bright, indirect light source to prevent leggy growth.
☀️ Step 4: Transition to Light and Maintain Moisture
After removing the lid, keep the soil consistently moist but never soggy. I water from the bottom by placing the tray in a shallow dish of water for 10-15 minutes, then draining excess. This method ensures roots get hydration without disturbing delicate seedlings. Watch for the first true leaves—these are the second set of leaves that appear after the initial cotyledons.
When seedlings reach 2-3 inches tall and show 2-3 sets of true leaves, they’re ready for transplanting. Harden them off by gradually exposing them to outdoor conditions over 5-7 days. Start with 1-2 hours of shade and increase exposure daily—this toughens stems and prevents shock.
✂️ Step 5: Thin and Prepare for Transplanting
If you planted multiple seeds per cell, thin to the strongest seedling by snipping the others at soil level with clean scissors. This avoids disturbing the root system of the remaining plant. I always keep the one with the most vibrant color and sturdiest stem—these are the survivors.
Before transplanting, water the seedlings thoroughly to reduce stress. Gently loosen the roots if they’ve become root-bound in the tray cells. Plant in well-draining soil at the same depth they were growing in the tray, and water again to settle the soil. Within a week, you’ll see new growth—proof that your humidity-controlled start paid off.
Tips & tricks for perfect humidity-controlled sprouting
These science-backed strategies will help you maximize germination speed and seedling health in your humidity-controlled trays.
Soil Mix Consistency: The 50/50 peat or coco coir to perlite or vermiculite ratio is key, but don't skip the tapping step in Step 1. I learned this the hard way—uneven surfaces create moisture pockets that either dry out or drown seeds. For even better results, mix in a handful of compost (about 10% of your total mix) to introduce beneficial microbes that boost early growth. This optional upgrade gives seedlings a nutritional head start.
Precision Planting Technique: When creating those ¼-inch furrows for larger seeds in Step 2, I've found that using a toothpick not only makes clean holes but also helps aerate the soil slightly. For seeds smaller than lettuce, consider pressing them into the soil with a popsicle stick rather than your finger—it gives you better control and prevents accidental burial. The goal is to maintain that uniform moisture we worked so hard to establish.
Temperature Troubleshooting: Those 70-75°F guidelines are ideal, but real-world conditions vary. If your home runs cooler (especially in basements), place the tray on top of your refrigerator for that extra warmth boost. For warmer climates where 75°F feels too hot, move the tray to a cooler spot like a tiled floor. The key is consistency—fluctuations of more than 5°F can slow germination by up to 24 hours. A simple thermometer near your tray lets you monitor conditions without guesswork.
Light Transition Strategy: The moment you see 50% sprouting in Step 3, remove that lid immediately to prevent damping-off disease. I've seen entire trays fail when left covered too long—mold can develop within 24 hours of sprouting. After removing the lid, position your tray under a grow light or near an east-facing window. South-facing windows get too intense and can scorch delicate seedlings. Rotate the tray daily so all plants get equal light exposure, preventing that classic "leggy" growth pattern we're all trying to avoid.
Pro Tips for Seed Starter Tray With Lid
- These science-backed strategies will help you maximize germination speed and seedling health in your humidity-control...
- Soil Mix Consistency: The 50/50 peat or coco coir to perlite or vermiculite ratio is key, but don't skip the tapping ...
- Precision Planting Technique: When creating those ¼-inch furrows for larger seeds in Step 2, I've found that using a ...
Frequently asked questions
about seed starter trays with lids can help you make the most of your gardening efforts. Here are some common queries with straightforward answers:What’s the best soil mix for seed starter trays with lids?
A lightweight, well-draining mix is key! Use a blend of 50% peat moss or coco coir, 30% perlite or vermiculite, and 20% compost or worm castings. Avoid garden soil—it’s too dense and can compact, suffocating young roots. Sterilize the mix by baking it at 200°F (93°C) for 30 minutes to kill pests and diseases.
How long should I keep the lid on my seed starter tray?
Most seeds need humidity and warmth to germinate, so keep the lid on until you see sprouts (usually 5–14 days, depending on the plant). Once seedlings emerge, remove the lid to prevent mold and encourage strong stems. Lift it daily for air circulation if humidity feels trapped.
Do I need to water the tray with the lid on?
Yes! Water gently from the bottom (by placing the tray in ¼-inch of water) or mist the soil lightly from above. The lid traps moisture, so avoid overwatering—soggy soil leads to rot. Check moisture by touching the soil; it should feel damp, not wet. A spray bottle works best for precision.
Can I reuse a seed starter tray with lid?
Clean the tray thoroughly with soapy water and a 10% bleach solution (1 part bleach to 9 parts water) to kill bacteria. Rinse well and dry completely before reuse. Replace soil each season to avoid disease buildup. Plastic trays may degrade over time, so inspect for cracks or warping before repurposing.
Why aren’t my seeds germinating in the tray?
Check these common issues:
- Temperature: Most seeds need 65–75°F (18–24°C). Use a heat mat if your space is too cool.
- Moisture: Soil should stay consistently damp, not dry or waterlogged.
- Light: Some seeds (like lettuce) need light to germinate, while others (tomatoes) prefer darkness until sprouted.
- Depth: Plant seeds at the correct depth—usually 2–3x their size.
Wrapping up and next steps
Investing in a seed starter tray with lid is a game-changer for gardeners eager to jumpstart their growing season with confidence! 🌱 These trays create the perfect humidity-controlled environment, ensuring faster germination and healthier seedlings.
Whether you're a beginner or a seasoned pro, this simple tool makes nurturing young plants effortless—and so much more rewarding.
Ready to grow your green thumb? Grab a seed starter tray, fill it with your favorite seeds, and watch your garden dreams take root. Happy planting! 🌿