
Lawn
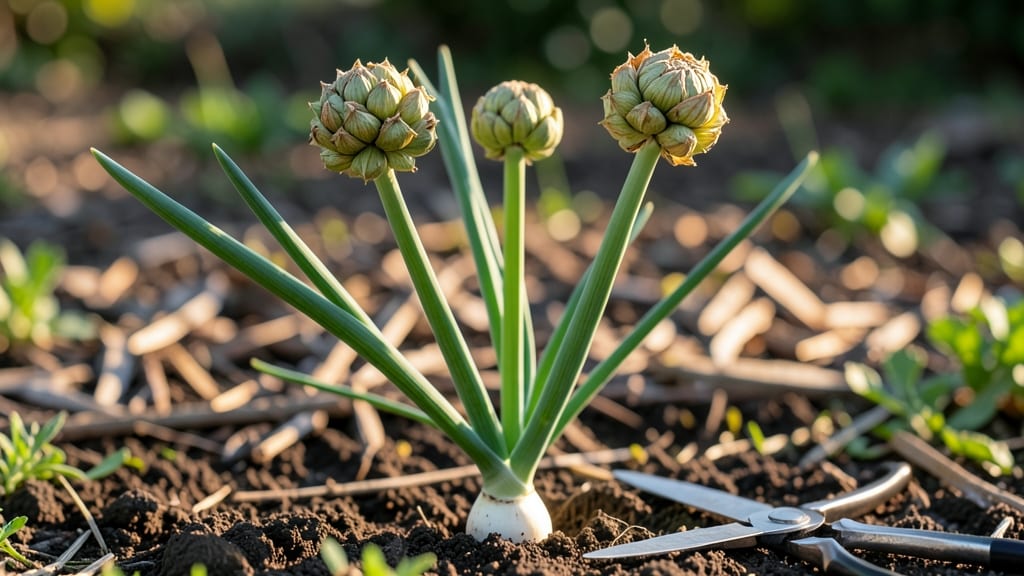
Harvesting those papery green onion seed pods in late summer means a fresh crop next spring—no store-bought seeds needed. ✨ I’ve saved seeds from my garden for years, and these little pods are one of the easiest to turn into next year’s harvest.
The key? Knowing when they’re ready, how to store them properly, and a little cold trick to break dormancy.
First, let’s talk about those pods—you’ll spot them when the green onion tops turn brown and papery, like tiny onion-shaped balloons. Once harvested, dry them completely in a shady spot for a week before storing in an envelope.
The cold stratification step (just 60 days in the fridge) mimics winter and tricks the seeds into thinking spring has arrived.
By planting them in early spring, you’ll see those familiar green shoots within two weeks. The soil just needs to be loose and well-draining—no fancy amendments required. This method cuts seed costs to near zero while giving you onions that taste like homegrown perfection.
Even beginners can nail this—no green thumb required. The only real trick is patience, and the payoff is worth it. Ready to turn this year’s harvest into next year’s garden? Let’s get those seeds sprouting!
📚 In This Guide
- What you need
- Instructions
- Tips and common mistakes
- Wrapping up and next steps
What you need
- ● Green onion seed pods (scallions) – 5–10 mature, disease-free pods (ensure they’re fully ripe for best germination).
- ● Organic potting soil – 2–3 gallons (lightweight, well-draining mix with compost).
- ● Seed-starting trays or small pots – 4–6 (4-inch diameter minimum) with drainage holes.
- ● Plastic wrap or a humidity dome – To retain moisture during germination.
- ● Spray bottle – For gentle watering to avoid disturbing seeds.
- ● Grow lights or sunny windowsill – 6+ hours of indirect light daily (or a seedling heat mat for warmth).
- ● Cold stratification setup – A refrigerator with a crisper drawer (or a cold frame outdoors in winter).
- ● Plant labels & marker – To track varieties and planting dates.
- ● Seedling fertilizer – Diluted fish emulsion or compost tea (1:10 ratio) for early growth.
- ● Perlite or vermiculite – To improve soil aeration (mix 10% into potting soil).
- ● Heating pad or seedling mat – Keeps soil at 65–75°F (18–24°C) for faster germination.
- ● Transplanting tool – A small trowel or spoon for careful seedling transfer.
- ● Journal or app – To log germination progress and cold stratification timelines.
How to grow green onions from seed pods in 60 days
Here's the straightforward method I use to turn homegrown green onion seed pods into fresh sprouts—no fancy tools required.
🌱 Step 1: Harvest and Dry the Seed Pods
Wait until the green onion seed pods turn a deep tan and begin to split open naturally. This usually happens in late summer or early fall, depending on your climate. Gently twist the pods from the stems and lay them out on a paper towel in a single layer. Place them in a warm, dry spot with good air circulation—like a sunny windowsill or a mesh bag hung in a breezy area.
Leave the pods to dry for 7-10 days until they rattle when shaken. The seeds inside need to be completely dry to prevent mold during storage. If humidity is high, spread them out on a fresh paper towel every few days to speed up drying. Once dry, store the pods in a paper envelope or small cloth bag in a cool, dark place until you're ready to plant.
💧 Step 2: Cold-Stratify the Seeds for Faster Germination
Green onion seeds benefit from a cold stratification process to break dormancy and ensure strong germination. Fill a small container with damp paper towels—not soaking wet, just lightly moistened. Place the dried seed pods between the towels, making sure they’re evenly spaced. Cover the container with plastic wrap and seal it tightly to trap moisture.
Put the container in your refrigerator for 4-6 weeks. Check the seeds every 7-10 days to ensure the towels stay damp but not soggy. After the stratification period, remove the container from the fridge and let it sit at room temperature for 24 hours before planting. This mimics the natural winter chilling period green onions experience outdoors, which helps them germinate more reliably.
☀️ Step 3: Plant the Stratified Seeds Indoors
Fill small pots or seed trays with well-draining potting mix—green onions don’t like soggy roots. Plant the seeds ¼ inch deep, spacing them about 1 inch apart in rows. Water gently until the soil is moist but not waterlogged. Place the pots in a sunny windowsill or under a grow light to provide 12-14 hours of light daily. Green onions grow best at 65-75°F, so avoid drafty spots or direct heat sources.
Keep the soil consistently moist, but don’t overwater—soggy soil can cause the seeds to rot before they sprout. You should see tiny green shoots within 7-14 days. Once the seedlings reach 2-3 inches tall, thin them to 1 inch apart to give each plant enough room to grow. This ensures stronger, healthier green onions instead of crowded, weak stems.
🌿 Step 4: Transplant and Maintain for Harvest
After the seedlings develop 3-4 true leaves (the second set of leaves after the initial seed leaves), they’re ready to transplant. Choose a location with full sun (at least 6 hours daily) and well-draining soil. If planting in the ground, space the seedlings 2-3 inches apart in rows 12 inches apart. For containers, use pots at least 6 inches deep with drainage holes.
Water the seedlings deeply after transplanting to help them establish roots. Keep the soil consistently moist but not waterlogged—green onions prefer even moisture. Fertilize lightly with a balanced, water-soluble fertilizer every 4-6 weeks to encourage steady growth. You’ll notice the green onions start to form bulbs and long green shoots in about 4-6 weeks after transplanting. Harvest the green shoots as needed by cutting them 1 inch above the bulb, and they’ll regrow for multiple harvests.
Tips & tricks for perfect green onion sprouts
These little-known tricks will help you get the most out of your green onion seed pods and avoid common growing pitfalls.
Drying Time Matters: In Step 1, when drying your seed pods for 7-10 days, don't rush this process. The pods need to be completely dry to prevent mold during storage. I've learned the hard way that slightly damp pods can develop mold within days, even in the fridge. Place them in a well-ventilated spot and check every few days to ensure they rattle when shaken. This is your sign they're ready for storage.
Stratification Setup: For Step 2's cold stratification, I recommend using a clear container with a tight seal so you can easily check moisture levels without opening it frequently. The damp paper towels should feel like a wrung-out sponge—not dripping, but holding moisture. If condensation forms on the plastic wrap, your setup is too wet. This is crucial because too much moisture can cause mold before germination even begins.
Lighting for Seedlings: When you're ready for Step 3, if your sunny windowsill isn't getting enough light (12-14 hours daily), consider adding a simple LED grow light. I've seen seedlings stretch toward weak light and become leggy. Position the light about 6 inches above the seedlings and adjust as they grow. The ideal temperature range of 65-75°F is perfect for this stage, but proper lighting is just as important for strong, healthy sprouts.
Transplanting Timing: In Step 4, when transplanting your seedlings, wait until they have 3-4 true leaves before moving them outdoors. This gives them enough root development to handle the transplant shock. I've found that seedlings with fewer leaves often struggle to establish themselves in the garden. Also, make sure to harden them off by placing them outside for a few hours each day before the final transplant to prevent shock from temperature changes.
Pro Tips for Green Onion Seed Pods
- These little-known tricks will help you get the most out of your green onion seed pods and avoid common growing pitfalls.
- Drying Time Matters: In Step 1, when drying your seed pods for 7-10 days, don't rush this process.
- Stratification Setup: For Step 2's cold stratification, I recommend using a clear container with a tight seal so you can easily check moisture levels without opening it frequently.
Frequently asked questions
Got questions about growing green onion seed pods?
You’re not alone! Here are some common queries—and their answers—to help you succeed from harvest to sprouts.
How do I know when green onion seed pods are fully mature for harvest?
Harvest seed pods when they turn tan or light brown and feel dry to the touch. If you squeeze them gently and hear seeds rattle inside, they’re ready! Avoid harvesting if pods are still green or soft—this means they’re not fully mature.
Can I skip cold stratification, or is it really necessary for green onion seeds?
Cold stratification isn’t strictly necessary for green onion seeds, but it dramatically improves germination rates (from ~50% to ~90%). Skip it if you’re impatient, but expect slower, less reliable sprouts. For best results, stratify for 4–6 weeks in a damp paper towel in the fridge.
What’s the fastest way to grow green onions from seed pods without starting indoors?
Direct-sow seeds after the last frost in well-drained soil, ¼ inch deep. Keep the bed consistently moist (not soggy) and mulch lightly to retain warmth. Sprouts may take 2–3 weeks to emerge—patience pays off for hardier plants!
My green onion seeds aren’t germinating. What’s wrong?
Check these common culprits:
- Old seeds: Green onion seeds lose viability after 1–2 years. Test a few in damp paper towels—if they don’t sprout in 7–10 days, replace them.
- Poor soil contact: Press seeds lightly into soil (don’t bury deep) and keep them moist but not waterlogged.
- Temperature issues: Seeds need soil temps of 60–75°F. If your climate is too hot/cold, try a seedling heat mat or wait for ideal conditions.
Are there any alternatives to growing from seed pods if I want green onions faster?
Yes! For instant green onions, try these shortcuts:
- Regrow from scraps: Save the white bulb base (1–2 inches), place it in water, and watch roots and shoots regrow in 1–2 weeks.
- Buy starts: Nurseries often sell young green onion plants ready to transplant—ideal for quick harvests.
- Use pre-sprouted seeds: Some seed companies sell pre-stratified or pre-germinated seeds for faster results.
Wrapping up and next steps
Growing green onion seed pods into thriving sprouts is a rewarding journey that connects you to nature while yielding fresh, homegrown goodness! 🌱 With the right tools—like cold stratification and patience—you can transform tiny seeds into vibrant, edible greens in just 60 days.
Whether you're a seasoned gardener or a curious beginner, this process is a fun and sustainable way to enjoy flavorful harvests year-round.
Ready to take the next step? Start small—plant a few pods in your kitchen or garden, and watch your green thumb grow! Share your progress with fellow gardeners or experiment with different varieties. Happy growing! 🌿