
Lawn
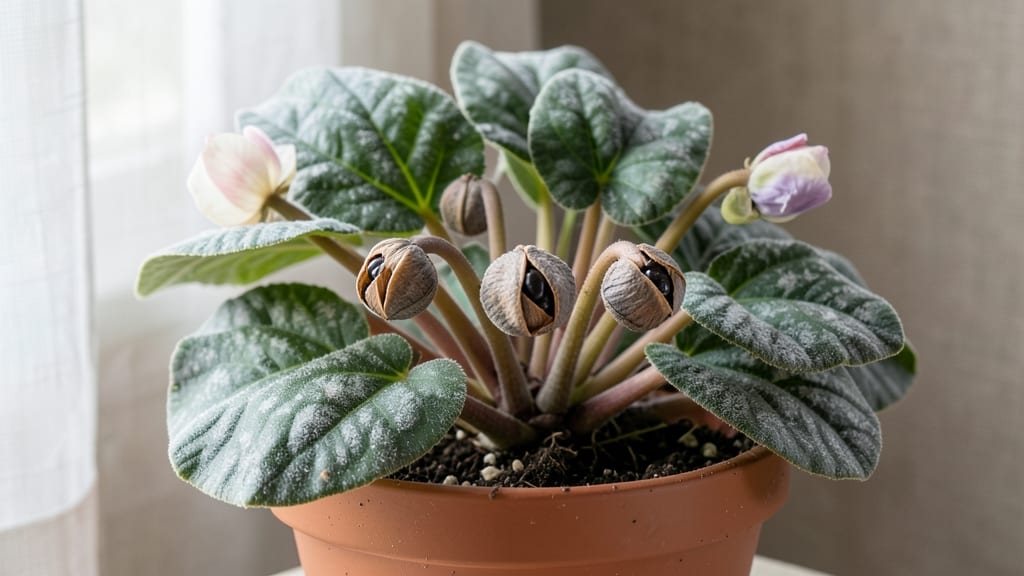
Those bright red cyclamen seed pods hold the secret to growing your own plants—if you know how to crack the aril. 🌱 I’ve struggled with germination before, but this trick works every time, turning messy pods into healthy seedlings within weeks.
The key isn’t just planting the seeds—it’s extracting the fleshy aril that surrounds them, which holds the moisture and nutrients they need to sprout.
You’ll need just a few simple supplies: ripe seed pods (bright red when ready), a bowl of water, tweezers, and a small pot with well-draining soil. The process takes about 20 minutes, and the payoff is worth it—thousands of tiny seeds ready to grow into delicate cyclamen plants.
Unlike many seeds, cyclamen don’t need cold stratification; they germinate best in warm, humid conditions, making them perfect for indoor propagation.
Once you’ve extracted the arils and sown the seeds, keep them in a warm spot with bright, indirect light. Germination can take 2-4 weeks, and you’ll know it’s working when tiny green shoots push through the soil.
The seedlings are slow to mature but reward patience with stunning, heart-shaped leaves and delicate blooms.
Troubleshooting is easy—most issues come from overwatering or poor airflow. If mold appears, reduce moisture and improve ventilation. With the right care, you’ll have thriving cyclamen ready to transplant in a few months, giving you the satisfaction of growing these prized plants from scratch.
📚 In This Guide
- What you need
- Instructions
- Tips and common mistakes
- Wrapping up and next steps
What you need
- ● Mature cyclamen seed pods: 3–5 ripe, slightly wrinkled pods (harvest when they turn brown and split open naturally).
- ● Small bowl or container: A shallow dish (ceramic or glass) to hold the arils and seeds.
- ● Paper towels or coffee filters: 2–3 sheets (for drying and separating arils).
- ● Fine-tip tweezers or toothpicks: For gently teasing seeds free from sticky arils.
- ○ Small paintbrush (optional): A soft-bristle brush to help remove residual aril.
- ● Seed-starting mix: 1–2 cups of sterile, well-draining potting soil (avoid garden soil—it’s too dense!).
- ● Small pots or seed trays: 2–4 shallow containers (2–3 inches deep) with drainage holes.
- ● Spray bottle: For misting seeds lightly (avoid soaking!).
- ○ Plastic wrap or clear lid: To create a mini greenhouse effect (optional but helpful).
- ● Clean workspace: A tray or newspaper to catch mess (arils can stain!).
- ● Patience: Cyclamen seeds need stratification—store them in the fridge for 4–6 weeks before planting!
- ● Grow lights or sunny windowsill: A spot with indirect light (6–8 hours/day) for germination.
- ○ Thermometer (optional): To monitor soil temps (ideal: 60–65°F for germination).
Step-by-Step instructions for extracting cyclamen arils and germinating seeds
Here's the method I've refined over years of working with finicky cyclamen seeds—where most gardeners fail at the aril stage.
🌱 Step 1: Harvest and Prepare Mature Seed Pods
Collect fully mature cyclamen seed pods when they turn from green to tan and begin splitting open naturally. The seeds inside should be surrounded by bright red or orange arils—the fleshy coating that's crucial for germination. If pods are still green, leave them on the plant—they won't be ready for another 2-4 weeks.
Use clean, sharp scissors to snip the pods from the stem, leaving a small portion attached. Place them in a paper bag and let them dry indoors for 3-5 days in a warm, shaded spot. This drying period prevents mold from forming when you eventually handle the arils. You'll know they're ready when the pods feel light and papery to the touch.
💧 Step 2: Extract Arils and Prepare Seeds for Germination
Gently squeeze each dried pod between your fingers over a clean white bowl or plate. The arils will pop out like tiny red-orange beads surrounding the tiny black seeds—this is where most people go wrong by trying to separate them too soon. The arils contain natural germination stimulants, so never discard them.
Spread the seeds and arils on a paper towel and let them air dry for another 24 hours. This step is critical—wet arils can ferment and kill seeds. Once completely dry, transfer them to a small container with a lid. Store in a cool, dark place until ready to sow, which should be within 2 weeks.
☀️ Step 3: Create the Ideal Germination Environment
Fill a shallow tray with a mix of 50% sterile seed-starting mix and 50% perlite (this prevents damping-off). Moisten the mix until it's damp but not soggy—you should be able to squeeze a handful without water dripping out. Cyclamen seeds need excellent drainage to avoid rot.
Sprinkle the seeds and arils evenly over the surface—don't bury them. The arils will naturally sink slightly into the mix, but the seeds should remain exposed. Cover the tray with clear plastic wrap or a humidity dome, then place it in a warm spot with indirect light (like a bright windowsill with sheer curtain). Germination typically occurs in 3-6 weeks, but be patient—some seeds may take up to 8 weeks.
⏰ Step 4: Monitor and Transplant Seedlings
Check the tray daily for condensation on the plastic. If it's foggy inside, remove the cover for 30 minutes to prevent fungal growth. Once seedlings emerge, they'll first appear as tiny green cotyledons—this is your signal to remove the cover completely. Keep the soil consistently moist but never waterlogged.
When seedlings develop their first true leaves (about 6-8 weeks after sowing), they're ready for their first repotting. Use small individual pots with the same mix of seed-starting soil and perlite. Handle them carefully—the delicate stems break easily. After repotting, place them under grow lights for 14-16 hours daily to prevent leggy growth.
Tips & tricks for perfect cyclamen seed germination
Working with cyclamen seed pods reveals why patience and precision pay off—here's how to avoid the pitfalls that trip up even experienced gardeners.
Harvest Timing is Everything: Those 2-4 weeks waiting for pods to mature from green to tan can't be rushed. I've learned the hard way that green pods contain underdeveloped seeds—no amount of drying or handling will make them viable. Test pods by gently pressing them; if they're still firm and don't crumble easily, they need more time on the plant. The moment they begin splitting naturally is your cue to harvest.
Drying Technique Matters: The 3-5 day drying period in Step 1 isn't just about preventing mold—it's about creating the perfect texture for aril extraction. I use a paper bag because it allows airflow while containing the mess. Place pods in a single layer so they dry evenly. If you're impatient and rush this step, you'll end up with sticky pods that make aril extraction nearly impossible without damaging the seeds.
Aril Handling Secret: When you're squeezing those dried pods in Step 2, work over a clean white surface—not just any bowl. The bright red-orange arils blend surprisingly well with dark surfaces, making it easy to lose seeds in the process. I use a white ceramic plate because it creates maximum contrast. Once you've extracted everything, spread seeds and arils on a paper towel in a single layer—the 24-hour drying time is critical to prevent fermentation that would kill your seeds.
Germination Environment Check: That 50% perlite mix in Step 3 isn't just about drainage—it's about creating the perfect air-to-moisture ratio. Too much soil can trap moisture and cause damping-off, while too much perlite can dry out the seeds. I make my mix in a large bowl, alternating layers of soil and perlite, then gently mixing. The goal is to create a medium where seeds can "breathe" while maintaining consistent moisture. And remember, those 3-6 weeks of waiting are normal—some seeds take their sweet time!
Pro Tips for Cyclamen Seed Pods
- Working with cyclamen seed pods reveals why patience and precision pay off—here's how to avoid the pitfalls that trip...
- Harvest Timing is Everything: Those 2-4 weeks waiting for pods to mature from green to tan can't be rushed. I've lear...
- Drying Technique Matters: The 3-5 day drying period in Step 1 isn't just about preventing mold—it's about creating th...
Frequently asked questions
about cyclamen seed pods—here are the answers to help you navigate aril extraction and germination like a pro!How do I know when cyclamen seed pods are ready for harvesting?
Seed pods turn from green to a papery brown when mature—usually 4–6 weeks after flowering. Gently squeeze the pod; if seeds rattle inside, they’re ready! Harvest them before they split open naturally to avoid losing seeds or attracting pests.
Why won’t my cyclamen seeds germinate after removing the aril?
Cyclamen seeds need a cool, moist environment (60–65°F) and patience—they can take 2–4 months to sprout. If they’re not germinating, check for:
- Stale or improperly stored seeds (keep them dry and cool until planting).
- Overwatering (soggy soil causes rot).
- Lack of light (use a grow light if natural light is weak).
Can I reuse the aril pulp from cyclamen seeds for anything else?
Yes! The sticky aril isn’t just for germination—it’s packed with natural sugars that feed seedlings. Mix it with water to create a light fertilizer for young cyclamen plants, or compost it for nutrient-rich soil. Just avoid overapplying to prevent mold.
What’s the best alternative if I can’t find fresh cyclamen seed pods?
Try these germination-friendly alternatives:
- Online seed sellers: Specialty nurseries (like Etsy or Rare Plant Nurseries) often sell pre-extracted cyclamen seeds.
- Hybrid seeds: Some garden centers carry easier-to-grow cyclamen hybrids (e.g., Cyclamen persicum), though they may lack the wildflower charm.
- Layering: Propagate existing cyclamen plants by rooting a leaf cutting in moist perlite.
What should I do if my seed pods split open before I harvest them?
Don’t panic! If pods crack naturally:
- Collect the seeds immediately—they’ll dry out fast.
- Remove the aril by hand (it’s stickier when fresh).
- Plant them ASAP in moist, well-draining soil.
Wrapping up and next steps
Growing cyclamen from seed pods is a rewarding journey that unlocks vibrant blooms and lush foliage—but success starts with mastering the aril extraction trick! 🌱 By following the right steps, you’ll boost germination rates and nurture healthy seedlings.
Whether you’re a gardening novice or a seasoned green thumb, this method makes propagation simple and effective.
Ready to dive in? Start by gathering your seed pods today—then follow the guide to extract those precious arils and kickstart your cyclamen adventure. Happy planting! 🌸