
Lawn
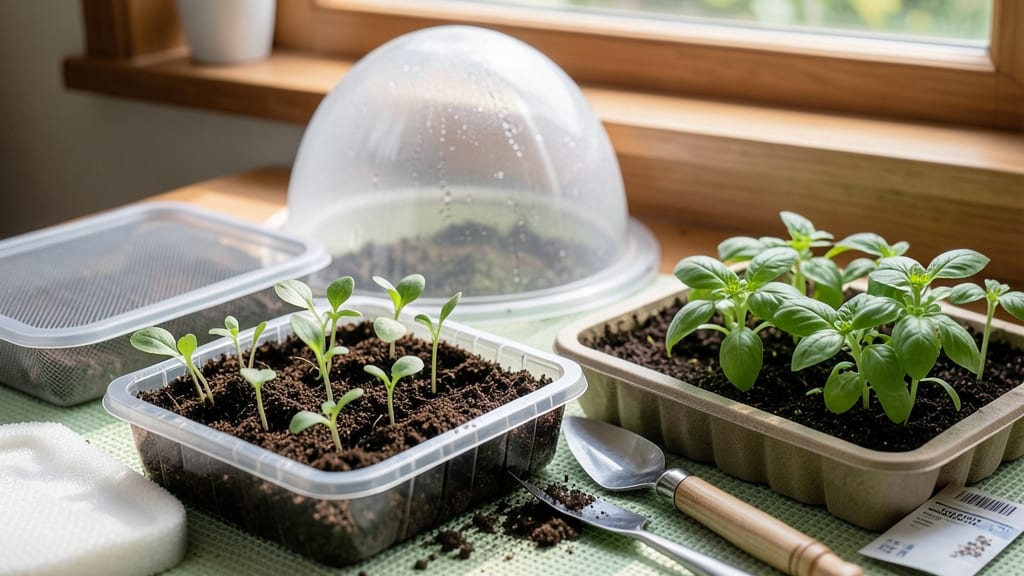
Seed tray lids create the perfect humidity dome for fast germination—turning a slow week into days of eager little sprouts. 🌱 I’ve watched trays of seeds go from damp soil to green shoots in just 4-5 days thanks to these simple plastic or glass covers.
They’re not just optional; they’re the secret weapon for anyone tired of waiting weeks for seeds to wake up.
The magic happens when the lid traps moisture and heat right where the seeds need it most. No fancy equipment—just a clear cover to mimic a greenhouse effect.
You’ll see condensation on the inside, and that’s exactly what you want: a warm, moist environment that tricks seeds into thinking spring has already arrived. Even finicky seeds like peppers and tomatoes germinate faster and more reliably with this simple trick.
Once your seedlings break through the soil, you’ll know it’s time to remove the lid—usually within a week. That’s when they’ll start stretching toward the light, their leaves unfurling like tiny green hands reaching for the sun.
The result? Stronger seedlings that transplant with confidence, not the leggy, weak plants you get from slow starts.
No lid? No problem. DIY options like plastic wrap or even a repurposed glass jar work in a pinch. The key is keeping that humidity high until germination happens.
Whether you’re growing in a sunny windowsill or under grow lights, this small step makes all the difference in your seed-starting success.
📚 In This Guide
- What you need
- Instructions
- Tips and common mistakes
- Wrapping up and next steps
What you need
- ● Seed trays: 1–2 trays (6–12 cell size, depending on your needs). Choose ones with clear, sturdy walls for easy lid placement.
- ● Lid material (pick one): Plastic wrap: 1–2 sheets (12" x 12" or larger, like Saran Wrap or cling film).
- ● Clear plastic lids: 1–2 lids (must fit snugly over your trays—check dimensions!).
- ● Glass or acrylic sheets: 1–2 sheets (thin, ¼"–½" thickness, cut to tray size).
- ● DIY options: Baking sheets + plastic wrap (if using trays without built-in lids).
- ● Scissors or utility knife: 1 (for cutting plastic/acrylic to size).
- ● Ruler or measuring tape: 1 (to ensure precise lid fit).
- ○ Spray bottle (optional): 1 (for misting seeds if humidity drops).
- ○ Rubber bands or clips (optional): 2–4 (to secure plastic wrap if needed).
- ○ Hair dryer or fan (optional): 1 (for gentle airflow if condensation builds up).
How to use lids for seed trays to speed up germination
Here's the simple trick I use to get seedlings popping through the soil in half the time.
🌱 Step 1: Select the Right Lid Material
Not all lids work equally well. Clear plastic lids create a perfect greenhouse effect by trapping heat and moisture, while glass lids let you peek at progress without removing them. I avoid metal or opaque materials—they don't allow light penetration and can trap too much heat, cooking your seeds.
Look for lids that fit snugly but don't press down on the soil surface. A slight gap around the edges allows for airflow while maintaining humidity. If your lids don't fit perfectly, prop them up with small pebbles or toothpicks to create a tiny ventilation gap—this prevents mold from building up.
💧 Step 2: Moisten Soil Before Sealing
Before placing the lid, water the seed tray until the top inch of soil feels damp but not soggy. You want moisture to rise to the surface through capillary action when you seal it. I use a spray bottle for this step—it gives gentle, even coverage without disturbing seeds.
Here's the thing—if the soil is too dry when you seal it, condensation will form on the inside of the lid but won't transfer back to the soil. That means your seeds stay dry and won't germinate. If the soil is too wet, you'll get mold before you see any sprouts. Aim for that "wrung-out sponge" texture.
☀️ Step 3: Position Trays for Optimal Warmth
Place your sealed trays in the warmest spot in your home—typically near a sunny window or on top of the refrigerator. The goal is to maintain soil temperatures between 70-80°F. I've found that a seedling heat mat set to 75°F works best for most vegetables and flowers.
Don't place trays directly on cold surfaces like concrete floors or metal counters. The temperature drop at the bottom will create condensation that drips onto seeds, potentially rotting them. A small insulated tray or even a folded towel under the seed tray helps maintain even warmth.
⏰ Step 4: Monitor and Ventilate Daily
Check your trays daily for condensation on the lid. If you see heavy fogging, it's time to ventilate. Lift the lid for 5-10 minutes each day to let excess moisture escape. This prevents fungal diseases that can wipe out seedlings overnight.
You'll know germination is working when you see tiny green sprouts pushing through the soil within 3-7 days (depending on the plant type). Once 50% of seeds have sprouted, remove the lid completely. The seedlings now need fresh air to develop strong stems and prevent damping-off.
✂️ Step 5: Transition to Normal Care
After removing the lid, move trays to a bright location with 12-14 hours of light daily. I use a grow light on a timer for consistent results. Watch for leggy growth—this happens when seedlings stretch toward light but don't get enough. If stems look thin and pale, lower the light closer to the plants.
Water from the bottom now by placing trays in ½ inch of water for 10 minutes. This encourages strong root development without disturbing the delicate seedlings. You'll know you're doing it right when the soil surface stays evenly moist but never soggy.
Tips & tricks for perfect seedling germination with lids
Want to cut your germination time in half? These pro tips will help you maximize your humidity dome setup and avoid common pitfalls that stall seed growth.
Lid Material Matters: For best results, use clear plastic lids—they create the ideal greenhouse effect by trapping heat while allowing light penetration. If you're using glass, place the trays in indirect light to prevent overheating. I've noticed that opaque or metal lids can actually cook the seeds when exposed to direct sunlight, so always keep them in a shaded spot.
The 5-10 Minute Ventilation Rule: Those daily ventilation sessions are crucial for preventing mold, but don't skip them! I've seen entire seed batches lost to fungal growth when people forget this step. Use a timer if you tend to forget—just 5 minutes of fresh air each day makes all the difference in keeping your seedlings healthy.
Temperature Troubleshooting: Maintaining that 70-80°F range is key, but every home has hot and cold spots. If your seeds aren't sprouting within 3-7 days, check the temperature at soil level with a thermometer. I've found that placing trays on top of refrigerators (not inside) gives consistent warmth without overheating, especially in summer months when indoor temps climb.
Light Transition Strategy: When you remove the lid after 50% germination, move trays to bright light immediately—but don't expose them to direct sun yet. I place mine under grow lights for the first 24 hours to harden off the seedlings gradually. This prevents shock and gives them time to adjust to the new environment before full sun exposure.
Pro Tips for Lids For Seed Trays
- Want to cut your germination time in half? These pro tips will help you maximize your humidity dome setup and avoid c...
- Lid Material Matters: For best results, use clear plastic lids—they create the ideal greenhouse effect by trapping he...
- The 5-10 Minute Ventilation Rule: Those daily ventilation sessions are crucial for preventing mold, but don't skip th...
Frequently asked questions
Got questions about using lids for seed trays? You’re not alone—germination can be tricky! Here are some of the most common questions (and answers) to help you grow like a pro.
How long should I keep the lid on my seed tray?
Most seeds need the lid (or humidity dome) for 5–14 days—until sprouts emerge and touch the lid. After that, remove it gradually to avoid damping-off (a fungal disease). Monitor soil moisture; if condensation forms, lift the lid for 10–15 minutes daily to ventilate.
Can I reuse seed tray lids?
Clean lids with soapy water and dry them thoroughly to prevent mold. Sterilize with a 10% bleach solution (1 part bleach to 9 parts water) if reusing for different seed types. Avoid plastic lids that warp or crack over time—opt for sturdy, food-grade materials for longevity.
What if my seeds aren’t germinating under the lid?
Check these first:
- Temperature: Most seeds need 65–75°F. Use a heat mat if your space is too cool.
- Moisture: Keep soil damp (not soggy). Mist lightly if the top layer dries out.
- Light: Some seeds (like lettuce) need light to germinate; others (like tomatoes) prefer darkness. Adjust your setup accordingly.
Are store-bought lids better than DIY alternatives?
Store-bought lids (like plastic domes or clear plastic wrap) are convenient and consistent, but DIY options work too! Try:
- Plastic food containers with lids (sterilized).
- Glass jars or cloche bells for larger trays.
- Plastic wrap secured with rubber bands (cheap but less durable).
How do I prevent mold or fungus under the lid?
Mold thrives in excess moisture + poor airflow. To prevent it:
- Lift the lid daily for 10–30 minutes once seeds sprout.
- Use sterilized soil (bake at 200°F for 30 mins or use fungicide-treated mix).
- Avoid overcrowding seeds—thin seedlings if needed.
- Add a thin layer of perlite or sand to improve drainage.
Wrapping up and next steps
Choosing the right lids for seed trays can transform your seed-starting game—keeping humidity high and roots thriving while you wait for those first sprouts to peek through! 🌱 Whether you opt for plastic domes, glass covers, or DIY solutions, the key is creating that cozy, greenhouse-like environment to speed up germination.
Now that you’re armed with tips and answers, it’s time to get growing—start with your favorite seeds, seal those trays, and watch your garden dreams take root!
Next step: Grab your supplies, follow your chosen method, and track your progress like a pro! Happy planting! 🌿