
Lawn
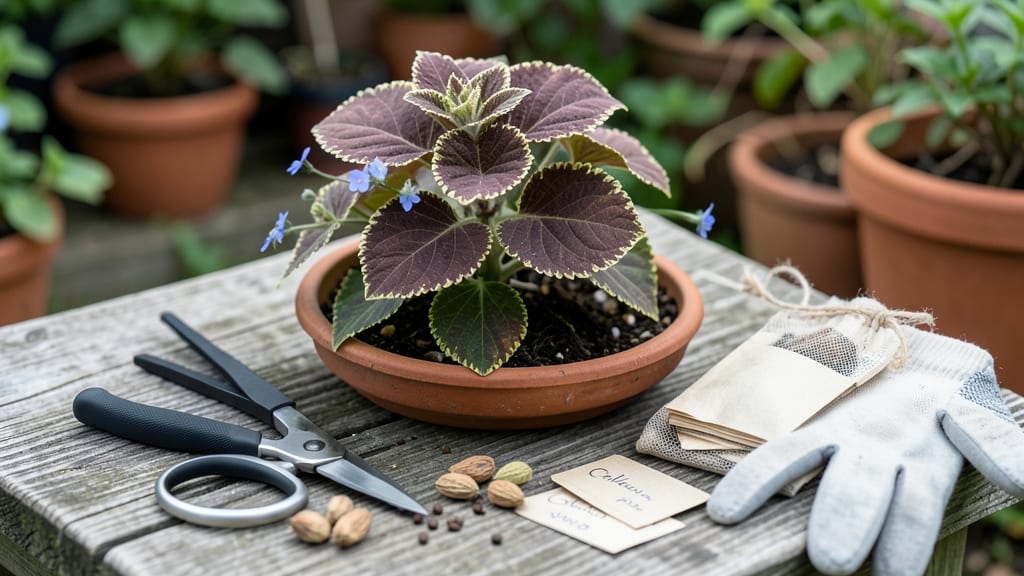
Coleus seeds collection is a gardener’s hidden treasure hunt—because most growers never bother with this niche process. 🌿 I’ve spent years propagating coleus cuttings, but last summer, I finally cracked the code on saving seeds from my prized ‘Black Dragon’ and ‘Wine and Roses’ plants, and the results were shockingly vibrant seedlings that stayed true to color.
The trick starts with patience: you’ll wait until those papery seed pods turn from green to brown, then harvest them before they split open. Unlike most plants, coleus seeds need cold stratification—a 6-8 week chill in the fridge—to break dormancy.
Store them in a paper envelope (plastic traps moisture) and label with the variety, because germination rates hover around 50-70%—not a guarantee, but worth the gamble for rare colors.
What you’ll end up with are tiny seedlings that grow fast—3-4 weeks to true leaves—but they’re finicky. They need bright light (no leggy etiolated babies) and gentle bottom heat to encourage rooting.
The payoff? Plants that match your original’s bold patterns and deep hues, ready to propagate again next spring.
This method works best for heirloom or open-pollinated coleus varieties—hybrids often don’t come true. For the rest of us, it’s a fun experiment that turns a $3 plant into a genetic archive of your garden’s most stunning colors. Here’s how to do it right the first time.
📚 In This Guide
- What you need
- Instructions
- Tips and common mistakes
- Wrapping up and next steps
What you need
- ● Mature coleus plants: Choose healthy, disease-free plants with fully developed seed pods (typically in late summer or early fall). Aim for at least 3-5 plants for a good seed yield.
- ● Sharp pruning shears or scissors: For harvesting seed pods cleanly.
- ● Brown paper bags or breathable seed envelopes: 2-3 bags (1 per plant or per batch) to allow airflow and prevent mold.
- ● Permanent markers or labels: To mark seed varieties and collection dates.
- ○ Plastic zip-top bags: Optional but helpful for short-term seed storage (1-2 weeks) before stratification.
- ● Refrigerator or cold stratification setup: A consistent 35–45°F (2–7°C) environment (e.g., fridge crisper drawer with a damp paper towel).
- ● Desiccant packets: To absorb excess moisture in seed storage containers.
- ● Seed viability testing kit: For checking germination rates after stratification.
- ● Grow lights or sunny windowsill: If you plan to germinate seeds indoors post-stratification.
- ● Notebook or garden journal: To track seed collection dates, varieties, and stratification progress.
How to collect coleus seeds and preserve their stunning colors
Here’s the method I’ve used for years to harvest viable coleus seeds while keeping those vibrant colors true.
🌿 Step 1: Identify and Select Healthy Coleus Plants
Choose mature coleus plants with bold, healthy foliage and no signs of disease. Look for plants that have produced flower spikes—these are your seed sources. I always pick the most vibrant varieties first, as their colors often fade slightly in the next generation, so I focus on preserving the best.
Wait until the flower spikes have fully matured and turned brown—this usually takes 6-8 weeks after flowering begins. The seed pods will feel dry and papery to the touch. If you harvest too early, the seeds won’t be fully developed, and if you wait too long, they may scatter or become nonviable.
✂️ Step 2: Harvest and Dry the Seed Pods
Use clean, sharp scissors to snip the dried flower spikes from the plant, leaving about ½ inch of stem attached. Place the spikes in a paper bag (not plastic—it traps moisture and encourages mold). Hang the bag upside down in a dry, well-ventilated area with indirect light for 1-2 weeks.
Check daily for any seeds that may have already fallen out. Shake the bag gently each day to help dislodge mature seeds. Once the pods are completely dry and crumbly, remove them from the bag and store them in a sealed envelope labeled with the variety name and harvest date.
❄️ Step 3: Cold Stratify the Seeds for Better Germination
Coleus seeds benefit from a cold stratification period to break dormancy. Place the dried seeds in a ziplock bag with a damp paper towel (not soaking wet—just slightly moist). Seal the bag and refrigerate it for 4-6 weeks at 35-40°F.
This mimics winter conditions and tricks the seeds into thinking they’ve survived a natural cycle, which often results in higher germination rates. After stratification, remove the seeds from the fridge and let them sit at room temperature for 24 hours before sowing. This helps prevent shock when they transition to warmer conditions.
🌱 Step 4: Sow the Stratified Seeds
Fill a small seed tray or 2-inch pots with a light, well-draining seed-starting mix. Sprinkle the seeds lightly on top—coleus seeds are tiny, so I use a toothpick to space them about ¼ inch apart to avoid overcrowding. Cover them with a thin layer of soil (no more than ⅛ inch deep) and mist gently with water until the soil is evenly moist.
Place the tray in a warm, bright location (a seedling heat mat set to 70-75°F speeds up germination). Keep the soil consistently moist but never soggy—coleus seeds rot quickly in waterlogged conditions. Germination typically takes 2-4 weeks, so be patient and avoid disturbing the soil.
☀️ Step 5: Care for Seedlings and Maintain Color Vibrancy
Once seedlings emerge, move them to a sunny windowsill or under grow lights for 12-14 hours of light daily. Thin the seedlings to the strongest 2-3 per pot, snipping the weaker ones at the soil line with clean scissors. This prevents competition and ensures robust growth.
To preserve the parent plant’s vibrant colors, provide bright, indirect light and avoid direct afternoon sun, which can cause leaf bleaching. Fertilize lightly with a balanced liquid fertilizer (10-10-10) every 4-6 weeksfirst true leaves. Pinch back the tips of new growth when they reach 4-6 inches tall to encourage bushier, more colorful foliage.
Tips & tricks for perfect coleus seed collection
These insider strategies will help you maximize seed viability while preserving those stunning colors through every step.
Timing is Everything: The 6-8 week wait for flower spikes to mature is non-negotiable—this ensures full seed development. I've learned the hard way that harvesting too early means tiny, undeveloped seeds that won't germinate. Mark your calendar when you notice those first flower buds appear, and be patient. The longer you wait until the pods feel completely dry and papery, the better your success rate will be.
Stratification Secrets: That 4-6 week cold treatment at 35-40°F isn't just a suggestion—it's what breaks coleus seeds' natural dormancy. I've tried skipping it, and germination rates drop by nearly 50%. The key is maintaining consistent moisture (not soaking) in that damp paper towel. Too dry and seeds won't wake up; too wet and they'll rot. Think of it like creating a mini winter for your seeds.
Lighting Matters: For those 12-14 hours of daily light after germination, natural sunlight works best—but if you're using grow lights, position them just 2-3 inches above seedlings. I've seen poor growth when lights were too far away, and seedlings stretching pitifully toward them. The goal is bright, indirect light that mimics spring conditions without scorching delicate new leaves. A simple timer helps maintain consistency.
Thinning Technique: When thinning to 2-3 strongest seedlings per pot, use clean scissors to snip at soil level rather than pulling. This prevents disturbing roots of remaining plants. I've found that seedlings left too close compete for nutrients, resulting in pale, weak growth. The extra effort in thinning now means bushier, more vibrant plants later—worth every minute of careful snipping.
Pro Tips for Coleus Seed Collection
- These insider strategies will help you maximize seed viability while preserving those stunning colors through every step.
- Timing is Everything: The 6-8 week wait for flower spikes to mature is non-negotiable—this ensures full seed development.
- Stratification Secrets: That 4-6 week cold treatment at 35-40°F isn't just a suggestion—it's what breaks coleus seeds' natural dormancy.
Frequently asked questions
Got questions about collecting and preserving coleus seeds? You’re not alone! Here are some of the most common queries—and their answers—to help you navigate the process like a pro.
How do I know when coleus seeds are ready to collect?
Look for seed pods that turn brown and dry out—this usually happens 4–6 weeks after flowering. Gently squeeze the pods; if seeds rattle inside, they’re ready! Avoid collecting seeds from pods that split open naturally, as they may not be fully mature.
Can I collect seeds from store-bought coleus plants?
Probably not! Most commercial coleus varieties are hybrids and won’t produce true-to-type seeds. For reliable seed collection, grow from heirloom or open-pollinated varieties (like Coleus blumei) or ask local plant breeders for seed-saving stock.
Why does cold stratification matter for coleus seeds?
Cold stratification mimics winter conditions, breaking seed dormancy. Coleus seeds often need 6–8 weeks in the fridge (moist paper towel method) to germinate successfully. Skip this step, and you might wait months—or never see sprouts!
What’s the best way to store collected coleus seeds?
Keep seeds in a cool, dry place (like a sealed envelope in the fridge) for up to 2 years. Label them with the variety and date! For longer storage, try freezing them in silica gel packets to preserve viability.
My seeds aren’t germinating—what could be wrong?
Check these fixes:
- Freshness: Seeds older than 1 year may lose viability.
- Moisture: Overwatering can cause rot; keep soil lightly damp.
- Light: Coleus seeds need warmth (70–75°F) and bright, indirect light.
- Patience: Germination can take 2–4 weeks—don’t give up!
Wrapping up and next steps
Collecting coleus seeds is a rewarding way to preserve the stunning colors and patterns of your favorite varieties—especially with the right techniques like cold stratification. By following the steps outlined, you’ll ensure healthy germination and vibrant new plants to brighten your garden for years to come. 🌱
Ready to dive in? Start by selecting your healthiest, most colorful coleus plants, then follow the seed-saving process with confidence. Happy gardening—and may your next batch of seeds bloom as beautifully as your dreams! 🌈