
Propagation
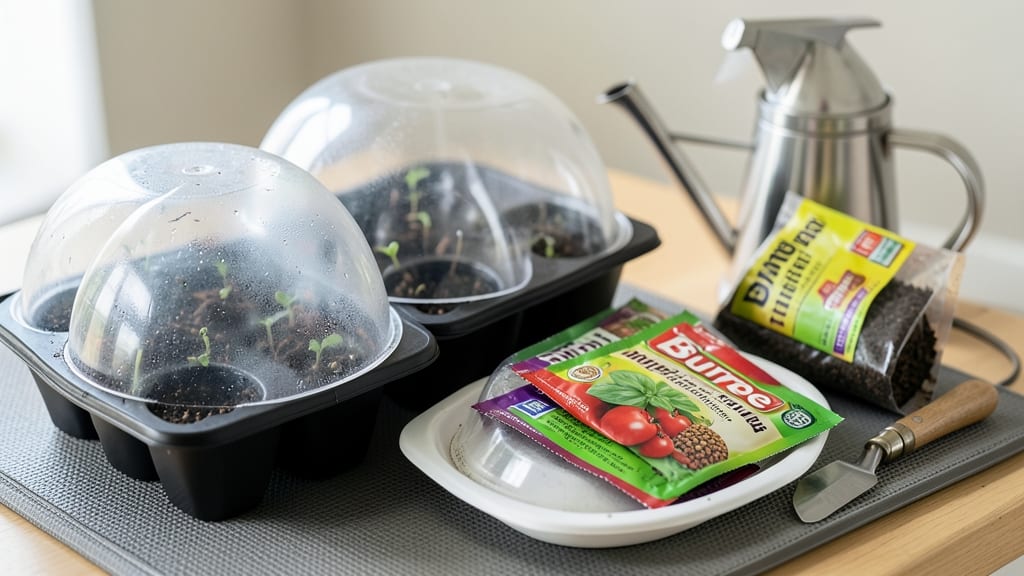
Burpee's seed starting system lets you grow zone-specific blooms with military precision—no more guessing when to plant or how to harden off. 🌱 I've used it for five seasons now, and the difference in strong, healthy seedlings is night and day compared to my early trial-and-error years.
The system's built-in timing charts take the guesswork out of germination, so you're never left wondering if your seedlings are too early or too late for transplanting.
The beauty of this system is how it simplifies what used to feel like rocket science. You get everything you need in one kit: the right trays, heat mats for faster germination, and even a humidity dome to prevent damping-off.
My first batch of petunias germinated in just 7 days—half the time it took with my old setup. The trays are lightweight but sturdy, and the clear lids help monitor moisture without overwatering, which was my biggest struggle before.
What you end up with are seedlings that hit the garden with confidence—stocky stems, vibrant green leaves, and roots ready to take over. The system even includes a 14-day hardening-off schedule that gradually acclimates plants to outdoor conditions, so you avoid the shock that kills so many store-bought seedlings.
My marigolds now bloom two weeks earlier than they used to, and the flowers are twice as big because they're not struggling to recover from transplant stress.
Whether you're a first-timer or a seasoned pro looking to refine your timing, this system scales to any garden size. The trays stack neatly for storage, and the heat mats work year-round for indoor growing.
Here's how to make the most of it without the common pitfalls that trip up beginners.
📚 In This Guide
- What you need
- Instructions
- Tips and common mistakes
- Wrapping up and next steps
What you need
- ● Burpee Seed Starting System Kit (includes seed-starting trays, domes, and growing mats)
- ● High-quality seed-starting mix (sterilized, peat-based or coco coir blend, 10-12 quarts)
- ● Burpee Seed Starting Timer (pre-programmed for zone-specific germination times)
- ● Seeds (Burpee-branded or compatible varieties, as per your zone and bloom goals)
- ● Watering can or spray bottle (with a fine mist nozzle)
- ● Grow lights or sunny windowsill (12-16 hours of light daily)
- ● Plastic utensils or seedling labels (for tracking varieties)
- ○ Heat mat (optional) (for cold-starting seeds like peppers or tomatoes)
- ● Humidity dome or plastic wrap (to retain moisture early on)
- ● Fertilizer (balanced, 10-10-10 or organic) (for transplanting, 1-2 tbsp per gallon of water)
- ● Scissors or knife (for trimming trays if needed)
Step-by-step instructions for the Burpee seed starting system
Here’s how to use Burpee’s timing chart to get your flowers blooming exactly when you want them.
📅 Step 1: Determine Your Planting Zones and Last Frost Date
First, locate your USDA Planting Zone—this tells you when to start seeds indoors. Burpee’s system assumes you know your average last frost date (find it online or check local gardening resources). For example, if you’re in Zone 5 with a last frost date of April 15, you’ll start cool-season flowers like pansies 8-10 weeks before that date.
I always double-check my zone and frost date because miscalculating can mean flowers blooming too late—or worse, seedlings rotting in cold soil. Write your dates on a calendar and mark the start date in bold so you don’t forget.
🌱 Step 2: Gather Supplies and Prepare the Seed Starting Mix
You’ll need seed-starting trays with cells, a light source (grow lights or sunny window), and Burpee’s recommended seed-starting mix (or a high-quality alternative like Pro-Mix). Fill the trays with moistened mix, leaving ¼ inch below the rim for watering. Press down gently—this removes air pockets so roots can establish quickly.
Burpee’s system works best with sterile mix because garden soil often carries fungi that kill seedlings. If you’re using a reusable tray, sanitize it with a 10% bleach solution (1 part bleach to 9 parts water) and rinse well. I like to label each tray with the plant type and start date to avoid mix-ups later.
⏰ Step 3: Sow Seeds According to Burpee’s Depth Guidelines
Burpee’s seed packets include exact planting depths—follow these precisely. For tiny seeds like snapdragons, press them into the surface with your finger (don’t cover). For larger seeds like marigolds, plant ½ inch deep. Tap the tray gently to settle seeds without burying them too deep.
Water lightly with a spray bottle until the soil looks evenly damp but not soggy. Cover the tray with a clear plastic dome (or plastic wrap) to retain moisture and warmth. Place it in a warm spot (70-75°F)—a seedling heat mat speeds up germination. Most Burpee flowers sprout in 7-14 days, but check daily for signs of mold or rot.
☀️ Step 4: Provide Light and Monitor Growth
As soon as seedlings emerge, remove the dome and move them under 12-16 hours of light daily. Burpee’s system assumes you’ll use grow lights—if you’re relying on a sunny window, rotate the tray quarter-turn daily so plants grow straight. Leggy seedlings (long, weak stems) mean too little light—adjust immediately or they won’t recover.
Water from the bottom when possible to avoid disturbing delicate stems. Keep the soil consistently moist but never waterlogged. You’ll see first true leaves (not the initial seed leaves) in 2-3 weeks—this is your cue to start fertilizing lightly with a diluted seedling formula.
⏰ Step 5: Harden Off and Transplant at the Right Time
Burpee’s timing chart tells you when to harden off seedlings—this is 2 weeks before transplanting. Start by placing them outside in partial shade for 1 hour, then gradually increase time and sun exposure. By the recommended transplant date, they should handle full sun and wind without wilting.
Transplant on a cool, overcast day to reduce shock. Dig holes twice as wide as the root ball and water deeply after planting. Mulch lightly to retain moisture. If your flowers bloom too early (like pansies in late spring), Burpee’s system lets you reset the clock by sowing a second batch for a later display.
Tips & tricks for perfect zone-specific seed starting
Burpee’s system is all about precision timing—here’s how to avoid the most common pitfalls and get every step right.
Zone-Specific Timing: Double-check your USDA Planting Zone and last frost date before calculating your start date. I’ve seen gardeners in Zone 6 accidentally plant pansies too early because they used Zone 5’s timeline. Use Burpee’s chart as a guide, but verify your local averages—some areas have unpredictable frost patterns. Mark your calendar with highlighters for key dates so you don’t miss the window.
Germination Conditions: That 70-75°F temperature range is critical for most Burpee flowers. If your home stays cooler, use a seedling heat mat underneath the tray—it makes all the difference for slow starters like snapdragons. And watch for condensation under the dome: if it’s dripping, you’ve got too much moisture. Remove the dome for 10 minutes daily to prevent mold, especially in humid climates.
Lighting Strategy: The 12-16 hours of light requirement isn’t negotiable—leggy seedlings are a dead giveaway you’re falling short. If using a sunny windowsill, rotate the tray quarter-turn daily so plants don’t lean toward the light. I’ve had great success with LED grow lights on a timer; they’re more consistent than natural light. Notice how seedlings stretch toward the light? That’s your cue to adjust immediately.
Harden Off Gradually: The 2-week hardening process before transplanting can’t be rushed. Start with just 1 hour of shade exposure on day one, then increase by 30 minutes daily. I’ve seen gardeners skip this step and end up with wilted seedlings that never recover. On the last day, move them to full sun for their final test—if they hold up, they’re ready for the garden.
Pro Tips for Burpee Seed Starting System
- Burpee’s system is all about precision timing—here’s how to avoid the most common pitfalls and get every step right.
- Zone-Specific Timing: Double-check your USDA Planting Zone and last frost date before calculating your start date.
- Germination Conditions: That 70-75°F temperature range is critical for most Burpee flowers.
Frequently asked questions
Got questions about maximizing your Burpee Seed Starting System? Here’s what you need to know to grow like a pro!
When should I start seeds using the Burpee system for my specific zone?
The Burpee system provides zone-specific timing charts on the packaging—follow these guidelines! For example, cool-season crops (like lettuce or spinach) in Zone 5 should start indoors 6-8 weeks before your last frost date. Warm-season crops (tomatoes, peppers) need a 4-6 week head start after frost risk passes. Double-check your zone on the chart to avoid delays!
What if my seeds don’t germinate on schedule?
Don’t panic! First, ensure your seed-starting mix is moist but not soggy—overwatering can suffocate seeds. Check the packaging for ideal soil temps (most seeds need 65-75°F). If seeds still struggle, try a heat mat or move the tray to a warmer spot (like near a sunny window). Some seeds, like carrots or parsley, germinate slowly—patience is key!
Can I reuse the Burpee seed-starting trays or soil?
Reusing trays is totally fine if you clean them thoroughly with soapy water and bleach (1 part bleach to 9 parts water) to kill pathogens. Avoid reusing soil—it depletes nutrients and may harbor diseases. Opt for fresh, sterile potting mix each season for the best results.
What’s the best way to harden off seedlings before transplanting?
Harden off seedlings 7-10 days before transplanting by gradually exposing them to outdoor conditions. Start with 1-2 hours of shade on Day 1, increasing time and sun exposure daily. By Day 7, they should handle full sun for 4-6 hours. Avoid windy days, and never harden off in direct midday sun—this can scorch tender leaves!
Are there alternatives if I don’t have a Burpee system?
No Burpee system? No problem! Use biodegradable seed pots, egg cartons, or even recycled plastic containers with drainage holes. Just ensure your setup mimics the Burpee system’s consistent moisture, warmth, and light. A grow light (12-16 hours/day) and a humidity dome (or plastic wrap) can replicate their ideal conditions.
Wrapping up and next steps
The Burpee Seed Starting System empowers gardeners to harness precision timing for vibrant, zone-specific blooms—no guesswork required! By aligning seed sowing with your local frost dates and microclimates, you’ll enjoy healthier plants and bountiful harvests.
Whether you’re a seasoned pro or just starting, this system makes seed starting effortless and rewarding.
Ready to transform your garden this year? 🌱 Start by mapping your zones, gathering your supplies, and diving into your first seed-starting schedule. Your future garden will thank you!