
Lawn
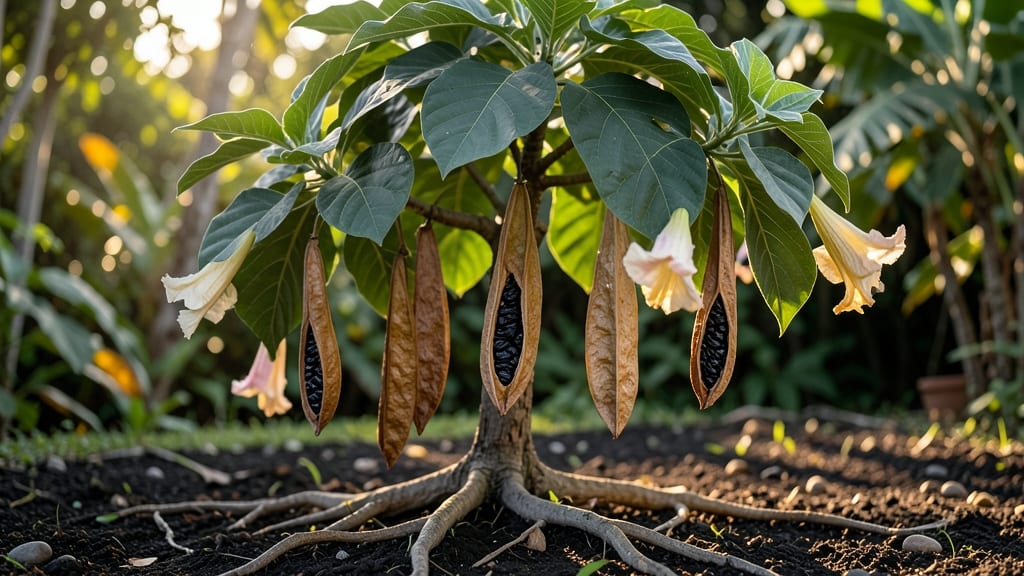
Brugmansia seed pods are nature’s way of growing your own angel’s trumpet—if you know when to harvest them. 🌿 The key is patience: pods turn from green to brown and split open on their own, revealing seeds ready for propagation.
I’ve learned the hard way that waiting too long means seeds lose viability, while harvesting too soon gives you immature, non-germinating seeds.
Gather your supplies: thick gloves (those seeds are toxic), a clean bucket, paper towels, and a sealed container for stratification. The process starts with collecting fully dried pods—when they crack open easily with a gentle squeeze.
Once you’ve got them, remove the seeds and let them air-dry for a week before storing them in the fridge for stratification.
After 6-8 weeks of cold treatment, those seeds will be primed for planting. You’ll see sprouts emerge within 2-4 weeks of sowing, and with proper care, your seedlings will grow into robust plants ready for transplanting. The payoff? A garden filled with fragrant, dramatic blooms that attract hummingbirds and butterflies.
Here’s where it gets interesting—brugmansia seedlings grow fast but need bright, indirect light and consistent moisture. Overwatering is the biggest mistake, so let the top inch of soil dry out between waterings. And remember: always handle seeds and plants with care, as every part of brugmansia is toxic if ingested.
📚 In This Guide
- What you need
- Instructions
- Tips and common mistakes
- Wrapping up and next steps
What you need
- ● Mature Brugmansia seed pods: 5–10 fully ripe, brown, and slightly papery pods (harvest when they naturally open or split).
- ● Sharp pruning shears or scissors: 1 pair (sterilized with 70% isopropyl alcohol to prevent contamination).
- ● Brown paper bags or breathable mesh sacks: 2–3 (for collecting seeds and pods during harvest).
- ● Tweezers or fine-tipped forceps: 1 pair (for gently extracting seeds from pods).
- ● Paper towels or silica gel packets: 2–3 (for drying seeds—silica gel speeds up the process!).
- ● Small glass jars with airtight lids: 2–4 (quart-sized, for seed storage post-stratification).
- ● Plastic zip-top bags: 2–3 (for temporary seed storage during stratification).
- ● Refrigerator or cold stratification setup: A standard fridge (35–40°F) or a seed stratification box with a thermometer.
- ● Labeling markers or tags: 1 (to mark jars/bags with harvest date and variety).
- ○ Gloves (optional but recommended): Nitrile gloves (to protect skin from mild irritants in Brugmansia sap).
- ● Seed viability test kit: A simple float test (water + salt) to check seed quality before stratification.
- ● Humidity tray or damp paper towels: For creating a mini greenhouse environment during germination tests.
- ● Digital scale: To weigh seeds (helpful for tracking moisture loss during drying).
- ● Notebook or spreadsheet: To log pod harvest dates, drying conditions, and stratification progress.
Step-by-Step guide to harvesting and processing Brugmansia seed pods
Here's how to transform those striking seed pods into viable seeds for next season's garden.
🌿 Step 1: Identify and Harvest Mature Seed Pods
Brugmansia seed pods turn from green to a papery brown when ready—wait until they're completely dry and crispy to the touch. I like to harvest them in the late afternoon when humidity is lower, as damp pods can mold overnight. Use clean, sharp pruners to snip the pods directly from the stem, leaving a small stub to prevent disease entry.
Don't rush this step. Immature pods contain underdeveloped seeds that won't germinate. You'll know they're perfect when the pod splits open naturally along its seam, revealing the black, bean-like seeds inside. Collect pods in a paper bag to prevent moisture buildup during transport.
🪴 Step 2: Dry and Clean the Seed Pods
Spread the harvested pods in a single layer on a mesh screen or paper towels in a well-ventilated area. Keep them out of direct sunlight to prevent overheating, which can damage the seeds inside. I place mine on a windowsill with indirect light for about 7-10 days, checking daily for any signs of mold or pests.
Once fully dry, gently crush each pod between your fingers over a clean surface. The seeds will pop out easily while the papery husks can be discarded. Sift through the debris to separate the seeds—use a fine-mesh strainer if needed. Store the clean seeds in an envelope labeled with the variety and harvest date.
⏰ Step 3: Stratify Brugmansia Seeds for Germination
Brugmansia seeds require a 60-90 day cold stratification period to break dormancy. Mix the seeds with slightly damp peat moss or sand in a sealed plastic bag. I use a ratio of 1 part seeds to 3 parts moist medium—just enough to keep everything damp but not soggy. Seal the bag and place it in your refrigerator's crisper drawer.
Check the bag monthly to ensure the medium hasn't dried out. After 90 days, remove the seeds and plant them in well-draining seed-starting mix at a depth of about ¼ inch. Keep the soil consistently moist but never waterlogged. Germination typically occurs within 2-4 weeks after sowing.
☀️ Step 4: Provide Ideal Growing Conditions
Once seedlings emerge, move them to a warm, bright location with 60-75°F temperatures and 12-14 hours of indirect light daily. Brugmansia seedlings are sensitive to temperature fluctuations—avoid drafts or sudden heat changes. I use a heat mat under the seed trays to maintain consistent warmth during early growth.
When seedlings develop their first true leaves, thin them to the strongest plant per cell. Transplant them into individual 4-inch pots once they've developed 3-4 sets of leaves. Brugmansia grows quickly, so be prepared to upgrade their containers every 4-6 weeks until they're ready for outdoor planting after the last frost.
Tips & tricks for perfect Brugmansia seed pod processing
Working with Brugmansia seed pods reveals how small details make all the difference between viable seeds and wasted effort.
Timing is Everything: The 7-10 day drying period in Step 2 is non-negotiable—this prevents mold while ensuring seeds remain viable. I've learned the hard way that rushing this step leads to seeds that either won't germinate or sprout mold. Place pods on a mesh screen in a well-ventilated area with indirect light to maintain consistent conditions. If your kitchen gets humid, consider using a small fan on low to improve airflow without disturbing the pods.
Stratification Precision: During the 60-90 day cold stratification in Step 3, maintain that 1:3 seed-to-medium ratio religiously. Too much moisture causes mold, while too little prevents proper dormancy breaking. I like to use a clear plastic bag so I can visually check moisture levels monthly without opening it—just squeeze gently to feel for dampness, not wetness. The refrigerator's crisper drawer provides the most stable temperature environment for this critical phase.
Visual Cues for Success: In Step 1, look for pods that naturally split open along their seams—this is your confirmation they're mature. If pods remain closed, they're not ready. For Step 4, seedlings should develop their first true leaves (not the initial seed leaves) before transplanting. These visual cues ensure you're working with properly developed seeds at every stage.
Pro Tips for Brugmansia Seed Pods
- Working with Brugmansia seed pods reveals how small details make all the difference between viable seeds and wasted e...
- Timing is Everything: The 7-10 day drying period in Step 2 is non-negotiable—this prevents mold while ensuring seeds ...
- Stratification Precision: During the 60-90 day cold stratification in Step 3, maintain that 1:3 seed-to-medium ratio ...
Frequently asked questions
Are brugmansia seed pods toxic like the plant itself?
The pods contain seeds that are toxic if ingested (just like the rest of the plant), so always wear gloves when handling them. While the dried pods themselves aren’t as dangerous, avoid crushing or inhaling dust. Keep them out of reach of pets and children!
How long do brugmansia seed pods take to dry completely?
Drying time varies by climate, but pods typically need 4–6 weeks in a well-ventilated, dry space (like a mesh bag in a dark, warm area). Test readiness by gently squeezing—if the pod feels hollow and brittle, it’s dry! Humidity slows drying, so use a fan or dehumidifier if needed.
Do brugmansia seeds need cold stratification, and how long?
Yes! Brugmansia seeds benefit from 8–12 weeks of cold stratification (mix seeds with moist sand in a sealed bag and refrigerate). This mimics winter conditions and breaks dormancy. Skip stratification only if you’re in a warm climate—plant seeds directly in spring for lower success rates.
What if my brugmansia pods won’t open naturally?
Some pods resist opening even when dry. Try these tricks:
- Freeze the pods for 24 hours to weaken the tissue.
- Gently tap them against a hard surface to crack them open.
- Use a knife to carefully slit the pod (wear gloves!).
Can I grow brugmansia from store-bought seeds instead of pods?
Store-bought seeds can work, but they’re often hybrid varieties with lower germination rates (10–30%) compared to fresh, stratified seeds from your own pods (50–80% success). If using store-bought seeds, follow the same stratification steps for best results!
Wrapping up and next steps
Brugmansia seed pods may seem tricky at first, but with the right tools and patience, you can successfully harvest, dry, and stratify them for thriving new plants! 🌱 Whether you're a seasoned gardener or a curious beginner, mastering this process opens the door to growing these stunning, fragrant bloomers in your garden. Ready to take the next step? Start by experimenting with a few pods this season—your future Brugmansia plants will thank you!