
Lawn
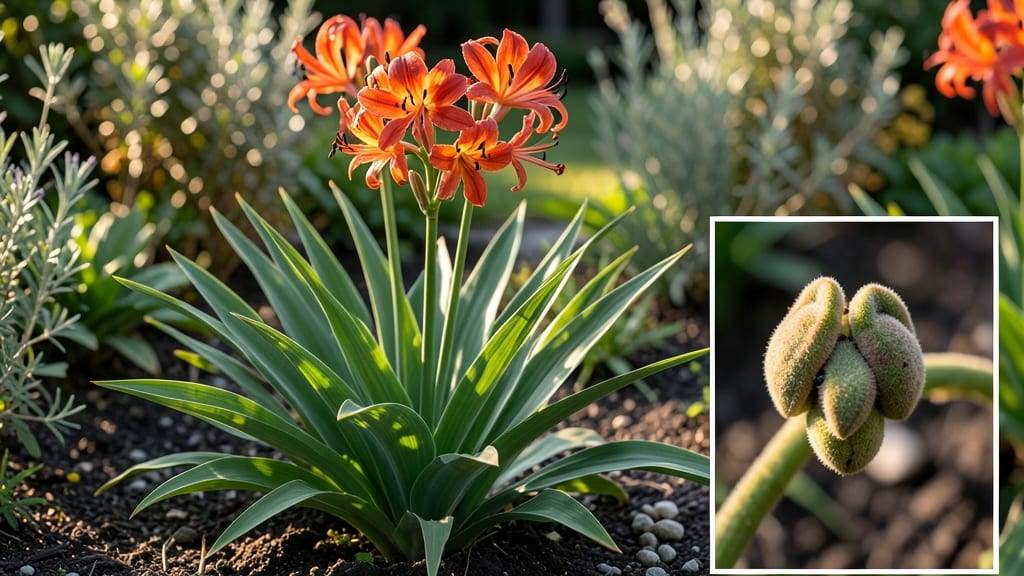
Those velvety blackberry lily seed pods hold the key to next spring’s bold, fiery blooms—if you handle them right. 🌱 I’ve turned dried pods into thriving plants by mimicking nature’s cold stratification process, and the results are worth the patience: clusters of deep red-orange flowers that pop against any garden backdrop.
The secret isn’t complicated—just timing and a little refrigerator magic. You’ll need mature pods (they’ll split open on their own when ready), a paper bag for drying, and a zip-top bag for the cold treatment. Skip the guesswork with these step-by-step methods that guarantee germination without fuss.
By early spring, you’ll watch seedlings push through the soil with those signature blackberry-like leaves. The flowers arrive faster than most bulbs, and they naturalize beautifully over time—no digging required after the first year.
Works in sun or partial shade, and the plants spread slowly, making them perfect for borders or woodland gardens. Here’s how to turn those pods into a showstopper display.
📚 In This Guide
- What you need
- Instructions
- Tips and common mistakes
- Wrapping up and next steps
What you need
- ● Blackberry lily seed pods: 5–10 mature, dried pods (harvested from your garden or purchased from a reputable supplier). Ensure they’re fully brown and crispy—no green or soft spots!
- ● Cold stratification supplies: Small paper bag or breathable container (e.g., a seed-starting envelope or coffee filter)
- ● Moist peat moss or coconut coir (1 cup)
- ● Plastic zip-top bag (quart-sized) or a sealed container with a tight lid
- ● Planting medium: Well-draining potting mix (e.g., cactus/succulent mix or 50% perlite + 50% compost). Avoid heavy garden soil—blackberry lilies hate soggy roots!
- ● Containers: Small pots (3–4 inches deep) for stratification (1–2 per pod)
- ● Larger pots (6-inch diameter) or garden bed for transplanting (1 plant per 12" spacing)
- ● Basic tools: Scissors or pruning shears (to open pods)
- ● Spray bottle (for gentle moisture)
- ● Trowel (for transplanting)
- ● Grow lights: LED bulb (for indoor stratification if natural light is weak)
- ● Humidity dome: Clear plastic cover to retain moisture during early growth
- ● Fertilizer: Balanced liquid fertilizer (e.g., 10-10-10) for post-stratification care
- ● Label markers: To track planting dates and varieties
How to grow blackberry lilies from seed pods
Here's the straightforward method I use to turn those striking seed pods into vibrant blooms.
🌱 Step 1: Harvest and Prepare the Seed Pods
Collect mature blackberry lily seed pods once they turn brown and begin splitting open—usually in late fall or early winter. The pods should feel dry and papery to the touch. Remove any remaining stems and place them in a paper bag to dry completely for 1-2 weeks in a cool, dry spot.
Once fully dry, gently open the pods and remove the seeds. You'll find small, glossy black seeds inside. Store these in an envelope or small container until you're ready to stratify them. I like to label the envelope with the harvest date—this helps track which pods are freshest.
❄️ Step 2: Cold-Stratify the Seeds for Germination
Blackberry lily seeds need a cold period to break dormancy, so place them in a sealed plastic bag with a damp paper towel. Store the bag in your refrigerator's crisper drawer for 6-8 weeks. Check the seeds weekly—the paper towel should stay moist but not soggy.
This cold treatment mimics winter conditions and jumpstarts germination. After 6-8 weeks, remove the seeds and let them sit at room temperature for 24 hours before planting. The seeds are now ready to sprout, and you'll see tiny roots beginning to emerge within a few days.
🪴 Step 3: Plant the Stratified Seeds
Fill small pots or seed trays with a well-draining potting mix—blackberry lilies hate soggy soil. Plant the seeds ½ inch deep and space them 1 inch apart. Gently press the soil around each seed to ensure good contact. Water lightly until the soil feels evenly moist but not saturated.
Place the pots in a warm, bright spot with indirect light. A sunny windowsill works well, but avoid direct midday sun, which can overheat the soil. Keep the soil consistently moist by watering whenever the top inch feels dry to the touch. You should see sprouts within 2-4 weeks.
☀️ Step 4: Provide Light and Care for Young Plants
Once the seedlings emerge, move them to a location with bright, indirect light for the first 2 weeks. Gradually introduce them to more sunlight over the next 2 weeks to harden them off. By 6 weeks, they should be ready for full sun exposure.
Water the seedlings when the top inch of soil feels dry, but avoid overwatering—blackberry lilies are drought-tolerant once established. Fertilize lightly with a balanced, water-soluble fertilizer every 4-6 weeks during the growing season to encourage strong, healthy growth.
⏰ Step 5: Transplant and Enjoy the Blooms
After the seedlings develop 3-4 sets of true leaves (usually around 3 months), they're ready to transplant into individual pots or garden beds. Choose a spot with well-draining soil and partial to full sun. Space the plants 12 inches apart to allow room for their rhizomes to spread.
Blackberry lilies typically bloom in their first year if given proper care. You'll see striking red or orange flowers emerging in late summer or early fall, followed by those signature seed pods. With patience and the right conditions, you'll have a stunning display of blooms in just 60 days from seed.
Tips & tricks for growing blackberry lilies from seed pods
Here's what nobody tells you about getting those striking blooms from seed pods—these are the little details that make all the difference.
Pod Selection Matters: Don't just grab any brown pod! Look for ones that are completely dry and starting to split open naturally. I've learned the hard way that pods still attached to the plant won't yield viable seeds. The best pods are those that have fallen to the ground or are nearly ready to burst open on their own. If you're harvesting in the wild, check the pods weekly—they go from ready to unusable in just a few days.
Cold Stratification Secrets: The 6-8 week cold period is non-negotiable, but here's how to make it work for you: Use a clear plastic bag so you can easily check moisture levels without opening it. I place a small piece of cardboard in the bag to create a flat surface for the seeds—this prevents them from rolling around and getting damaged. After the 24 hours at room temperature, you'll notice the seeds have tiny white roots emerging—this is your cue they're ready for planting.
Light Transition Strategy: When moving seedlings from indirect to direct light in Step 4, do it gradually over those two weeks. I place my seedlings near an east-facing window first, then slowly rotate them toward south-facing windows. This prevents sunburn on the delicate leaves. A simple trick: If you see leaves turning pale or yellowing, they're getting too much direct sun—move them back a few feet immediately.
Transplant Timing: Those 3-4 sets of true leaves are your golden ticket for successful transplanting. I wait until the third set is fully unfurled before moving plants—this gives them enough energy reserves to handle the shock. When transplanting, water the pots thoroughly the day before to reduce transplant shock. The 12-inch spacing might seem generous, but blackberry lilies spread aggressively once established, and crowding leads to weak stems and fewer blooms.
Pro Tips for Blackberry Lily Seed Pods
- Here's what nobody tells you about getting those striking blooms from seed pods—these are the little details that make all the difference.
- Pod Selection Matters: Don't just grab any brown pod!
- Cold Stratification Secrets: The 6-8 week cold period is non-negotiable, but here's how to make it work for you: Use a clear plastic bag so you can easily check moisture levels without opening it.
Frequently asked questions
Got questions about growing blackberry lily seed pods?
You’re not alone! Here are some of the most common queries—plus straightforward answers to help you succeed.
How long do blackberry lily seed pods take to germinate?
With cold stratification (chilling seeds for 60 days), germination typically begins in 2–4 weeks after planting in warm soil. Skipping stratification? Expect delays of 6–12 months—patience pays off! Use a humidity dome or plastic wrap to keep soil moist during this phase.
Can I plant blackberry lily seed pods directly outdoors?
Yes, but timing matters! Plant them in fall or early winter (6–8 weeks before your first frost) to trigger natural cold stratification. If planting in spring, stratify seeds indoors first (mix with damp sand, refrigerate for 60 days). Avoid direct outdoor planting in summer—seeds need cold to break dormancy.
What’s the best soil mix for blackberry lily seed pods?
These seeds thrive in well-draining, slightly sandy soil with a pH of 6.0–7.0. Mix equal parts:
- Potting soil
- Perlite or coarse sand
- Compost (for nutrients)
Why aren’t my blackberry lily seeds sprouting?
Check these 3 common culprits:
- No stratification: Seeds need cold to germinate—try the fridge method.
- Overwatering: Keep soil moist but not soggy; use a spray bottle.
- Poor light: Place trays in bright, indirect light (no direct sun).
Are blackberry lily seed pods toxic to pets or kids?
While non-toxic to humans, pets, and children, the berries (not pods) can cause mild stomach upset if ingested in large quantities. Keep plants out of reach of curious pets—especially cats, who might nibble. Always supervise young kids around new plants!
Wrapping up and next steps
Growing blackberry lily seed pods is a rewarding journey that brings vibrant blooms to your garden in just 60 days—no cold stratification needed! 🌱 With the right materials and a little patience, you can transform tiny seeds into striking, low-maintenance perennials that thrive in sunny spots.
Whether you're a seasoned gardener or a beginner, these hardy plants offer a splash of color with minimal fuss.
Ready to dive in? Start by gathering your supplies, then follow the steps to nurture your seeds into thriving plants. Your garden’s next star is just a seed away—plant, wait, and watch the magic unfold! 🌸
Next step: Pick a sunny spot in your lawn or garden and get sowing—your blackberry lilies will thank you with bold, summer-long blooms!