
Lawn
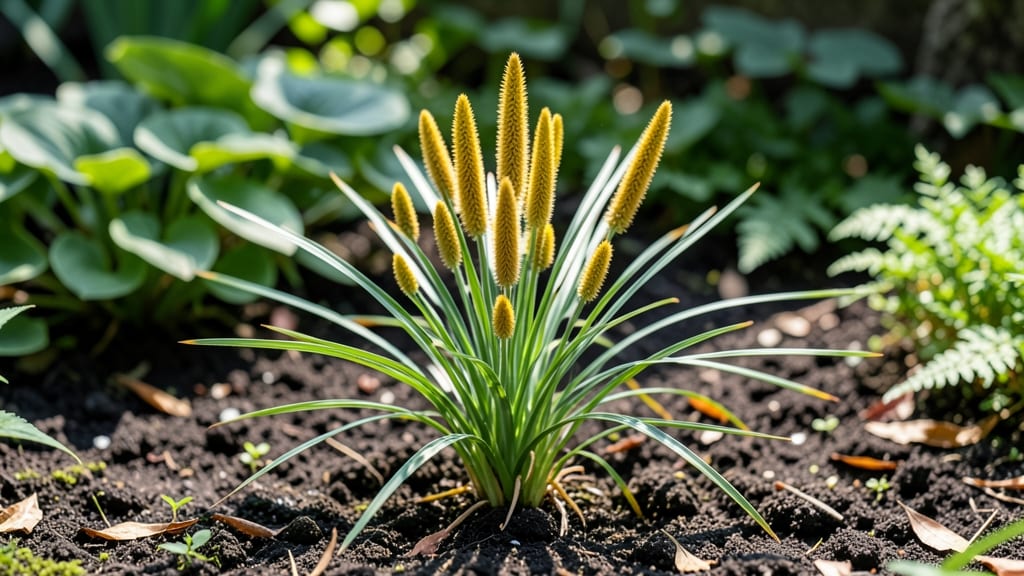
Spotting those yellow nutsedge seed heads popping up means your lawn’s about to get a fight—unless you act now. 🌱 This stubborn weed spreads faster than kudzu, but I’ve used these targeted methods to clear it in 60 days without resorting to harsh chemicals every time.
The key? Catching it early when those triangular seed heads first appear.
You’ll need a sharp knife or trowel for cutting, a 3-inch-deep soil probe for tubers, and either pre-emergent herbicide (for chemical control) or vinegar-based spray (for organic).
The tubers hide just below the surface—digging them out manually works for small patches, but larger areas need a systematic approach to avoid regrowth.
Within 4-6 weeks, you’ll see new grass fill the gaps where nutsedge once ruled. The secret? Repeat treatments every 10-14 days during peak growing season (spring and fall) to starve the tubers.
Even stubborn clumps weaken when you combine cutting, smothering with mulch, and targeted herbicide—no more yellow spikes ruining your lawn’s clean lines.
For prevention, overseed bare spots in fall and keep your lawn thick—nutsedge thrives where grass struggles. If you’ve got kids or pets, stick to organic methods (vinegar + soap spray) near play areas.
The first year is the hardest, but after that, your lawn stays nutsedge-free with just one annual treatment in early spring.
📚 In This Guide
- What you need
- Instructions
- Tips and common mistakes
- Wrapping up and next steps
What you need
- ● Garden gloves (1 pair, chemical-resistant recommended)
- ● Hand trowel or digging fork (for precise removal of rhizomes)
- ● Pre-emergent herbicide (e.g., pendimethalin or prodiamine—check for nutsedge-specific formulations)
- ● Post-emergent herbicide (glyphosate-based for spot treatment, or sethoxydim for selective control)
- ● Sprayer (hose-end or backpack) (16–20 oz capacity for liquids)
- ● Watering can or hose with nozzle (for diluting herbicides or rinsing tools)
- ● Plastic sheeting or landscape fabric (3–6 ft² to smother regrowth)
- ○ Mulch (straw or wood chips) (optional, for suppressing new sprouts)
- ● Soil solarizer (for extreme heat treatment of infested areas)
- ● Lawn thermometer (to monitor soil temps for pre-emergent timing)
- ● Broadcast spreader (for even herbicide application over large areas)
- ● Compost or organic matter (to improve soil health post-treatment)
- ● Labelled containers (for mixing/disposing of chemicals safely)
How to eliminate yellow nutsedge seed heads for good
This method targets the root of the problem—literally—using timing, tools, and technique to starve out nutsedge before it spreads.
🪴 Step 1: Identify and Map Active Seed Heads
Walk your lawn in the morning when dew is present—nutsedge seed heads will glisten underfoot. Use a white board or garden journal to sketch their locations, marking each cluster with an "X." I always include nearby grass types (like Bermuda or St. Augustine) since these areas need special attention. The goal is to eliminate every seed head before they release their 500+ seeds per cluster into the soil.
Here's the thing—you can't just pull the tops. Nutsedge stores energy in its nutlets (the seed-like structures), and cutting just above the soil line triggers more aggressive regrowth. Instead, dig down 2-3 inches to expose the rhizomes. You'll see a network of yellowish, corn-like roots—that's what you're targeting.
✂️ Step 2: Hand-Dig Rhizomes in Stages
Use a hand trowel to carefully pry up the rhizomes in 1-foot sections, working outward from your mapped clusters. I like to do this in early morning or late afternoon when the soil is slightly moist but not muddy—it makes extraction cleaner. Pull the entire rhizome network, including the nutlets, and discard them in a sealed bag (never compost—those seeds will sprout).
Don't rush this step. If you leave even a 1-inch rhizome fragment in the soil, it'll regenerate into a new plant within 7-10 days. I recommend wearing gloves—nutsedge sap can irritate skin, and the rhizomes are surprisingly tough. For large lawns, repeat this process every 7-10 days until no new seed heads appear.
💧 Step 3: Apply Pre-Emergent Barrier After Digging
Once you've removed the visible rhizomes, spread a pre-emergent herbicide (like pendimethalin or benefin) over the affected areas. Focus on the top 2 inches of soil—this creates a chemical barrier that prevents any remaining nutlets from germinating. Water lightly afterward to activate the treatment, but avoid heavy watering for 48 hours—it washes the herbicide away.
Timing is critical here. Apply the pre-emergent 2-4 weeks before your region's typical nutsedge germination window (check local agricultural extensions for exact dates). If you miss this window, nutsedge will sprout, and you'll be back at square one. I mark my calendar with reminders—trust me, it's worth the effort.
☀️ Step 4: Strengthen Grass Competition
After eliminating the seed heads, focus on crowding out nutsedge with dense, healthy grass. Overseed bare spots with a shade-tolerant blend (if needed) and apply slow-release nitrogen fertilizer to encourage rapid grass growth. Nutsedge thrives in thin turf, so the more grass you have, the less room nutsedge has to spread.
Mow high—3-4 inches—to shade the soil and discourage nutsedge germination. I also adjust my watering schedule to deep, infrequent soakings (every 7-10 days) rather than light, frequent watering. This encourages deep grass roots while depriving nutsedge of the shallow moisture it craves.
⏰ Step 5: Monitor and Repeat as Needed
Check your lawn weekly for new seed heads, especially in high-traffic or shaded areas. Nutsedge often returns in patches, so treat each new cluster immediately. If you see regrowth after 60 days, repeat the digging process—this time, you might need to go 3-4 inches deep to hit the remaining rhizomes.
Real talk: This isn't a one-and-done fix. Nutsedge is persistent, but consistency pays off. After two full growing seasons of vigilance, most lawns see 90% reduction in seed heads. The key is patience—don't skip steps, and you'll reclaim your lawn.
Tips & tricks for eliminating nutsedge seed heads
These battle-tested strategies will help you tackle nutsedge like a seasoned lawn warrior.
Precision Digging Technique: When you're digging in Step 2, focus on removing the entire rhizome network—even small fragments can regenerate. I use a garden fork to loosen the soil first, then carefully lift out the rhizomes in their entirety. Look for the characteristic yellowish, corn-like roots; these are your targets. The deeper you go (up to 3-4 inches), the better your chances of eliminating the source. Remember, those 500+ seeds per cluster are waiting to sprout if you leave any part behind.
Timing is Everything: The 48-hour window after applying pre-emergent herbicide is non-negotiable. This is when the chemical barrier becomes fully effective. I set a reminder on my phone for the exact day—missing this window means nutsedge will sprout and you'll have to start over. Also, time your digging sessions for early morning or late afternoon when the soil is moist but not saturated; this makes extraction cleaner and more efficient.
Equipment Upgrade: While a hand trowel works, I've found that a rhizome knife (a specialized garden tool with a narrow, pointed blade) makes the job significantly easier. It lets you cut through tough rhizomes without damaging surrounding grass. For large lawns, consider renting a sod cutter—it removes the top layer of soil where nutsedge rhizomes reside, making the process faster. Just be sure to dispose of the removed sod properly to prevent spreading seeds.
Post-Treatment Care: After eliminating seed heads, maintain your lawn's health to prevent regrowth. In Step 4, those deep, infrequent waterings (every 7-10 days) are crucial—they encourage grass roots to grow deep, creating a competitive environment that nutsedge can't tolerate. I also recommend applying a slow-release nitrogen fertilizer to give your grass the boost it needs to outcompete any remaining nutsedge.
Pro Tips for Yellow Nutsedge Seed Head
- These battle-tested strategies will help you tackle nutsedge like a seasoned lawn warrior.
- Precision Digging Technique: When you're digging in Step 2, focus on removing the entire rhizome network—even small fragments can regenerate.
- Timing is Everything: The 48-hour window after applying pre-emergent herbicide is non-negotiable.
Frequently asked questions
about yellow nutsedge seed heads—and how to tackle them before they take over your lawn!What does a yellow nutsedge seed head look like, and how do I confirm it’s nutsedge?
A yellow nutsedge seed head resembles a small, yellowish-green, feather-like cluster that grows on a thin, grass-like stem. Unlike grass, nutsedge produces a triangular, yellow-brown tuber underground. If you spot these feathery plumes in summer, it’s likely nutsedge—no seed head, just a telltale sign of its invasive nature!
When is the best time to remove yellow nutsedge seed heads to stop regrowth?
Act now—before the seed heads mature! Once they turn brown (late summer to early fall), the plant has already spread via tubers. Pull or mow them down early (spring to mid-summer) to prevent new tubers from forming. Pro tip: Hand-pulling works best when soil is moist!
Can I kill yellow nutsedge with vinegar or natural remedies?
While vinegar (20-30% acetic acid) or boiling water can kill young nutsedge, it’s not reliable for established tubers. For long-term control, pre-emergent herbicides (like oxyfluorfen) or post-emergent options (like glyphosate) are more effective. Pro tip: Combine with soil solarization for stubborn patches!
Why does yellow nutsedge keep coming back even after treatment?
Nutsedge spreads via underground tubers, not seeds! If you see regrowth, the tubers survived. Reapply herbicide or dig out tubers (they’re yellow, triangular, and potato-like). Prevent future invasions by improving drainage and avoiding overwatering—nutsedge thrives in soggy soil!
How can I prevent yellow nutsedge seed heads from spreading to other lawn areas?
Start with proper lawn maintenance:
- Mow high (3-4 inches) to shade out weeds.
- Water deeply but less frequently to dry soil between waterings.
- Apply pre-emergent herbicide in early spring to block new growth.
- Remove thatch (nutsedge loves thick layers).
Wrapping up and next steps
Mastering the battle against yellow nutsedge seed heads takes patience and precision—but you’ve got this! 🌱 By following the right techniques, from pre-emergent herbicides to manual removal, you can reclaim your lawn in just 60 days. The key is consistency and acting before those pesky seed heads spread.
Ready to take action? Start by testing your soil this weekend and pick your preferred method (organic or chemical). Small steps now mean a lush, nutsedge-free lawn soon—your future self will thank you! 🌿✨