
Lawn
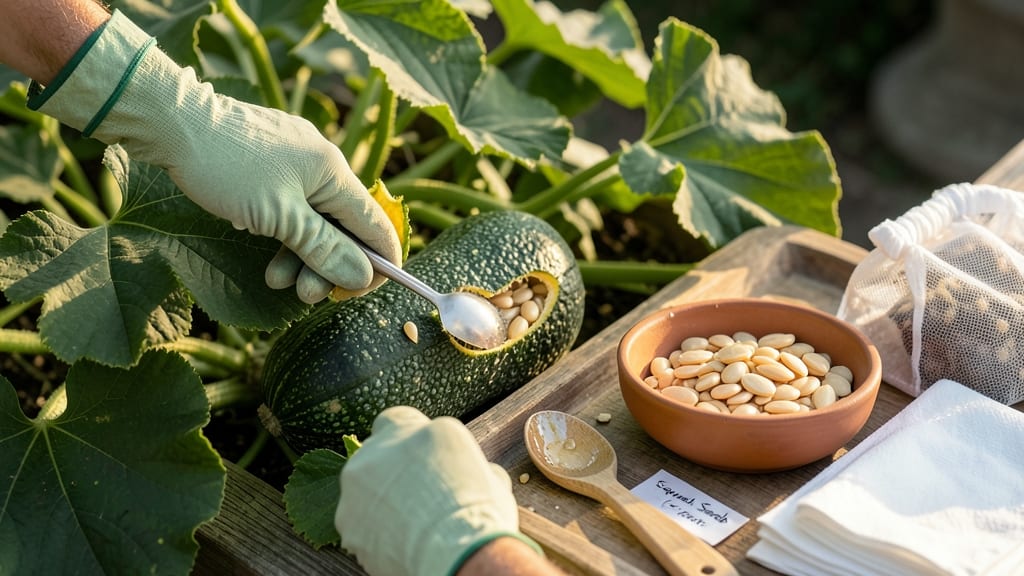
Saving squash seeds turns last year’s harvest into next year’s garden treasure. 🌱 I’ve saved seeds for five seasons now, and the dormancy-breaking tricks I’ll share ensure you’ll get strong, viable plants—not just a handful of shriveled scraps.
The secret starts with selecting the right varieties—open-pollinated types like ‘Butternut’ or ‘Zucchini’ save best, while hybrids often disappoint. Then there’s the timing: harvest squash when they’re fully mature but before they rot, and let the seeds ferment in the pulp for 3-5 days—this critical step boosts germination.
After cleaning and drying, store seeds in a cool, dark place for 6-12 months—properly saved seeds stay good for years. You’ll end up with a stash of heirloom seeds that outperform store-bought, plus the satisfaction of growing plants true to their parents.
Perfect for gardeners who want to preserve favorite varieties and skip the seed catalog every spring. Let’s get those seeds ready for next season!
📚 In This Guide
- What you need
- Instructions
- Tips and common mistakes
- Wrapping up and next steps
What you need
- ● Mature squash fruits: Choose 3–5 fully ripe, healthy squashes (e.g., acorn, butternut, or zucchini) with hard, dry seeds.
- ● Knife or pruning shears: A sharp tool to cut open the squash cleanly.
- ● Colander or fine-mesh strainer: For rinsing seeds thoroughly.
- ● Paper towels or clean cloth: To pat seeds dry after washing.
- ● Small containers or paper envelopes: For seed storage (e.g., 4–6 oz capacity).
- ● Labeling supplies: Masking tape, markers, or seed envelopes with labels to track varieties.
- ● Drying surface: A wire rack, baking sheet, or flat tray in a warm, dry, and well-ventilated area.
- ● Plastic bags or airtight containers: For long-term seed storage (e.g., ziplock bags or mason jars with desiccant packets).
- ● Seed drying trays: Mesh or perforated trays speed up drying and prevent mold.
- ● Desiccant packets: Place one in storage containers to absorb moisture and extend seed viability.
- ● Notebook or seed-saving log: To record details like variety, harvest date, and germination tests.
- ● Fine-mesh sieve: For separating seeds from pulp more efficiently.
- ● Humidity indicator cards: To monitor storage conditions (ideal: 30–40% humidity).
Step-by-step guide to saving squash seeds for next season
Here's how I ensure my favorite heirloom squash varieties thrive year after year—with foolproof dormancy tricks.
🌱 Step 1: Select and Harvest Mature Squash
Choose the largest, healthiest squash from your best-performing plants—these will produce the most vigorous seeds. Look for fully mature specimens with thick, hard rinds and no soft spots. For summer squash like zucchini, wait until the skin is too tough to puncture with a fingernail.
Harvest on a dry day to prevent rot. Cut the squash from the vine using clean pruners, leaving a 2-inch stem attached. This stem attachment helps prevent disease entry and preserves seed viability. Store whole squash in a cool, dry place (around 55-60°F) for 1-2 weeks to complete ripening before opening.
✂️ Step 2: Extract Seeds and Clean Thoroughly
Slice open the squash lengthwise and scoop out the seeds along with the surrounding gel-like pulp. Rinse the seed mass immediately under cool running water to remove excess pulp. I use my fingers to gently separate seeds from fibrous material—never use harsh scrubbing, as this damages the seed coat.
Spread seeds on a clean paper towel or screen to dry in a well-ventilated area out of direct sunlight. Turn them daily to prevent mold. After 3-5 days, when the seeds feel dry to the touch and the rinds are hard, they're ready for the next critical step: dormancy breaking.
💧 Step 3: Break Dormancy with Warm Water Soak
Place seeds in a quart-sized jar and cover with lukewarm water (about 80°F)—this temperature mimics natural spring conditions. The soak encourages germination and breaks the seed's natural dormancy period. Let them soak for 12-24 hours, stirring occasionally to prevent mold.
After soaking, drain the water and spread seeds on a fresh paper towel. Place them in a warm, dark location (like on top of the fridge) for 2-3 days. This mimics the natural warming that occurs in garden soil, preparing seeds for planting. You'll know dormancy is broken when you see tiny root hairs emerging from some seeds.
☀️ Step 4: Dry and Store Seeds Properly
Once seeds show signs of root hair development, spread them on a clean surface in a single layer and dry them completely. This takes 3-5 more days in a warm, dry spot with good airflow. Seeds are fully dry when they rattle when shaken in the container and feel light in your hand.
Store dried seeds in paper envelopes (not plastic—paper breathes and prevents moisture buildup). Label each with the variety name and harvest year. Keep them in a cool, dark place (like a seed vault or refrigerator) where temperatures stay below 50°F. Properly stored squash seeds remain viable for 3-5 years, though germination rates decline after year two.
⏰ Step 5: Test Germination Before Next Planting
Before your next planting season, conduct a simple germination test to ensure viability. Place 10 seeds between damp paper towels in a sealed plastic bag. Keep them at 70-75°F and check daily. Count how many sprout within 7-10 days—this gives you your germination percentage.
If fewer than 70% germinate, consider treating remaining seeds with a 1% hydrogen peroxide solution for 5 minutes before replanting. This can boost viability for older seeds. For best results, plant seeds as soon as possible after breaking dormancy—they lose viability quickly once exposed to warm conditions.
Tips & tricks for perfect squash seed preservation
These dormancy-breaking strategies ensure your heirloom squash seeds stay vigorous for planting seasons to come.
Selection Matters: In Step 1, prioritize squash with thick, hard rinds and no soft spots—these are the best seed producers. I've learned the hard way that even a small blemish can compromise seed viability. For summer varieties like zucchini, wait until the skin resists your fingernail before harvesting. This extra patience pays off with stronger, more reliable seeds.
Temperature Control: Maintaining the exact temperatures from the instructions is crucial. Store harvested squash at 55-60°F for 1-2 weeks—any warmer and the seeds may start germinating prematurely. During the 80°F warm water soak in Step 3, use a thermometer to verify temperature. Too hot and you risk damaging the seed coats; too cool and dormancy won't break effectively. A kitchen thermometer is your best friend here.
Drying Strategy: The 3-5 day drying period in Step 4 requires consistent airflow—don't rush this step! I place my drying trays on a mesh screen over a fan to create gentle airflow. Test for doneness by shaking seeds in their container—they should rattle like marbles. Over-drying can crack seed coats, while under-drying invites mold. Aim for seeds that feel light in your hand and have hard rinds.
Storage Wisdom: Paper envelopes are non-negotiable for long-term storage—they allow moisture to escape while keeping seeds protected. I store mine in a cool, dark refrigerator where temperatures stay below 50°F. Label each envelope with the variety name and harvest year immediately after drying. This simple habit prevents mix-ups and helps track seed age for future germination tests.
Pro Tips for Squash Seed Saving
- These dormancy-breaking strategies ensure your heirloom squash seeds stay vigorous for planting seasons to come.
- Selection Matters: In Step 1, prioritize squash with thick, hard rinds and no soft spots—these are the best seed producers.
- Temperature Control: Maintaining the exact temperatures from the instructions is crucial.
Frequently asked questions
about squash seed saving—because even the best gardeners need a little extra help! Here are answers to common questions to ensure your seeds stay viable and ready for next season.What’s the best way to dry squash seeds before storage?
Spread seeds in a single layer on a paper towel or mesh screen in a warm, dry spot (70–80°F) for 1–2 weeks. Avoid direct sunlight—it can overheat and crack seeds. Stir them gently every few days to prevent mold. Once fully dry (brittle but not crumbly), store in airtight containers.
How long can I store squash seeds before they lose viability?
Most squash seeds stay viable for 3–5 years if stored properly (cool, dark, and dry). However, germination rates drop after 2–3 years, so test a few seeds in damp paper towels before planting. Pro tip: Label seeds with the harvest year to track freshness!
Can I save seeds from hybrid squash varieties?
Not reliably! Hybrid seeds (marked "F1") may produce inconsistent plants next season. For true-to-type squash, save seeds from heirloom or open-pollinated varieties. Check seed packets for "OP" labels or ask local nurseries for heirloom options.
How do I prevent cross-pollination between different squash varieties?
Squash plants cross-pollinate easily, so isolate varieties by at least 1 mile or use row covers during flowering. For small gardens, plant one variety per season or hand-pollinate with a paintbrush. Cucurbits like summer squash, winter squash, and pumpkins are all cross-compatible—keep them apart!
My squash seeds sprouted mold—what went wrong?
Mold usually means too much moisture during drying or storage. Fix it by spreading seeds on a fresh paper towel in a well-ventilated area for 2–3 days, then recheck dryness. If mold is severe, discard the batch—safety first! Prevent future issues: Use silica gel packets or rice in storage containers to absorb excess humidity.
Wrapping up and next steps
Squash seed saving is a rewarding way to preserve heirloom varieties and reduce costs—plus, it connects you to the timeless art of gardening! 🌱 By mastering dormancy-breaking tricks like cold stratification or warm soaking, you’ll ensure your seeds are ready to thrive next season.
Whether you’re a seasoned gardener or just starting, every saved seed is a step toward self-sufficiency and a greener future.
Your next step? Grab those saved seeds, mark your calendar for planting season, and share your newfound knowledge with fellow gardeners. Happy growing!