
Lawn
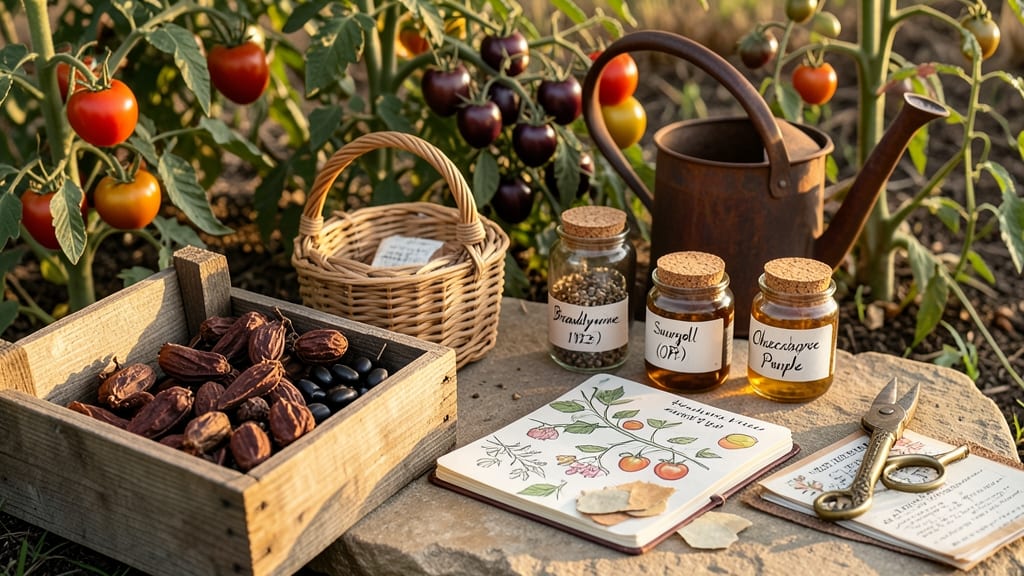
Saving heirloom seeds from Seed Savers Exchange connects you to generations of gardeners—and the future of food. 🌱 These open-pollinated varieties aren’t just plants; they’re living pieces of history, adapted to local climates and flavors lost in grocery stores.
The exchange lets you grow, save, and share seeds that commercial companies would never sell.
What makes heirlooms special is their genetic diversity—each seed carries traits developed over decades, like disease resistance or unique flavors. My Black Krim tomatoes produce fruit so rich that neighbors ask for cuttings every summer.
The exchange provides detailed growing guides, ensuring you’ll get the best results from varieties like Mammoth Melting Snow peas or Amarillo chiles that thrive in specific conditions.
Once you grow them, saving seeds is simpler than you’d think: let plants mature fully, collect dry seeds, and store them in cool, dark places. A paper envelope in the freezer keeps them viable for years.
You’ll end up with seeds that outperform hybrid varieties in taste, hardiness, and adaptability—plus the satisfaction of preserving something rare.
This isn’t just gardening; it’s seed stewardship. By joining the exchange, you support biodiversity while gaining access to thousands of varieties that would disappear without gardeners like you. Start with one packet this season, and you’ll be hooked on the cycle of saving, sharing, and growing.
📚 In This Guide
- What you need
- Instructions
- Tips and common mistakes
- Wrapping up and next steps
What you need
- ● Heirloom Seeds: Purchase or trade through Seed Savers Exchange (or other reputable sources). Start with 1–5 varieties (e.g., tomatoes, beans, or flowers) to avoid overwhelm.
- ● Garden Space: Direct sunlight (6–8+ hours/day) for most veggies.
- ● Well-draining soil (amend with compost if needed).
- ● Space for plants to grow to maturity (check seed packet spacing guidelines).
- ● Basic Gardening Tools: Hand trowel (for planting/seeding).
- ● Pruners or scissors (for harvesting).
- ○ Gloves (optional but recommended).
- ● Harvesting Supplies: Paper bags or breathable fabric sacks (to dry seeds).
- ● Small mesh bags or envelopes (for long-term storage).
- ● Permanent markers (to label seeds).
- ● Storage Containers: Air-tight jars or containers (with silica gel packets for humidity control).
- ● Cool, dark place (e.g., fridge or basement) for seed viability.
- ● Seed catalogs or journals (to track varieties and notes).
- ● Humidity pack (for seeds needing stratification).
- ● Grow lights (for indoor seed starting or low-light areas).
- ● Local gardening community (for trades, tips, and moral support!).
Step-by-step guide to participating in seed Savers Exchange
Here’s how to join the community and preserve rare heirloom seeds properly.
🌱 Step 1: Join the Seed Savers Exchange Community
Start by visiting the official Seed Savers Exchange website and creating a free membership account. This unlocks access to their vast catalog of rare, open-pollinated heirloom seeds—varieties that have been saved and shared for generations. The exchange operates on a trust-based system, so honesty about growing conditions and seed viability is critical.
Once registered, browse the seed library to identify varieties that suit your climate and growing goals. Look for detailed descriptions that include days to maturity, light requirements, and pollination notes—these details help you choose seeds that will thrive in your space. I always start with a few easy-to-grow varieties like Cherokee Purple tomatoes or Black Krim tomatoes to build confidence before tackling more delicate species.
📝 Step 2: Request and Receive Seeds
Place your seed orders through the exchange’s online system, specifying the quantities you need. Most varieties are offered in 10-20 seed packets, which is plenty for a small garden. The exchange ships seeds twice yearly—once in the fall for spring planting and again in the spring for summer crops. Plan ahead to ensure you receive seeds in time for your planting season.
When your seeds arrive, store them in a cool, dark place (like a refrigerator) until ready to plant. Label each packet with the variety name, requested year, and any special notes about growing conditions. I also add a small sticker with the last frost date for my region to avoid planting too early. This step is crucial—mislabeling seeds can lead to confusion and wasted effort.
🌿 Step 3: Grow and Save Seeds Properly
Follow the growing instructions provided with each seed packet, paying close attention to spacing, watering needs, and pollination requirements. Heirloom seeds often require careful isolation to prevent cross-pollination, especially for crops like tomatoes, peppers, and beans. For example, if growing Brandywine tomatoes, keep them at least 100 feet away from other tomato varieties to preserve their true characteristics.
Once plants mature, harvest seeds at the peak of ripeness. For tomatoes, this means letting them fully ripen on the vine before scooping out the gel and seeds. Rinse the seeds thoroughly, then ferment them in a jar of water for 3-5 days to separate the viable seeds from the pulp. After fermentation, strain the seeds through a fine mesh, rinse them again, and spread them on a paper towel to dry completely in a well-ventilated area. Store dried seeds in airtight containers in a cool, dark place for long-term preservation.
✂️ Step 4: Document and Share Your Seeds
Keep detailed records of your growing experience, including notes on germination rates, plant health, and any challenges you faced. The Seed Savers Exchange encourages members to share their findings with the community, which helps others avoid common pitfalls. For example, if you notice a particular variety struggles in your climate, document it so others can make informed choices.
Once your seeds are dry and tested for viability (a simple germination test works), you can offer them back to the exchange. Fill out the seed donation form, specifying the quantity and any notes about growing conditions. The exchange relies on this cycle of sharing to keep rare varieties alive. I’ve found that the most rewarding part of seed saving is seeing how others grow and adapt the seeds you’ve shared—it’s a living legacy.
📅 Step 5: Plan for Future Seasons
At the end of each growing season, review your seed-saving successes and challenges. Identify varieties that performed well in your garden and note which ones may need adjustments in future years. For example, if a particular pepper variety struggled with blight, consider growing it in a different location or under row covers next season.
Update your seed inventory to reflect what you’ve saved and what you’ll need to request again. The Seed Savers Exchange allows you to track your seed orders and donations through your account, making it easy to plan ahead. By the end of the season, you’ll have a clear picture of what to order for the next planting cycle. This ongoing process ensures that rare heirloom seeds continue to thrive for generations to come.
Tips & tricks for preserving heirloom seeds through seed Savers Exchange
Here's what nobody tells you about maximizing your seed-saving success with rare varieties.
Climate Matching: Don't just choose seeds based on names—pay close attention to the days to maturity listed for each variety. In my Zone 6 garden, I avoid varieties needing over 90 days to mature, as our growing season is limited. Cross-reference with your last frost date (which you should note on seed packets) to ensure you'll have enough time for full development. I always add a 10-day buffer to account for unpredictable weather.
Pollination Isolation: The 100-foot isolation distance for tomatoes and peppers is non-negotiable if you want to maintain true-to-type seeds. For smaller gardens, consider growing only one variety per species or use row covers during flowering to prevent cross-pollination. I've seen beginners accidentally mix varieties just because they were planted close together—this ruins the integrity of heirloom traits.
Fermentation Precision: That 3-5 day fermentation for tomato seeds isn't arbitrary—it's when the gel breaks down and viable seeds sink while non-viable ones float. I use a clear jar so I can see when the seeds separate clearly. If you're in a hurry, you can reduce to 2 days but risk losing some good seeds in the rinse. The key is patience here—rushing leads to lower germination rates later.
Documentation System: Create a simple spreadsheet with columns for variety, germination rate, days to maturity, and any notes about disease resistance. I've learned which varieties thrive in my shady spot and which need full sun through this system. The Seed Savers Exchange values this kind of data—it helps preserve varieties that might struggle in other climates but excel in yours.
Pro Tips for Seed Savers Exchange Heirloom Seeds
- Here's what nobody tells you about maximizing your seed-saving success with rare varieties.
- Climate Matching: Don't just choose seeds based on names—pay close attention to the days to maturity listed for each ...
- Pollination Isolation: The 100-foot isolation distance for tomatoes and peppers is non-negotiable if you want to main...
Frequently asked questions
What exactly are heirloom seeds, and why save them?
Heirloom seeds are open-pollinated varieties passed down through generations, often dating back over 50 years. They’re prized for their unique flavors, disease resistance, and historical significance. Saving them preserves biodiversity, reduces reliance on corporate seed monopolies, and keeps rare varieties alive for future gardeners.
When is the best time to start saving seeds from my garden?
Timing depends on the plant! For most vegetables, let them fully mature and produce seeds—like tomatoes or beans—before harvesting. Flowers like zinnias or marigolds release seeds when dry. Pro tip: Label plants as you go to avoid mix-ups! Start seed-saving in late summer or early fall for most annuals, but research specific varieties for precise timing.
How much does it cost to join Seed Savers Exchange, and are there alternatives?
Seed Savers Exchange offers free membership with a $10 annual donation to cover shipping. For alternatives, check local seed swaps, Facebook gardening groups, or organizations like Seed Savers Exchange’s online catalog. Many community gardens also host seed libraries—free and accessible!
Will saving seeds work if I have pollinators like bees visiting my garden?
Yes! Cross-pollination by bees or wind is natural, but it can mix traits. To maintain purity, isolate plants (e.g., grow tomatoes 10+ feet apart from other varieties) or choose self-pollinating plants like peas or beans. If cross-pollination happens, embrace it—you might discover a new heirloom!
What if my saved seeds don’t grow the next year?
Seeds lose viability over time (usually 2–5 years for most veggies). Store them in a cool, dry place (like a sealed jar in the fridge) to extend shelf life. If they fail to sprout, try testing viability by soaking a few in water—if they sink, they’re likely still good! For stubborn seeds, check moisture levels or try scarifying (lightly nicking the seed coat).
Wrapping up and next steps
Joining the Seed Savers Exchange isn’t just about growing plants—it’s about preserving history, fostering community, and ensuring heirloom seeds thrive for future generations. 🌱 Whether you’re a seasoned gardener or a curious beginner, every seed you save or share makes a difference.
Start small: pick one rare variety, grow it with care, and pass it along to keep these botanical treasures alive.
🌟 Ready to Take the Next Step?
- Browse the Seed Savers Exchange catalog and pick your first heirloom seeds!
- Join local gardening groups or forums to connect with fellow seed savers.
- Share your harvest stories—inspire others to join the movement!