
Lawn
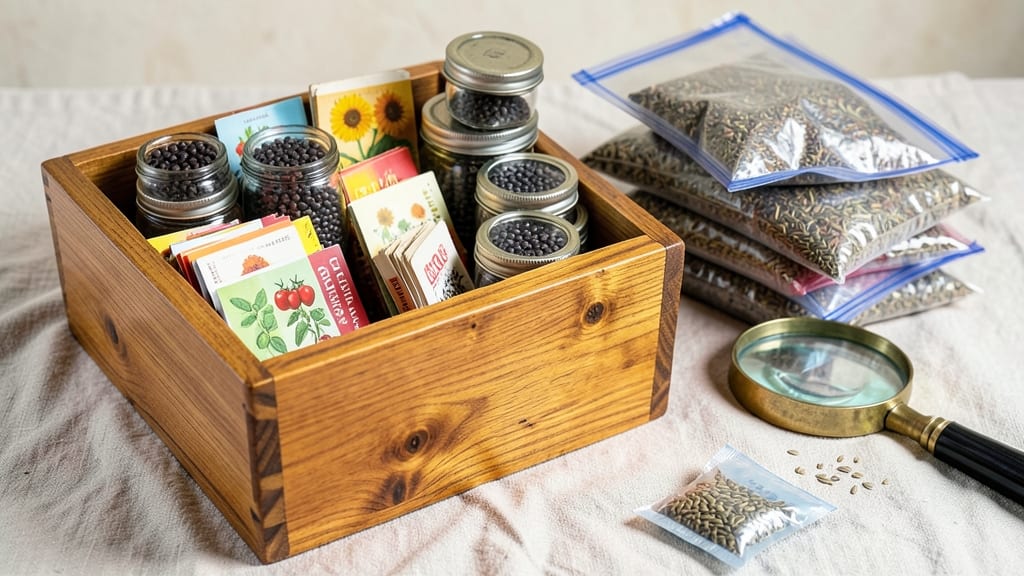
Your seed packet storage could be the difference between a thriving garden and wasted dollars. 🌱 Properly stored seeds last for years—sometimes even decades—while poor storage turns them into dust. The secret lies in controlling moisture, temperature, and light, not just stuffing packets in a drawer.
You’ll need airtight containers (glass jars or resealable bags work best), silica gel packets to absorb moisture, and a cool, dark place like a basement or pantry. Label everything with the seed type and date—trust me, you’ll forget otherwise. Even heirloom seeds stay viable for 5-10+ years when stored right.
Imagine opening a jar next spring and finding seeds that germinate just as well as brand-new ones. The key is keeping humidity below 30% and temperatures between 32-41°F. Avoid refrigerators or freezers unless you’re storing seeds for 20+ years—temperature swings do more harm than good.
Common mistakes? Storing seeds in their original packets (they’re not airtight) or leaving them near windows (light degrades viability). For rare seeds, add a tiny desiccant packet and check containers every 6 months—old seeds deserve extra care.
📚 In This Guide
- What you need
- Instructions
- Tips and common mistakes
- Wrapping up and next steps
What you need
- ● Air-tight containers: 2-3 containers (e.g., Mylar bags, glass jars with rubber seals, or plastic bins with gaskets). Choose sizes that fit your seed collection (small for herbs, larger for bulk seeds).
- ● Silica gel packets: 1-2 packets per container (to absorb moisture). Opt for food-grade silica gel to avoid chemical risks.
- ● Desiccant bags: 1-2 per container (alternative to silica gel; reusable and eco-friendly).
- ● Permanent markers: 1-2 (for labeling containers with seed names, varieties, and dates).
- ● Small paper envelopes or labels: Enough to organize seeds by type (e.g., flowers, veggies, herbs).
- ● Climate-controlled space: A cool, dry area (ideal temp: 32–41°F or 0–5°C; humidity below 40%). A refrigerator or root cellar works well.
- ● Vacuum sealer: For long-term storage (extends shelf life by removing air).
- ● Digital hygrometer: To monitor humidity levels in your storage space.
- ● UV-protective bags: If storing seeds near windows (sunlight degrades viability).
- ● Seed catalog or spreadsheet: To track inventory and germination rates.
Step-by-step guide to storing seed packets for maximum longevity
Here’s how to preserve your seeds for years—no fancy equipment needed, just smart climate control.
🪴 Step 1: Choose the Right Airtight Containers
Start with containers that seal tightly to block moisture and oxygen, which degrade seeds over time. I recommend using glass jars with airtight lids (like mason jars) or food-grade plastic containers with rubber gaskets. Avoid metal containers—they can corrode and introduce moisture. Label each container with the seed variety and storage date using a permanent marker or masking tape.
For extra protection, place a small silica gel packet inside the container. These packets absorb excess moisture and are often included in new shoes or electronics packaging. A single packet can keep seeds dry for years. If you’re storing multiple seed types, use separate containers to prevent cross-contamination.
☀️ Step 2: Control Temperature and Humidity
Seeds last longest in a cool, stable environment—ideally between 40-50°F. A refrigerator’s crisper drawer is perfect, but avoid the freezer unless storing seeds for decades (some seeds can survive freezing, but temperature fluctuations damage them). If your fridge isn’t humidity-controlled, place a small dehumidifier packet inside the container alongside the seeds.
Never store seeds in areas prone to temperature swings, like near windows, ovens, or heaters. I’ve seen seeds lose viability after just a few months in a garage that reached 90°F—they shrank and sprouted poorly. A basement or pantry with consistent temperatures works well if humidity stays below 40%. Use a hygrometer to monitor levels if needed.
💧 Step 3: Organize and Rotate Seeds Strategically
Arrange seeds by expiration date (or planting priority) with the oldest in front. I use a small cardboard divider inside each container to separate seed packets by type, making it easy to grab what I need without disturbing others. Store seeds in their original packets if they’re still sealed—these are designed to protect against light and pests.
Check your seed stash once a year to test viability. Place a few seeds from each packet in a damp paper towel, seal in a plastic bag, and wait 7-10 days. If 80% or more sprout, they’re good to plant. Discard packets that fail this test or show signs of mold, pests, or musty odors. This simple step saves money and ensures strong germination rates.
⏰ Step 4: Protect Against Light and Pests
Light accelerates seed degradation, so store containers in opaque or dark-colored containers. If using clear jars, wrap them in aluminum foil or place them inside a black plastic storage bin. Avoid storing seeds near windowsills or under grow lights—even indirect light can reduce their lifespan.
Pests like weevils or moths can infiltrate seeds through tiny tears in packets. To deter them, add a cedar block or a few cloves of garlic to the container. Cedar naturally repels insects, and garlic’s scent confuses pests without harming seeds. If you notice holes or webbing in packets, quarantine the affected seeds immediately and inspect nearby containers for signs of infestation.
🌱 Step 5: Adjust for Long-Term Storage (5+ Years)
For seeds you plan to save beyond 5 years, add an extra layer of protection. Place the sealed container inside a second airtight bag with a oxygen absorber packet (available online or in vacuum-sealing kits). These packets remove oxygen, which slows seed aging. Store the double-sealed container in the freezer for maximum longevity—just thaw it overnight before planting.
Document your storage conditions and test a few seeds annually to track viability. Over time, you’ll notice some seeds (like tomatoes or peppers) lose vigor faster than others (beans or peas often last 10+ years). Keep a simple logbook with notes on storage environments and germination rates. This helps you refine your method and ensures you always have fresh, high-quality seeds ready for planting.
Tips & tricks for perfect seed packet preservation
These smart strategies will help you extend seed viability beyond what you’d expect—think of it as a seed vault in your kitchen.
Container Selection Matters: While glass jars and food-grade plastic work perfectly, avoid metal containers—they can corrode over time and introduce moisture that ruins seeds. I’ve found that amber glass jars provide the best protection against light degradation. If using clear containers, wrap them in aluminum foil to block all light exposure. For extra security, place a small piece of parchment paper between the seeds and container lid to prevent condensation buildup during temperature changes.
Temperature Stability is Non-Negotiable: The 40-50°F range isn’t arbitrary—it’s where seed metabolism slows dramatically. If your refrigerator’s crisper drawer fluctuates above 50°F, consider using a small cooler with ice packs inside your pantry for more stable conditions. I’ve seen seeds stored at 90°F lose viability in just 3 months—don’t let that happen to your hard-earned seeds! For long-term storage, a seed-safe freezer (with no temperature fluctuations) is ideal, but only for seeds you won’t plant for several years.
The Viability Test You Can't Skip: That 7-10 day germination test in Step 3 is your best quality control. I recommend testing seeds from each container annually—even if they look fine. Some seeds like tomatoes and peppers degrade faster than others, so prioritize testing these varieties. For a quicker check, try the "float test": Place seeds in water—if they sink, they’re likely viable; if they float, discard them. This method gives you results in just minutes.
Pest Prevention Goes Beyond Cedar Blocks: While cedar blocks and garlic are excellent, consider adding a small bay leaf to your containers—its natural oils repel pests without affecting seeds. For severe infestations, place containers in a freezer for 48 hours to kill any eggs or larvae. I’ve also had success using diatomaceous earth (food-grade only) lightly sprinkled around the container’s interior—it’s a natural insecticide that won’t harm seeds but will deter weevils and moths.
Pro Tips for Seed Packet Storage
- These smart strategies will help you extend seed viability beyond what you’d expect—think of it as a seed vault in your kitchen.
- Container Selection Matters: While glass jars and food-grade plastic work perfectly, avoid metal containers—they can corrode over time and introduce moisture that ruins seeds.
- Temperature Stability is Non-Negotiable: The 40-50°F range isn’t arbitrary—it’s where seed metabolism slows dramatically.
Frequently asked questions
Got questions about keeping your seed packets fresh and ready for planting? Here are some of the most common ones—and their answers!
How long can I store seed packets in airtight containers?
Most seeds last 1–5 years in ideal conditions (cool, dry, dark). Vegetable seeds (like tomatoes or peppers) typically stay viable for 2–3 years, while flower seeds (e.g., marigolds) may last 1–2 years. Always check the packet for a germination rate—if it drops below 80%, it’s time to replace them!
What’s the best temperature for storing seed packets long-term?
Aim for 32–41°F (0–5°C), like a refrigerator or root cellar. Never store them in:
- Freezers (moisture buildup ruins seeds)
- Garages or attics (temperature swings speed up aging)
- Direct sunlight (heat degrades seed quality faster)
Pro tip: Use a small zip-top bag with a silica gel packet inside your airtight container for extra humidity control!
Can I reuse seed packets from last year?
Yes, but only if they’re fully sealed and undamaged. Remove old labels, add this year’s date, and store them in a fresh airtight container with a desiccant packet (like those in shoe boxes). Never reuse packets if they’ve been cut open or exposed to moisture—contamination risks are too high!
What if my seeds get damp or moldy?
If you spot moisture or mold, act fast:
- Dry them immediately with a fan or silica gel for 24–48 hours.
- Check viability by planting a few—if they sprout, the rest may still be good!
- Discard moldy seeds (they won’t grow and could spread contamination).
Prevent this by double-sealing packets in a vacuum or Mylar bag before storing!
Are there alternatives to airtight containers for seed storage?
Try these budget-friendly options:
- Glass jars with tight lids (like canning jars with rubber seals).
- Vacuum-sealed bags (remove air to prevent moisture).
- Food-grade buckets with gamma seals (common in seed banks).
- Ammo cans or metal tins (rust-proof and airtight).
Just avoid plastic bins without seals—they trap humidity and encourage mold!
Wrapping up and next steps
Properly storing your seed packets in airtight containers with climate control isn’t just smart—it’s a game-changer for your gardening success! 🌱 By keeping seeds dry, cool, and protected from light, you’ll extend their viability and ensure vibrant blooms or lush lawns when you’re ready to plant.
Whether you’re a seasoned gardener or just starting out, these simple steps will save you time, money, and frustration.
Now that you’re armed with the secrets to seed packet storage, take the next step: organize your collection today! Grab those containers, label your seeds, and create a cozy, climate-controlled haven for your future garden. Happy growing! 🌿