
Lawn
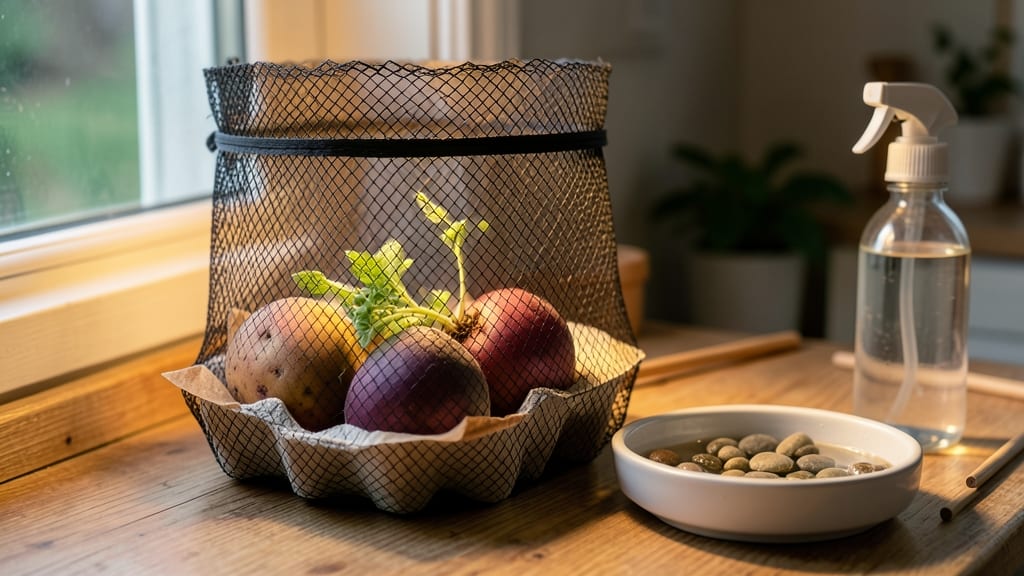
Pre-sprouting seed potatoes gives you a 10-day head start on the growing season. 🌱 Honestly, I used to just toss them in the ground and hope for the best—until I saw how much faster chitted potatoes established roots and produced tubers.
The secret is simple: expose them to light and warmth for a few weeks before planting, and you’ll get stronger, more vigorous plants that outperform store-bought starts.
You’ll need just a few things: seed potatoes (certified disease-free), a bright windowsill or grow light, and a container with good airflow. The process takes about 3-4 weeks, but it’s worth it—your plants will emerge from the soil faster and with fewer setbacks.
I’ve even used this method in small spaces, like my balcony, with great results.
By the time you plant, your potatoes will have 1-2 inch sprouts called "chits," which means they’ll hit the ground running. You’ll notice fewer rot issues, better early growth, and a more reliable harvest. Plus, it’s a great way to use up those small, odd-shaped potatoes that stores reject.
Timing is key—start in late winter (about 6-8 weeks before your last frost date) so the sprouts aren’t too long by planting time. If they get leggy, just trim them back slightly before planting.
This method works for both early and late varieties, so you can adapt it to your growing season.
📚 In This Guide
- What you need
- Instructions
- Tips and common mistakes
- Wrapping up and next steps
What you need
- ● Seed potatoes: Certified disease-free, organic seed potatoes (1–2 lbs per 10 sq ft of garden space). Choose varieties suited to your climate (e.g., Yukon Gold, Red Pontiac, or Fingerlings).
- ● Cardboard egg cartons or paper trays: 1–2 cartons per 10 seed potatoes (or repurpose any shallow, breathable container).
- ○ Newspaper or paper towels: Enough to line the bottom of your chitting container (optional but helps with drainage).
- ● Bright, cool location: A sunny windowsill (50–60°F / 10–15°C) or a basement with indirect light. Avoid direct sunlight or heat sources.
- ● Spray bottle: For lightly misting potatoes if your space is dry (keep them moist but not soggy).
- ● Plastic wrap: A loose covering to retain humidity (remove once sprouts appear).
- ● Labeling tags: To track potato varieties if testing multiple types.
- ● Garden journal: To note sprouting progress and planting dates.
How to pre-sprout seed potatoes for stronger plants
Here's the simple method I use every spring to get my potato plants off to a flying start.
🌱 Step 1: Select and Prepare Your Seed Potatoes
Choose certified seed potatoes—the ones labeled for planting, not grocery store spuds. Look for varieties that suit your climate, like Yukon Golds or Red Pontiacs. Cut larger tubers into 2-ounce pieces, ensuring each has at least 2-3 eyes (those little dimples where sprouts emerge). Let the cut surfaces dry for 24 hours before proceeding—this prevents rot.
I always store my seed potatoes in a cool, dark place (around 40-50°F) for 4-6 weeks before sprouting. This mimics winter dormancy and triggers stronger chits (those little white sprouts). If you're starting late, no worries—just give them an extra week or two of chill time before sprouting.
☀️ Step 2: Create Ideal Sprouting Conditions
Place your seed potatoes in a bright, cool spot (around 55-65°F) with indirect light—no direct sun yet. I use a cardboard egg carton or small paper cups to hold each piece upright. This keeps them stable and prevents rot from sitting in moisture. Keep them in a well-ventilated area to avoid humidity buildup.
Check them every 3-4 days and mist lightly if the sprouts look dry. You'll see tiny white chits (sprouts) appear in 2-4 weeks. These chits should be 1-2 inches long before planting—this means your potatoes are ready. If they grow too long (3+ inches), they'll snap easily when planted.
💧 Step 3: Harden Off Before Planting
About 10-14 days before your last frost date, move the sprouted potatoes to a cooler outdoor spot (like a garage or shaded patio) for 4-6 hours daily. This hardens them off—just like with seedlings. Gradually increase their outdoor time until they're getting full sun exposure for the entire day.
If frost is still a threat, cover them with a lightweight cloth at night. You'll know they're ready when the chits are sturdy and green-tipped—this means they're tough enough to handle transplanting. Plant them 2-3 inches deep, eyes facing up, in well-drained soil when the ground reaches 45°F or warmer.
⏰ Step 4: Plant at the Right Time
Wait until the soil is workable and at least 45°F before planting—cold soil slows growth and attracts pests. Space your potatoes 12 inches apart in rows 3 feet apart for good airflow. If you're in a short-season area, plant earlier-maturing varieties first. Water them deeply right after planting to settle the soil around the tubers.
Mulch with 2-3 inches of straw or grass clippings to retain moisture and regulate soil temperature. Avoid waterlogging—the soil should stay evenly moist but not soggy. In 4-6 weeks, you'll see green foliage breaking through the soil, signaling your chitted potatoes are thriving.
Tips & tricks for pre-sprouting seed potatoes
These simple strategies will help you avoid common pitfalls and get your seed potatoes ready for planting like a pro.
Selection Tip: When cutting your seed potatoes into 2-ounce pieces with 2-3 eyes each, make sure the cuts are clean and even. Using a sharp knife and cutting board prevents crushing the tubers, which can lead to rot. I like to use a ceramic knife for this step—it's gentler on the potatoes than stainless steel. The 24-hour drying period is crucial; this allows the cut surfaces to form a protective callus that prevents moisture loss and disease.
Temperature Matters: The 40-50°F storage temperature before sprouting might seem chilly, but it's essential for breaking dormancy. If your home is warmer than this, store them in your refrigerator's crisper drawer. Too much warmth can cause the potatoes to sprout too quickly before they're ready, leading to weak chits. I've learned this the hard way—once, I stored mine in a warm pantry and ended up with spindly sprouts that snapped when I tried to plant them.
Harden Off Gradually: The 10-14 day hardening-off period is where many gardeners go wrong. Start with just 4-6 hours of outdoor exposure and gradually increase the time. Sudden exposure to full sun can shock the potatoes, causing them to wilt or even die. Look for green-tipped chits as your signal that they're ready for planting—this color change indicates they've developed some natural protection against the elements.
Planting Depth: Planting your chitted potatoes 2-3 inches deep might seem shallow, but this depth allows the soil to warm up quickly in spring, encouraging faster growth. If you plant them too deep, they may take longer to emerge and could even rot before breaking through the soil. I use a simple garden trowel to create small holes and place each potato gently, ensuring the eyes are facing upward.
Pro Tips for Pre Sprouting Seed Potatoes
- These simple strategies will help you avoid common pitfalls and get your seed potatoes ready for planting like a pro.
- Selection Tip: When cutting your seed potatoes into 2-ounce pieces with 2-3 eyes each, make sure the cuts are clean a...
- Temperature Matters: The 40-50°F storage temperature before sprouting might seem chilly, but it's essential for break...
Frequently asked questions
Got questions about pre-sprouting seed potatoes? You’re not alone! Here are answers to the most common concerns—so you can chit potatoes like a pro and boost your garden’s success.
Why should I pre-sprout potatoes instead of planting them right away?
Pre-sprouting (or "chitting") gives your seed potatoes a head start by encouraging early growth. Sprouts (called "chits") form before planting, meaning your tubers waste less energy establishing roots—leading to faster, stronger plants and a bigger harvest. Plus, it helps avoid rot from damp soil if planted too soon!
How long does it take for seed potatoes to sprout?
With the right conditions (cool, bright light and temps between 40–50°F (4–10°C)), you’ll see tiny sprouts in 2–4 weeks. Larger, more robust chits (about ½–1 inch long) take 4–6 weeks. Pro tip: Avoid warm spots—they’ll grow leggy and weak!
What if my potatoes sprout but turn green or scrawny?
Green sprouts mean too much light (they’re producing chlorophyll). Move them to a darker, cooler spot (like a basement or garage with indirect light). Scrawny sprouts? They’re likely too warm—adjust to 40–50°F (4–10°C) and avoid direct sunlight until planting.
Can I still plant potatoes if they haven’t sprouted yet?
While chitting gives you an edge, unsprouted seed potatoes will still grow—just with a slightly delayed harvest. If you’re in a hurry (like a short growing season), plant them anyway! Just bury them 4–6 inches deep in well-drained soil for best results.
What if I miss the chitting window—can I still pre-sprout?
Yes! Start chitting 4–6 weeks before your last frost date, but if you’re late, don’t stress. You can still chit them indoors for 2–3 weeks before planting—just expect a slightly shorter season. The key is to plant as soon as soil is workable (around 40°F/4°C).
Wrapping up and next steps
Pre-sprouting your seed potatoes is a simple yet powerful way to give your garden a head start!
By encouraging those tiny chits to emerge before planting, you’ll enjoy faster germination, stronger plants, and a bountiful harvest. 🌱 Whether you’re a seasoned gardener or just starting out, this small step can make a big difference in your potato-growing success.
Ready to take the next step? Grab your seed potatoes, follow the easy chitting process, and watch your garden thrive! Happy planting—and may your harvest be plentiful! 🌟