
Container Gardens
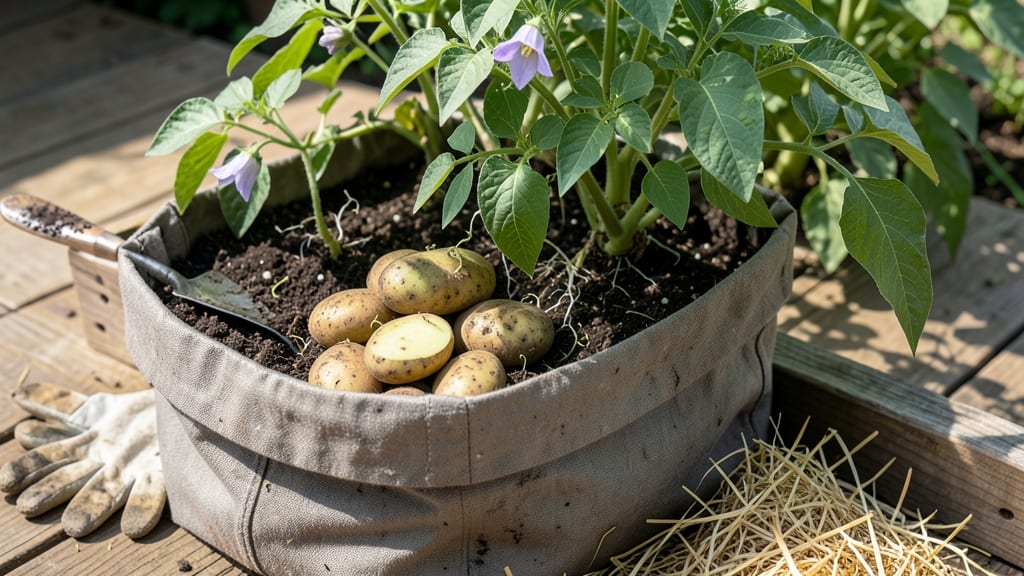
Planting seed potatoes in containers turns even a tiny balcony into a high-yield potato patch. 🌱 I’ve turned my 5-gallon buckets into a 3-month harvest system that beats traditional gardening—no digging, no weeds, and no wasted space.
The secret? Chunky soil, the right container, and a little patience for those first green shoots.
You’ll need containers at least 10 inches deep (5-gallon buckets work perfectly), well-draining potting mix, and seed potatoes cut into chunks with at least two eyes each.
Place them 4 inches deep, spacing chunks 6 inches apart, and keep them in full sun. Water when the top inch feels dry—never soggy.
By early summer, you’ll be harvesting small, tender potatoes that taste sweeter than store-bought. The best part? You can keep planting new chunks every 2 weeks for a continuous harvest. Even my black-thumb neighbor pulled this off last year—it’s that foolproof.
Works for patios, decks, or sunny windowsills—just avoid plastic containers (they rot). If your potatoes turn green, they’ve been exposed to light; dig them up before they get bitter. Ready to grow your own spuds without the garden?
📚 In This Guide
- What you need
- Instructions
- Tips and common mistakes
- Wrapping up and next steps
What you need
- ● Seed potatoes: 3–5 lbs (1.4–2.3 kg) of certified disease-free seed potatoes (choose early-maturing varieties like Yukon Gold or Red Pontiac for faster harvests).
- ● Containers: 2–3 large pots (10–12 inches deep) or a single tall container (18+ inches deep) with drainage holes. Use fabric grow bags or 5-gallon buckets for flexibility.
- ● Potting mix: 2–3 bags (1–2 cubic feet each) of high-quality, well-draining potting soil (avoid garden soil—it compacts!).
- ● Organic fertilizer: A balanced, slow-release fertilizer (10-10-10 or 5-5-5) or compost (1–2 cups per container).
- ● Watering can or hose: With a gentle spray nozzle for even moisture.
- ● Scissors or knife: For cutting seed potatoes (if needed).
- ● Potato grow bags with built-in drainage (saves space!).
- ● Mulch (straw or grass clippings) to retain moisture.
- ● Plant markers to track varieties.
- ● A moisture meter to monitor soil hydration.
- ● Epsom salt (1 tbsp per container) for extra magnesium.
Step-by-Step instructions for planting seed potatoes in containers
Here's how to grow a thriving potato harvest in containers using minimal space and effort.
🪴 Step 1: Select and Prepare Your Containers
Choose containers that are at least 10-12 inches deep—deeper is better for larger yields. I prefer fabric grow bags because they allow roots to breathe and prevent waterlogging. Make sure each container has drainage holes; if not, drill them yourself. For four plants, you'll need four containers of this size.
Clean the containers thoroughly with a 10% bleach solution to kill any pathogens. Rinse well and let them dry completely. Place the containers in a spot that receives full sun (6-8 hours daily)—potatoes need plenty of light to produce tubers. If your space only gets partial sun, choose early-maturing varieties to maximize your harvest.
🌱 Step 2: Chit Your Seed Potatoes Before Planting
Place your seed potatoes in a bright, cool spot (around 50-55°F) for 4-6 weeks before planting. This process, called "chitting," encourages sprouts to grow from the "eyes" (the dimples on the potato). You'll see tiny green shoots emerge—these are your future stems.
Don't let the sprouts grow longer than 1-2 inches before planting. If they get too long, they'll break easily. I like to place my seed potatoes on a seed tray or egg carton in a sunny windowsill. This keeps them stable and gives the sprouts room to grow without bending over.
💧 Step 3: Layer Soil and Plant Your Chitted Potatoes
Fill the bottom of each container with 2-3 inches of potting soil. This initial layer gives the first set of sprouts enough room to establish roots. Gently place one chitted seed potato on top of the soil, with the sprouts facing upward. Cover the potato with another 2 inches of soil, leaving the sprouts exposed.
As the sprouts grow, add more soil in layers. When the sprouts reach about 4-6 inches tall, add another 2 inches of soil, burying the lower half of the plant. Repeat this process every 2-3 weeks until the container is nearly full. This method, called "hilling," encourages more tuber formation and prevents the plant from toppling over.
☀️ Step 4: Water and Maintain Your Container Potatoes
Water your container potatoes deeply when the top 1-2 inches of soil feel dry. Avoid wetting the leaves to prevent disease. I use a watering can with a narrow spout to direct water to the base of the plants. Mulch the soil surface with straw to retain moisture and keep the soil temperature consistent.
Fertilize lightly every 4-6 weeks with a balanced, organic fertilizer (like 5-5-5). Too much nitrogen will produce lots of foliage but few tubers. Watch for signs of pests like Colorado potato beetles—remove them by hand if you spot them. If the plants start to flower, you're on track for a good harvest!
⏰ Step 5: Harvest When Plants Begin to Die Back
When the foliage turns yellow and dies back (usually around 3 months after planting), it's time to harvest. Carefully empty the container and sift through the soil to find your potatoes. Handle them gently to avoid bruising, which can lead to rot.
Let the harvested potatoes cure in a dark, dry place for 1-2 weeks before storing. This helps toughen their skins and prevents spoilage. Store them in a cool, dark spot (around 40-50°F) with good airflow. With container growing, you'll get smaller potatoes than in-ground, but they'll be just as flavorful and perfect for roasting or mashing.
Tips & tricks for perfect container-grown potatoes
Here's what nobody tells you about maximizing your container potato harvest—lessons I learned after three failed attempts.
Container Depth Matters: While the instructions recommend 10-12 inches, I've found that 14-16 inches makes a noticeable difference in tuber size—especially for larger varieties like Yukon Golds. The extra depth gives roots room to grow downward instead of circling. If you're using shallower containers, opt for early-maturing varieties that produce smaller tubers.
Chitting Shortcut: The 4-6 weeks chitting time can feel long, but here's a pro move: Place your seed potatoes in an egg carton on a sunny windowsill and rotate them weekly. This ensures even light exposure and prevents leggy sprouts. If you're in a hurry, you can speed up the process by keeping them in a slightly warmer spot (around 60°F) for 2-3 extra weeks—just don't exceed 65°F or the sprouts will scorch.
Soil Layering Secret: When you're adding those 2-inch soil layers in Step 3, mix in a handful of compost or well-rotted manure with each addition. This gives your plants a slow-release nutrient boost without overwhelming them. I also like to use a mix of potting soil and coconut coir—it retains moisture better than straight potting soil, which is critical in containers where soil dries out faster.
Harvest Timing: The 3-month guideline is perfect for most varieties, but watch for these signs instead: When about 75% of the foliage has yellowed and died back, that's your cue. If you wait too long, your potatoes will start sprouting, which makes them less storable. For a smaller, "new potato" harvest, you can gently dig around the base of the plant when it's about 6 weeks old—just leave some tubers to mature for your main harvest.
Pro Tips for Planting Seed Potatoes In Containers
- Here's what nobody tells you about maximizing your container potato harvest—lessons I learned after three failed atte...
- Container Depth Matters: While the instructions recommend 10-12 inches, I've found that 14-16 inches makes a noticeab...
- Chitting Shortcut: The 4-6 weeks chitting time can feel long, but here's a pro move: Place your seed potatoes in an e...
Frequently asked questions
Got questions about growing seed potatoes in containers?
You’re not alone—this method is packed with potential, but it’s smart to know the ins and outs before diving in. Here are answers to the most common queries to help you crush your container potato harvest!
When is the best time to plant seed potatoes in containers?
Plant seed potatoes 2–3 weeks after your last frost date when soil temps hit 45°F (7°C) or warmer. In containers, you can start slightly earlier (indoors with grow lights) if your climate is cool. Aim for spring planting—summer starts can work in mild zones, but heat stress may reduce yields.
What’s the best container size for seed potatoes?
Go big or deep—each potato needs 10–12 inches of depth and 12+ inches of diameter per plant. A 5-gallon bucket works for 1–2 potatoes, while half-barrels or fabric grow bags (20+ gallons) let you grow 3–4 potatoes per container. Avoid shallow trays—they’ll stunt growth!
Can I use regular grocery store potatoes as seed potatoes?
Nope! Store-bought potatoes are treated to prevent sprouting and may carry diseases. Instead, buy certified seed potatoes (from nurseries or online) or cut your own from organic, untreated potatoes. Let them sprout in light for 2–4 weeks before planting to jumpstart growth.
How do I keep pests (like slugs or wireworms) out of my container potatoes?
Containers help, but pests can still sneak in! Prevent them with:
- Copper tape around container edges (slugs hate it!).
- Diatomaceous earth (food-grade) on soil surface.
- Row covers for early growth stages.
- Neem oil spray (weekly) to deter beetles/worms.
Check undersides of leaves daily—early action is key!
What can I plant with seed potatoes in containers to save space?
Pair potatoes with shallow-rooted, fast-growing companions like:
- Bush beans (fix nitrogen in soil).
- Spinach or lettuce (harvest before potatoes bulk up).
- Nasturtiums (deter pests and add color!).
Avoid tomatoes, peppers, or eggplants—they’re in the same family and compete for nutrients.
Why aren’t my container potatoes growing? Troubleshooting guide
| Issue | Likely Cause | Fix It! |
|---|---|---|
| Sprouts turn yellow | Overwatering or poor drainage | Let soil dry slightly between waterings; add perlite to mix. |
| Small, stunted tubers | Not enough light or nutrients | Move to full sun (6+ hours/day); fertilize with balanced 10-10-10 every 3 weeks. |
| Holes in leaves | Pests (slugs, flea beetles) | Handpick pests; use row covers or neem oil. |
| Leaves wilt in heat | Underwatering or root stress | Water deeply daily; mulch with straw to retain moisture. |
Wrapping up and next steps
Growing seed potatoes in containers is a rewarding, space-saving hack that delivers fresh, homegrown spuds in just three months—no yard required! 🌱 Whether you’re a city dweller with a balcony or a gardener maximizing small plots, this no-dig method proves that big harvests start with small, smart steps.
Now that you’re armed with the right tools, timing, and techniques, it’s time to roll up your sleeves and plant those potatoes.
👉 Next up: Mark your calendar for planting day, prep your containers, and watch your green thumbs (and potato patch!) thrive. Happy growing! 🌟