
Lawn
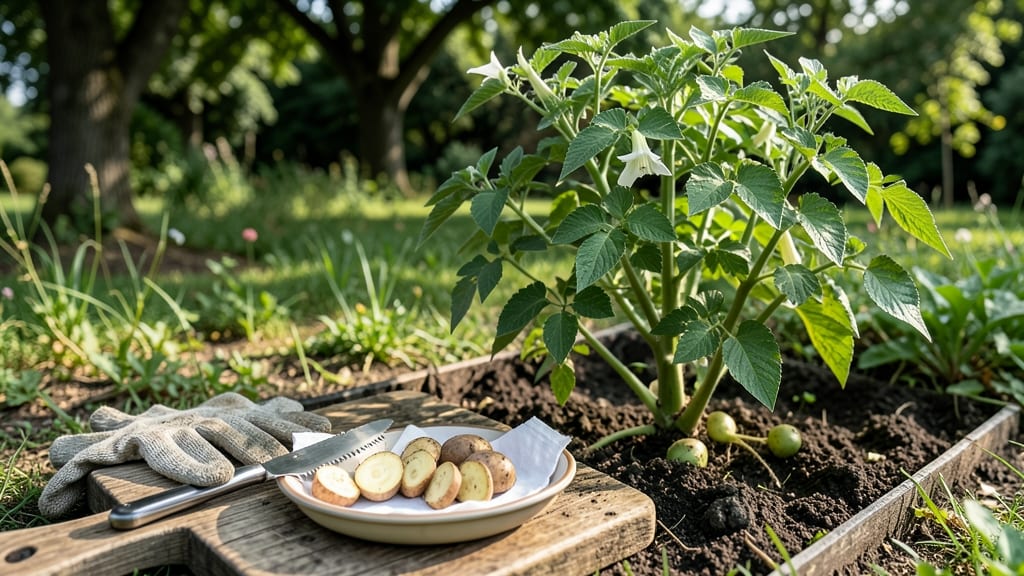
Cutting seed potatoes doubles your harvest—here's how to do it right. 🌱 I used to buy bags of seed potatoes, but now I cut my own from store-bought spuds, saving money and getting more plants. The key is making clean cuts and letting them heal before planting.
You'll need a sharp knife, a clean cutting board, and certified disease-free seed potatoes. Avoid cutting store-bought potatoes unless they're labeled "seed potatoes"—regular spuds might carry diseases that ruin your crop. Cut each potato into chunks with at least two "eyes" (sprouts) per piece.
After cutting, let the pieces dry for 24 hours in a cool, dark place. This "curing" prevents rot and helps them establish roots faster. Store them in a paper bag or cardboard box until planting time—never plastic, which traps moisture.
Once healed, plant your cut potatoes 2-3 inches deep with the eyes facing up. In 4 weeks, you'll have chubby sprouts ready for transplanting. The secret to success? Sharp tools, proper healing, and patience—no rushing this step!
📚 In This Guide
- What you need
- Instructions
- Tips and common mistakes
- Wrapping up and next steps
What you need
- ● Seed potatoes: 1–2 lbs (preferably certified disease-free, organic if possible). Look for varieties like Yukon Gold, Red Pontiac, or Fingerlings.
- ● Sharp knife or seed potato cutter: A clean, sterilized knife (or a dedicated potato cutter) to make precise cuts without crushing the tubers.
- ● Cutting board: A sturdy, food-safe board to protect your countertops and keep things tidy.
- ○ Hydrogen peroxide (3%) or cinnamon: 1–2 tbsp (optional but highly recommended) to disinfect cuts and prevent rot.
- ● Newspaper or paper towels: Enough to line a tray or box for drying cuts (about 2–3 sheets).
- ● Container for drying: A shallow tray, cardboard box, or even a baking sheet to hold cut potatoes while they heal.
- ● Growing containers or garden bed: Containers: 5–10 gallon pots with drainage holes (1–2 potatoes per 5-gallon container).
- ● Garden bed: Loose, well-draining soil with a pH of 5.0–6.5 (amend with compost if needed).
- ● Potting soil or compost: 1–2 bags of high-quality, peat-free potting mix or compost for containers.
- ● Watering can or hose with gentle spray: For even moisture without disturbing sprouts.
- ● Plant labels: To track varieties if growing multiple types.
- ● Fertilizer (balanced 10-10-10 or potato-specific): 1–2 tbsp per container at planting time.
- ● Row covers or frost cloth: For early planting in cold climates.
- ● Pruning shears: For trimming excessive foliage later in the season.
- ● Gloves: To keep hands clean while handling soil or potatoes.
Step-by-step instructions for cutting seed potatoes
Here's how to turn store-bought potatoes into vigorous, sprout-filled cuttings ready for planting.
🌱 Step 1: Select and Prepare the Right Potatoes
Choose organic seed potatoes (not grocery store potatoes—they're treated to prevent sprouting). Look for ones with firm, unblemished skin and eyes (those little dimples) that are at least ½ inch deep. I like to pick medium-sized ones because they're easier to handle and cut.
Place the potatoes in a cool, dark spot for 2-4 weeks before cutting. This lets the eyes develop strong, white sprouts that are ready to grow. If you skip this step, your cuttings will take longer to establish roots. Once sprouts are 1-2 inches long, it's time to cut.
✂️ Step 2: Cut Potatoes into Individual Pieces
Wash the potatoes first to remove dirt, then use a clean, sharp knife to cut them into pieces. Each piece should have at least 2-3 eyes and 1-2 inches of potato flesh around them. I aim for 4 pieces per potato—this gives me enough cuttings for a small garden.
Let the cut pieces air-dry for 24 hours before planting. This prevents rot by sealing the cut edges. Place them on a paper towel-lined tray in a shady spot. After drying, you'll see the cut surfaces turn slightly dull and firm—that's your sign they're ready.
🪴 Step 3: Plant Cuttings in Containers or Directly in Soil
Fill 6-inch deep containers or a garden bed with well-draining soil mixed with a little compost. If planting in containers, use the 4 cuttings per 6-inch pot you prepped earlier. For garden beds, space cuttings 12 inches apart in rows 2 feet apart. The key here is depth: plant with the eyes facing up and the cut side down, about 4 inches deep.
Water gently but thoroughly so the soil is moist but not soggy. You'll know it's right when water runs out the bottom of containers or soaks into the soil without pooling. Avoid wetting the sprouts—they're delicate and can rot if overwatered.
☀️ Step 4: Provide Ideal Light and Temperature
Place containers or garden beds in a spot with partial shade for the first 2 weeks. This helps the cuttings focus on root growth instead of leaf production. After that, move them to full sun (6+ hours daily). You'll see new green leaves emerge within 10-14 days—that's your signal the roots are established.
Keep the soil evenly moist but not waterlogged. Stick your finger 1 inch deep—if it feels dry, water lightly. Aim to keep the temperature between 50-65°F during this phase. If nights dip below 40°F, cover cuttings with lightweight row fabric to protect them.
💧 Step 5: Fertilize and Prepare for Transplanting
After 4 weeks, your cuttings should have 3-4 inches of healthy green growth and strong roots. This is when I add a balanced, water-soluble fertilizer (like 10-10-10) at half-strength. Mix it into the watering can and apply it once every 2 weeks to encourage robust growth without burning the plants.
If you're growing in containers, keep them there until the flowers form (about 8-10 weeks total). For garden beds, you can transplant the cuttings to their permanent spot once they've developed 6+ inches of growth. Harden them off first by placing them outside for 1-2 hours daily, gradually increasing time over 5-7 days.
Tips & tricks for perfect seed potato cuttings
Here's how to avoid common pitfalls and maximize your potato cuttings' success.
Sprout Development: Don't rush the 2-4 week pre-sprouting phase—this is where the magic happens. Place potatoes on a paper towel in a cardboard box to catch any moisture, which helps speed up sprouting slightly. I've found that 1-2 inch sprouts are ideal because they're sturdy enough to handle but haven't used up too much of the potato's energy reserves. If your kitchen stays above 65°F, you might see sprouts in just 2 weeks.
Cutting Technique: Use a clean, sharp knife and make sure each cutting has 2-3 eyes—this ensures each piece will grow into a full plant. Here's what I learned the hard way: never cut through the eyes if you can avoid it. If you must, make sure each piece still has at least one eye. Also, aim for 1-2 inches of potato around each eye—this gives the cutting enough energy to establish roots before it starts growing leaves.
Air-Drying Secret: The 24-hour air-drying period is crucial for preventing rot. I've had the best success placing cuttings on a paper towel-lined tray in a shady spot with good air circulation. After drying, the cut surfaces should look slightly dull and firm. If they still look wet or shiny, give them another 12 hours to dry completely. This step might seem tedious, but it's what separates healthy plants from rotten cuttings.
Planting Depth: When planting, remember the 4 inches deep rule—this is especially important for garden beds. Plant with the eyes facing up and the cut side down. The cut side will naturally develop roots, while the eyes will grow into stems and leaves. In containers, I like to use 6-inch deep pots because they give roots room to grow without becoming root-bound too quickly.
Pro Tips for Cutting Seed Potatoes
- Here's how to avoid common pitfalls and maximize your potato cuttings' success.
- Sprout Development: Don't rush the 2-4 week pre-sprouting phase—this is where the magic happens. Place potatoes on a ...
- Cutting Technique: Use a clean, sharp knife and make sure each cutting has 2-3 eyes—this ensures each piece will grow...
Frequently asked questions
Got questions about cutting seed potatoes? You’re not alone—this method saves space and money, but it’s easy to get tripped up on timing, prep, or troubleshooting. Here are answers to the most common queries to help you grow chubby, sprout-ready potatoes like a pro!
How do I know if my seed potatoes are ready to cut?
Look for healthy, firm potatoes with sprouts 1–2 inches long (about the size of a pencil). Avoid soft, shriveled, or moldy tubers—these won’t root well. Cut 2–3 weeks before planting to give the cut surfaces time to callus over (a dry, scab-like layer forms naturally).
Can I cut seed potatoes too early or too late?
Timing matters! Cutting too early (before sprouts appear) delays growth, while cutting too late (right before planting) risks rot. Aim for 2–3 weeks before the last frost in your zone. If you’re in a hurry, opt for pre-sprouted potatoes from a nursery—no cutting required!
What’s the best way to cut seed potatoes without ruining them?
Use a clean, sharp knife (sterilize with rubbing alcohol) and make cuts 1–2 inches from the base of each sprout. Each piece should have 1–2 eyes (sprouts) and at least 2 ounces of weight. Let the cut sides air-dry for 24–48 hours in a dark, cool place (like a paper bag) to form a callus—this prevents rot!
Why are my cut seed potatoes rotting after planting?
Rotting usually means one (or more) of these mistakes:
- No callusing: Planting too soon after cutting (wait 24–48 hours for the cuts to dry).
- Dirty knife: Bacteria or fungus from a dull blade can infect the cuts.
- Too much moisture: Overwatering or planting in soggy soil suffocates the tubers.
- Weak sprouts: If sprouts are mushy or black, toss the potato—it’s diseased.
For extra protection, dust cut sides with cinnamon or sulfur powder (natural antifungals) before planting.
Can I reuse leftover seed potatoes from last year?
Yes! Store leftover seed potatoes in a cool (35–40°F), dark, dry place (like a cardboard box in the fridge) for up to 4–5 months. Avoid refrigerating for long—cold temps turn starches to sugar, making them sweet and less ideal for sprouting. If they’re still firm and sprouting, they’re fair game!
Wrapping up and next steps
Cutting seed potatoes is a simple yet powerful way to boost your garden’s yield with minimal effort!
By following these steps—choosing healthy tubers, slicing them carefully, and nurturing your chubs—you’ll be rewarded with vigorous, ready-to-plant sprouts in just 4 weeks. 🌱 Whether you’re a beginner or a seasoned gardener, this method is your ticket to a bountiful harvest.
Now that you’re armed with the know-how, take the next step: grab your potatoes, a sharp knife, and start chubbing! Watch those sprouts grow, and soon, you’ll be planting with confidence—knowing you’ve given your future plants the best possible start. Happy gardening! 🌿