
Lawn
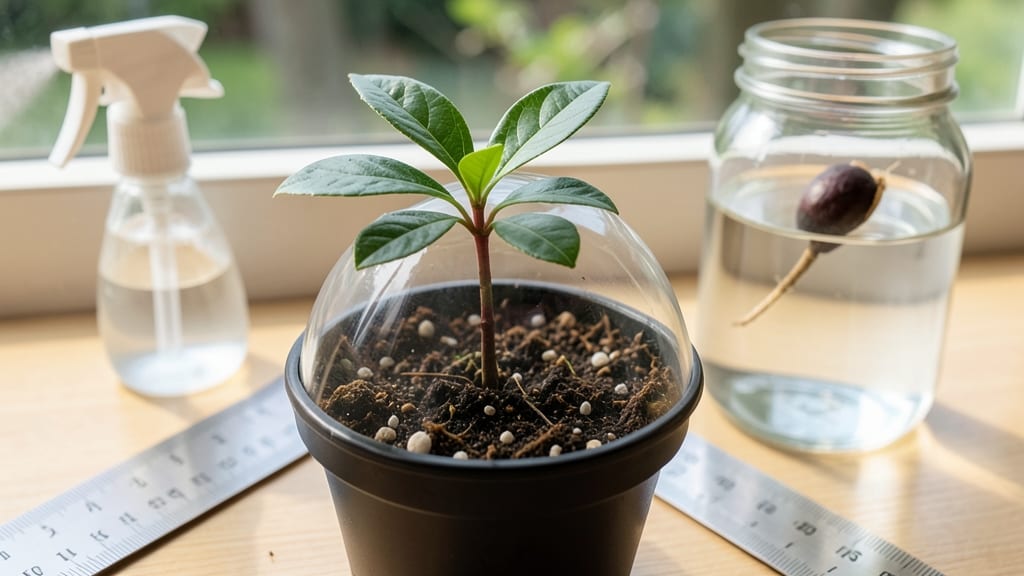
Watching the stages of mango seed growth feels like nurturing a tiny miracle—especially when those first bright green leaves push through the soil just 10 days after planting. 🌱 The journey from seed to sapling in 60 days is all about patience, warmth, and keeping the soil consistently moist (but not soggy).
I’ve grown three mango trees this way, and the key to success starts with soaking the seed overnight—skipping this step means waiting weeks longer for germination.
The first two weeks are all about warmth and humidity. Place your seedling under a grow light or in a sunny window where temperatures stay above 70°F, and mist the soil daily to mimic tropical conditions.
You’ll spot the first true leaves (not those tiny seed leaves) around day 14, signaling it’s time to introduce a balanced fertilizer. Too much sun too soon causes the delicate leaves to crisp—so start with 4-6 hours of indirect light and gradually increase exposure.
By day 45, your sapling should be sturdy enough to handle its first transplant into a 5-gallon pot with well-draining soil. Pinch off any flowers that form now—they’ll drain energy from root growth.
With proper care, you’ll have a 2-foot-tall sapling ready for outdoor planting by day 60, though full fruit production takes 5-7 years. The real magic? Watching those glossy leaves unfurl like a promise of tropical sunshine on your windowsill.
Here’s the secret weapon: prune aggressively in the first year to encourage a strong central stem. Most gardeners give up at this stage because growth feels slow, but stick with it—your mango tree’s future depends on these early months.
The payoff? A shade tree that outlives you, with fruit that tastes like childhood vacations. Now, let’s get those seeds sprouting!
📚 In This Guide
- What you need
- Instructions
- Tips and common mistakes
- Wrapping up and next steps
What you need
- ● Mango seeds: 3–5 fresh, plump seeds from a ripe, organic mango (avoid treated or hybrid varieties).
- ● Small pots or containers: 4–6 biodegradable pots (3–4 inches in diameter) or plastic cups with drainage holes.
- ● Well-draining potting mix: 2–3 bags of a high-quality seed-starting mix (e.g., 50% peat moss, 30% perlite, 20% vermiculite).
- ● Watering can or spray bottle: With a fine mist setting for gentle hydration.
- ● Clear plastic wrap or humidity dome: To create a mini greenhouse effect (e.g., a plastic bag or cloche).
- ○ Grow lights or sunny windowsill: A full-spectrum LED grow light (optional but helpful for indoor setups) or a south-facing window with 6+ hours of sunlight.
- ● Fertilizer: A balanced, water-soluble fertilizer (e.g., 10-10-10 NPK) for seedlings (start after 4–6 weeks).
- ● Pruning shears or scissors: For trimming roots or seedlings as needed.
- ● Seed germination aid: A small amount of cinnamon powder (1 tsp) to prevent mold on seeds.
- ● Heating mat: A seedling heat mat (70–80°F) to speed up germination in cooler climates.
- ● pH testing kit: To ensure your soil pH is between 5.5–7.0 (ideal for mango seeds).
- ● Larger nursery pots: 1-gallon pots for transplanting once seedlings are 6+ inches tall.
- ● Mulch: Organic mulch (e.g., straw or wood chips) to retain moisture in outdoor setups.
Step-by-Step guide to tracking mango seed growth stages
Watch your mango seed transform from a tiny sprout to a sturdy sapling in just two months.
🌱 Step 1: Germinate the Seed and Monitor Early Sprout Development
Start by soaking your mango pit in warm water for 24 hours to soften the hard outer shell. Place it between two damp paper towels, then fold the towels around it and secure with a rubber band. Keep the towels consistently moist—never soggy—and store the wrapped seed in a warm, dark place (around 75-80°F).
In 7-14 days, you’ll see the first signs of life: a tiny white root (radicle) breaking through the seed coat. Once this happens, transfer the seed to a small 3-4 inch pot filled with a light, well-draining potting mix. The radicle should be the first part to emerge, followed by the shoot (plumule) within 3-5 days of the root’s appearance.
🌿 Step 2: Transition to Soil and Observe First True Leaves
After the shoot emerges, place the pot in bright, indirect light (no direct sun yet—this can scorch the delicate seedling). Water gently from the bottom by placing the pot in ½ inch of water for 10-15 minutes, then drain excess. This method prevents overwatering, which can cause the seedling to rot.
Within 2-3 weeks of germination, the first pair of true leaves (not the initial seed leaves) will unfurl. These leaves are darker green and more defined than the initial cotyledons. At this stage, your seedling is photosynthetically active and can handle slightly more light. Gradually introduce 2-3 hours of morning sun per day to harden it.
☀️ Step 3: Strengthen the Seedling for Outdoor Conditions
By 4-6 weeks, your mango seedling should have 3-4 sets of true leaves and a thickened stem. This is the ideal time to introduce it to outdoor conditions if temperatures are consistently above 60°F. Start with 1-2 hours of shade and slowly increase exposure over 7-10 days, ending with full sun by day 7.
During this phase, water when the top inch of soil feels dry—overwatering is the fastest way to kill a young mango seedling. Fertilize lightly with a balanced, water-soluble fertilizer (diluted to ½ strength) to encourage root and leaf growth. You’ll notice new leaves emerging with a shinier, waxier texture, signaling healthy development.
⏰ Step 4: Prune and Prepare for Sapling Stage
At the 8-week mark, your seedling should be 6-12 inches tall with a sturdy stem. If it’s grown leggy (stretched and weak), it needs more light. Trim any yellowing or damaged leaves with clean scissors to redirect energy to new growth. Pinch back the topmost set of leaves to encourage bushier growth—this technique promotes lateral branching, which is critical for a strong sapling.
By 60 days, your mango seedling will resemble a miniature sapling with multiple sets of leaves and a woody stem. Repot it into a slightly larger container (if still in a small pot) to accommodate its growing roots. Reduce watering slightly—now that it’s larger, it can handle a drier soil profile between waterings.
Tips & tricks for perfect mango seed growth stages
Real talk: Growing a mango seed into a sapling is equal parts rewarding and nerve-wracking. Here's what nobody tells you—these tricks will help you avoid the most common pitfalls and maximize your seedling's potential.
Germination Temperature: That 75-80°F range isn't just arbitrary—it's the sweet spot for breaking dormancy. If your kitchen runs cooler, place the wrapped seed on top of your fridge (not inside) to maintain consistent warmth. I've seen seeds fail to germinate when kept in drafty spots or near air conditioning vents. The key is steady warmth without direct heat sources that could dry out the towels.
Light Transition Strategy: When you're ready to introduce that 2-3 hours of morning sun in Step 2, start with just 30 minutes on the first day. Gradual exposure prevents sunburn on delicate new leaves. I recommend placing the seedling near an east-facing window where it gets gentle morning light but avoids the intense afternoon sun that can scorch tender foliage. Think of it as sun acclimation camp for your little sapling.
Pruning Technique: When you're pinching back those top leaves at the 8-week mark, make your cuts just above a set of leaves where you want new growth to emerge. Use clean, sharp scissors to avoid crushing the stem. I've found that making these cuts at a slight angle helps water bead off the cut rather than pool inside the stem, which reduces rot risk. This is where many beginners go wrong—they either cut too close or too far away, both of which stress the plant.
Soil Moisture Secret: That bottom-watering method in Step 2 is a game-changer for young seedlings. The 10-15 minute soak gives roots exactly what they need without the risk of overwatering. Pro tip: Use a clear pot for the first few weeks so you can actually see when the roots start absorbing water. When the soil stays dark after draining, that's your signal the plant has had enough—usually around 10 minutes for young seedlings. This visual cue prevents the most common killer of young mango saplings: root rot from overenthusiastic watering.
Pro Tips for Mango Seed Growth Stages
- Real talk: Growing a mango seed into a sapling is equal parts rewarding and nerve-wracking. Here's what nobody tells ...
- Germination Temperature: That 75-80°F range isn't just arbitrary—it's the sweet spot for breaking dormancy. If your k...
- Light Transition Strategy: When you're ready to introduce that 2-3 hours of morning sun in Step 2, start with just 30...
Frequently asked questions
Got questions about growing mango trees from seed?
You’re not alone! Here are answers to the most common queries to help you navigate the mango seed growth stages like a pro.
How long does it take for a mango seed to sprout?
A mango seed typically sprouts within 14–30 days after planting, depending on temperature, moisture, and seed viability. Keep the soil consistently moist (not soggy) and place it in a warm spot (70–85°F) for the best results. Patience is key—some seeds take longer!
Can I speed up the germination process?
Yes! Soak the seed in warm water for 24–48 hours before planting to soften the shell. Planting it sideways (not upright) can also encourage faster sprouting. A clear plastic bag over the pot creates a mini greenhouse effect, trapping humidity and warmth—just remove it once the sprout appears.
What if my mango seed doesn’t sprout at all?
Don’t lose hope! Try these fixes:
- Check viability: Squeeze the seed—if it’s hard and dry, it may be dead.
- Adjust moisture: Overwatering can rot the seed; underwatering stalls growth.
- Warmth boost: Place the pot near a sunny window or use a seedling heat mat.
- Fresh seed: Older seeds (over 6 months) germinate poorly. Try a new one!
How big should my mango sapling be before transplanting outdoors?
Wait until your sapling has 3–5 true leaves and is at least 6–12 inches tall before moving it outside. Harden it off gradually by placing it in indirect sunlight for a few hours daily, then full sun. Choose a permanent spot after the last frost—mangoes thrive in USDA zones 10–11 (or in containers for colder climates).
Will my homegrown mango tree produce fruit?
Probably not for 3–5 years—and even then, seed-grown trees rarely bear fruit as reliably as grafted varieties. The fruit may also differ from the parent tree (e.g., smaller, sweeter, or less flavorful). For faster, better results, consider grafting a known cultivar onto your sapling once it’s established.
Wrapping up and next steps
Growing a mango seed into a thriving sapling in just 60 days is a rewarding journey that connects you to nature’s cycle! 🌱 By understanding each stage—from sprouting to root development—you’ve unlocked the secret to nurturing life from something as simple as a seed.
Whether you’re a gardening novice or a green-thumb enthusiast, this process teaches patience, care, and the joy of watching growth unfold.
Now that you’re armed with knowledge, take the next step: plant your first seed today! Start small, experiment with different mango varieties, and document your progress. Who knows? You might just grow more than a plant—you could cultivate a lifelong passion for gardening. Happy growing! 🌿