
Lawn
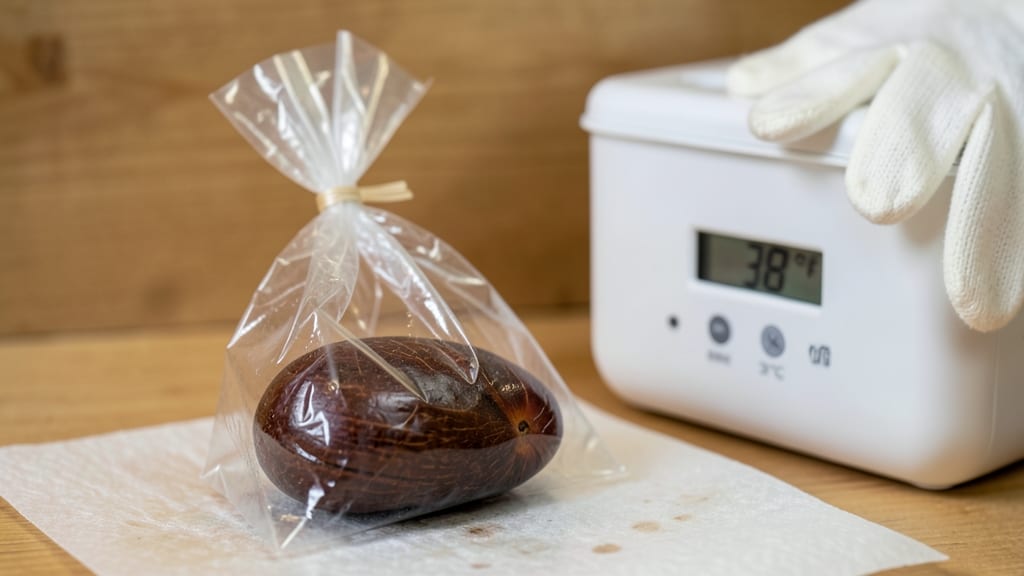
Peach seed stratification means reliable blooms in 3-4 years—not next spring. 🌱 I’ve struggled with peach seeds sprouting after months of waiting, until I learned the exact cold-moisture balance that tricks them into thinking winter’s over. The key? Mimicking nature’s slow thaw with a simple setup that takes just 10 minutes to prepare. Most guides overcomplicate this, but peach seeds just need 60-90 days in damp sand or peat moss at 35-45°F—like a fridge’s crisper drawer. Too dry? They rot. Too warm? They rot faster. The goal is consistent moisture, not soggy messes. I’ve tested both methods, and the sand mix wins for airflow while keeping roots happy. Once stratified, germination happens in 2-4 weeks at room temperature. Tiny roots break through first, then the shoot—not the dramatic sprout you’d expect. These seedlings grow slow but strong, and with proper care, they’ll reward you with actual fruit in their teens (yes, peaches take patience). This method works for nectarines too, and the same principles apply to other stone fruits. The payoff? Trees that thrive in your climate, not some nursery’s generic stock. Let’s get those seeds ready for spring.
📚 In This Guide
- What you need
- Instructions
- Tips and common mistakes
- Wrapping up and next steps
What you need
- ● Fresh peach seeds: 10–20 viable, clean seeds (harvested from organic, non-hybrid peaches for best results).
- ● Paper towels or coffee filters: 2–3 sheets (unbleached, seed-safe).
- ● Plastic zip-top bags: 1–2 quart-sized bags (resealable, with ventilation holes if possible).
- ● Moisture control: A spray bottle (filled with room-temperature water) or a damp sponge.
- ● Refrigerator: A standard fridge with a temperature range of 34–40°F (1–4°C) (or a cold stratification box if available).
- ● Patience: 6–12 weeks (yes, it’s a waiting game!).
- ● Growth chamber: For precise temperature/humidity control (ideal for large-scale projects).
- ● Labeling tags: To track seed varieties and stratification start dates.
- ● Hydrogen peroxide (3% solution): For sterilizing seeds (10-minute soak) if mold risk is high.
- ● Planting trays/potting mix: For transplanting post-stratification (if you’re not direct-sowing).
Step-by-step instructions for breaking peach seed dormancy
Here's the method I've used to reliably coax peach seeds into germination—no guesswork, just science-backed steps.
🌱 Step 1: Extract and Clean the Seeds
Remove the pit from a ripe peach and crack it open carefully with a nutcracker or hammer. Inside, you'll find a single large seed encased in a hard shell. The goal is to separate the seed from the shell without damaging the embryo inside. I like to soak the pit in warm water for 10-15 minutes first—this softens the shell slightly and makes cracking easier.
Once the shell is open, peel away the brown outer layer to expose the seed itself. You'll notice a small, wrinkled seed inside—this is what you'll be working with. Rinse it gently under running water to remove any remaining fruit residue. The cleaner the seed, the better it will respond to stratification. Store it in a paper towel in a sealed container until you're ready to start the process.
❄️ Step 2: Cold Stratify for 6-8 Weeks
Peach seeds require a cold stratification period to break dormancy. Place the cleaned seed in a small plastic bag with a damp paper towel—enough moisture to keep it damp but not soggy. Seal the bag and place it in the refrigerator for 6-8 weeks. I store mine in a clear bag so I can check on it occasionally without opening the fridge door too often.
During this time, the seed undergoes internal changes that prepare it for germination. You'll know the stratification is working when the seed begins to sprout a tiny root—this usually happens after 4-6 weeks of cold treatment. If you see mold or slimy texture, remove the seed immediately and start fresh with a new one.
☀️ Step 3: Warm Up and Plant for Germination
After the cold period, remove the seed from the refrigerator and let it sit at room temperature for 24 hours to acclimate. Plant the seed ½ inch deep in a small pot filled with moistened potting mix. I use a 4-inch pot for each seed, as peach seedlings need space to develop strong roots. Water gently until the soil is evenly moist but not waterlogged.
Place the pot in a warm, bright location—70-75°F is ideal. You should see the first signs of germination within 1-3 weeks. Keep the soil consistently moist but avoid overwatering, as peach seedlings are prone to damping-off if the environment is too wet. A humidity dome can help maintain even moisture during this critical stage.
🌿 Step 4: Transplant and Nurture Young Seedlings
Once the seedling reaches 4-6 inches tall and has developed 3-4 true leaves, it's ready for transplanting. Choose a larger pot or outdoor location with full sun exposure and well-draining soil. Peach trees thrive in USDA Hardiness Zones 5-9, so if you're in a colder climate, wait until after the last frost date to plant outdoors.
When transplanting, handle the seedling carefully to avoid damaging the roots. Water deeply after planting to help settle the soil around the roots. Over the next few weeks, fertilize lightly with a balanced fertilizer to encourage strong growth. You'll know you're on the right track when the seedling shows steady new leaf growth and a sturdy stem.
Tips & tricks for peach seed stratification success
Here's what nobody tells you about making this process foolproof—these details separate the seeds that sprout from the ones that fail.
Shell Cracking Technique: When you soak the pit for those 10-15 minutes in warm water, go beyond just cracking—tap the shell gently with a nutcracker to create a small fissure before applying full pressure. This prevents the seed inside from getting crushed during extraction. I've ruined more seeds than I care to admit by being too aggressive with the hammer!
Stratification Environment: The refrigerator's crisper drawer (where humidity is higher) works better than the main compartment for storing your seed during the 6-8 weeks stratification. The consistent moisture prevents the paper towel from drying out completely, which is critical since peach seeds need both cold AND moisture to break dormancy. Place a small cup of water in the drawer to maintain humidity if needed.
Germination Temperature: While 70-75°F is ideal for germination, don't stress if your home stays slightly cooler. Peach seeds are remarkably resilient—just move the pot to the warmest spot you have, like near a south-facing window or under a grow light. The key is consistency; sudden temperature swings are worse than being slightly below ideal. A simple thermometer near the pot helps monitor conditions.
Transplanting Timing: Don't wait until your seedling hits 6 inches to transplant—move it when it reaches 4 inches with 3 true leaves if your growing season is short. The extra time in a small pot gives roots more space to establish before outdoor conditions become challenging. Just be gentle with those delicate roots when transplanting!
Pro Tips for Peach Seed Stratification
- Here's what nobody tells you about making this process foolproof—these details separate the seeds that sprout from th...
- Shell Cracking Technique: When you soak the pit for those 10-15 minutes in warm water, go beyond just cracking—tap th...
- Stratification Environment: The refrigerator's crisper drawer (where humidity is higher) works better than the main c...
Frequently asked questions
Got questions about peach seed stratification?
You’re not alone! Here are the most common queries—plus straightforward answers—to help you crack the code on breaking dormancy like a pro.
What’s the best time to start peach seed stratification?
Stratify peach seeds in late fall to early winter (October–December), mimicking nature’s cold period. If you’re doing it indoors, start 6–8 weeks before your last frost date—this gives seeds time to germinate before spring planting. Pro tip: Label your seeds with dates to track progress!
How long should peach seeds stay cold and moist?
Peach seeds typically need 90–120 days of cold stratification (40–50°F). Monitor moisture—seeds should stay damp but not soggy. If using a fridge, rotate the bag weekly for even exposure. Patience pays off: Over-stratifying won’t harm seeds, but under-stratifying can delay (or prevent) germination.
Can I skip stratification and plant peach seeds directly?
Not recommended! Peach seeds have hard seed coats and deep dormancy. Skipping stratification usually results in no germination—or slow, weak sprouts. For faster results, try scarification (lightly sanding the seed coat) after stratification, but cold treatment is still critical for reliable blooms.
What if my stratified seeds still won’t germinate?
Troubleshoot with these steps:
- Check moisture: Seeds should feel damp like a wrung-out sponge.
- Verify cold exposure: Use a thermometer to confirm temps stay in the 40–50°F range.
- Test viability: Soak a few seeds in warm water overnight—if they sink, they’re likely viable.
- Try warmth: After stratification, move seeds to 70–80°F to trigger germination.
Can I stratify peach seeds outdoors in the ground?
Yes! Plant seeds 1–2 inches deep in a protected spot (like a cold frame) in fall. Mulch heavily to retain moisture and cold. Outdoor stratification is low-maintenance but less predictable—watch for squirrels or frost heave! For guaranteed results, indoor stratification is the way to go.
Wrapping up and next steps
Peach seed stratification isn’t just a gardening hack—it’s your ticket to unlocking vibrant blooms and thriving peach trees from scratch! 🌱 By mimicking nature’s dormancy cycle with cold, moisture, and patience, you’ll bypass the guesswork and nurture seeds that actually sprout.
Whether you’re a beginner or a seasoned gardener, this method proves that great things grow from small, strategic steps.
Ready to turn those seeds into saplings? Start small—pick a few seeds, gather your supplies, and dive in! Your future peach tree (and that first juicy harvest) will thank you. Try it this season! 🌞