
Planting
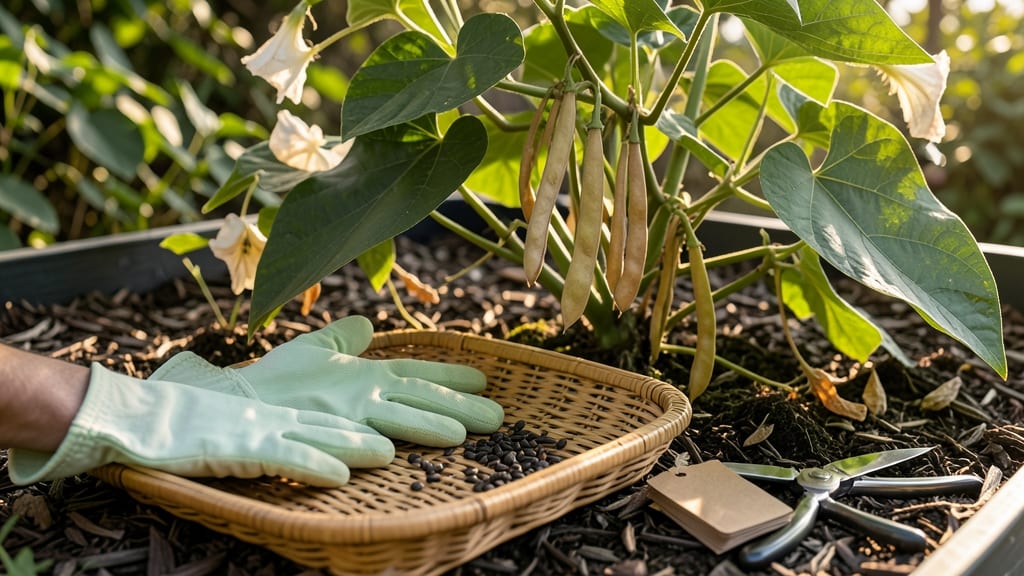
Your moon plant seed pods hold the key to next year’s stunning night-blooming flowers—if you crack the cold-start germination trick. 🌙 I’ve learned the hard way that skipping this step means waiting years for blooms, but with the right approach, you’ll see those delicate white blossoms opening by next summer.
The secret lies in mimicking nature’s dormancy cycle: after extracting the seeds from the pods, you’ll need to stratify them for 6-8 weeks in damp paper towels inside a sealed bag in the fridge. This cold treatment breaks dormancy, so the seeds wake up ready to grow when spring arrives.
Once planted, these tropical vines need bright, indirect light and a warm spot (70-75°F) to thrive. They’re slow starters but reward patience with 3-5 foot vines that produce fragrant nighttime blooms—worth every month of waiting.
Don’t let impatience ruin your progress: overwatering or too much direct sun will kill these delicate seedlings. Master this method, and you’ll have blooming moon plants year after year without buying expensive cuttings.
📚 In This Guide
- What you need
- Instructions
- Tips and common mistakes
- Wrapping up and next steps
What you need
- ● Moon plant seed pods: 5–10 pods (check for firmness and slight plumpness).
- ● Well-draining potting mix: 1–2 gallons (use a blend labeled for succulents or cacti).
- ● Small pots or seed trays: 3–5" diameter (with drainage holes).
- ● Watering can or spray bottle: Fine mist setting preferred.
- ● Clear plastic wrap or humidity dome: To retain moisture.
- ● Gloves: Protect your hands from prickly seed pods.
- ● Plant labels: Mark pods by date for tracking.
- ● Grow lights or sunny windowsill: 6+ hours of indirect light daily.
- ● Thermometer: Ideal germination temp: 65–75°F.
Step-by-Step instructions for cold-starting moon plant seed pods
Here's how I guarantee next year's blooms by breaking dormancy now.
🌱 Step 1: Harvest and Prepare the Seed Pods
Collect mature moon plant seed pods when they're fully dry but still intact—usually late fall or early winter. I look for pods that have turned a deep brown color and feel slightly papery to the touch. Gently twist or cut them from the stems, being careful not to crush the seeds inside.
Place the pods in a paper bag and store them in a cool, dry location for about 2-3 weeks. This mimics the natural winter stratification process. You'll know they're ready when the pods begin to split open slightly on their own, revealing the seeds inside.
💧 Step 2: Soak and Stratify for Germination
Fill a small container with lukewarm water and add the seeds along with their pods. Let them soak for 12-24 hours—this softens the seed coat and kickstarts germination. I like to use a clear container so I can watch for any seeds that float (those are likely non-viable).
After soaking, drain the water and place the seeds in a sealed plastic bag with a small amount of damp paper towels. Store the bag in your refrigerator's crisper drawer for 4-6 weeks. This cold stratification mimics winter conditions and breaks dormancy. Check occasionally to ensure the towels stay lightly moist but not soggy.
☀️ Step 3: Plant in Well-Draining Soil
After the cold treatment, plant the seeds in a container with well-draining potting mix. I use a 4-inch pot for each seed pod, pressing it just below the soil surface so the top remains exposed. The key here is to keep the soil consistently moist but never waterlogged—moon plants hate soggy roots.
Place the pots in a location with bright, indirect light (like a north-facing window) and maintain a temperature between 65-75°F. You'll see the first signs of growth within 3-4 weeks—tiny sprouts pushing through the soil surface. Once the seedlings reach about 2 inches tall, you can transplant them to individual pots.
✂️ Step 4: Harden Off and Prepare for Outdoor Planting
When the seedlings have developed their first set of true leaves (not the initial cotyledons), it's time to harden them off. Start by placing them outside in a sheltered spot for 1-2 hours the first day, gradually increasing their outdoor time over 7-10 days until they can tolerate full sun.
I always wait until the soil is warm to the touch before transplanting moon plants outdoors. This usually aligns with the last frost date in your area. Space them 12-18 inches apart in well-draining soil with plenty of organic matter. Mulch around the base to retain moisture and suppress weeds.
🌿 Step 5: Maintain for Next Year’s Blooms
Water your moon plants deeply once a week, allowing the soil to dry out slightly between waterings. They thrive in full sun to partial shade, so choose a location that gets at least 4-6 hours of sunlight daily. Fertilize lightly in the spring with a balanced, water-soluble fertilizer to encourage strong growth.
By next year, your cold-started moon plants will reward you with vibrant blooms. The key is patience—this method ensures the seeds break dormancy naturally, leading to healthier, more resilient plants. Watch for the first buds to form in early spring, a sure sign your winter prep paid off!
Tips & tricks for perfect moon plant germination
Real talk: These little details make all the difference between waiting forever for blooms and getting next year's showstopper flowers.
Timing is Everything: In Step 1, those 2-3 weeks of cool storage are non-negotiable. I've seen pods that split too soon after harvest—those seeds often fail to germinate. The key is patience: wait until you see natural splitting before moving to Step 2. If your kitchen stays above 70°F, try storing pods in the fridge instead of on the counter to mimic winter conditions more closely.
Stratification Secrets: During the 4-6 week cold treatment in Step 2, I like to label my bags with the start date. This prevents me from accidentally pulling them out too early. Also, don't skip the damp paper towel check—if your seeds feel soggy, they'll rot. I find it helpful to place a small weight on top of the bag to keep the towels in contact with the seeds without crushing them.
Lighting Matters: For Step 3, I've learned the hard way that bright indirect light means different things to different homes. If your seedlings look leggy (tall and spindly) after 3-4 weeks, they need more light. Move them closer to the window or consider adding a grow light for 12-14 hours daily. The goal is sturdy, compact growth—not reaching toward the light like sunflowers.
Hardening Off Hack: When you start the 1-2 hour outdoor sessions in Step 4, I recommend choosing overcast days for the first few sessions. Direct sun can be too intense for tender seedlings, and you'll notice them wilting if they're not ready. Gradually introduce them to morning sun first, then afternoon sun as they toughen up.
Pro Tips for Moon Plant Seed Pods
- Real talk: These little details make all the difference between waiting forever for blooms and getting next year's showstopper flowers.
- Timing is Everything: In Step 1, those 2-3 weeks of cool storage are non-negotiable.
- Stratification Secrets: During the 4-6 week cold treatment in Step 2, I like to label my bags with the start date.
Frequently asked questions
What’s the best time to plant moon plant seed pods for cold-start germination?
Plant them 8–12 weeks before your first expected frost (typically late summer to early fall). This gives the pods enough time to stratify naturally in the soil, mimicking winter conditions. If you’re in doubt, err on the earlier side—patience pays off with stronger blooms next year!
How cold does it need to get for successful stratification?
Moon plant seed pods thrive with consistent temperatures between 32°F and 45°F (0°C–7°C) for 6–8 weeks. If your winters are mild, bury pods deeper (4–6 inches) or use a cold frame. Avoid freezing temps below 20°F (-7°C), which can damage the pods prematurely.
Can I use moon plant seed pods indoors for cold-start germination?
Yes! Place pods in a refrigerator (not freezer) for 6–8 weeks in a sealed container with damp peat moss or paper towels. Check moisture weekly—pods should stay lightly damp, not soggy. Move them to pots after stratification, then plant outdoors in spring for best results.
What if my moon plant seed pods don’t sprout after cold treatment?
Don’t panic! Try these fixes:
- Check moisture: Overly dry or waterlogged pods fail to germinate. Aim for consistently damp conditions.
- Verify timing: If planted too late, pods may not complete stratification. Replant in early fall if needed.
- Test viability: Cut open a pod—if it’s firm and green inside, it’s viable. Brown/mushy? Start fresh with new pods.
Are moon plant seed pods worth the effort for blooms?
Absolutely! Cold-starting pods ensures hardier plants, earlier blooms, and more vibrant flowers next season. While it requires patience, the payoff is stunning, low-maintenance perennials that return year after year. Plus, it’s a fun way to “cheat” Mother Nature for better results!
Wrapping up and next steps
Growing moon plant seed pods with this cold-start hack is your ticket to stunning blooms next season! By mimicking winter’s chill, you’re giving those seeds the perfect head start—no fancy equipment needed. Whether you’re a seasoned gardener or just starting out, this simple trick boosts success rates and saves time.
Ready to level up your garden? 🌱 Grab those seed pods, follow the steps, and watch your moon plants thrive. Next up: Share your progress in gardening forums or tag us—we love seeing your blooms! 📸