
Lawn
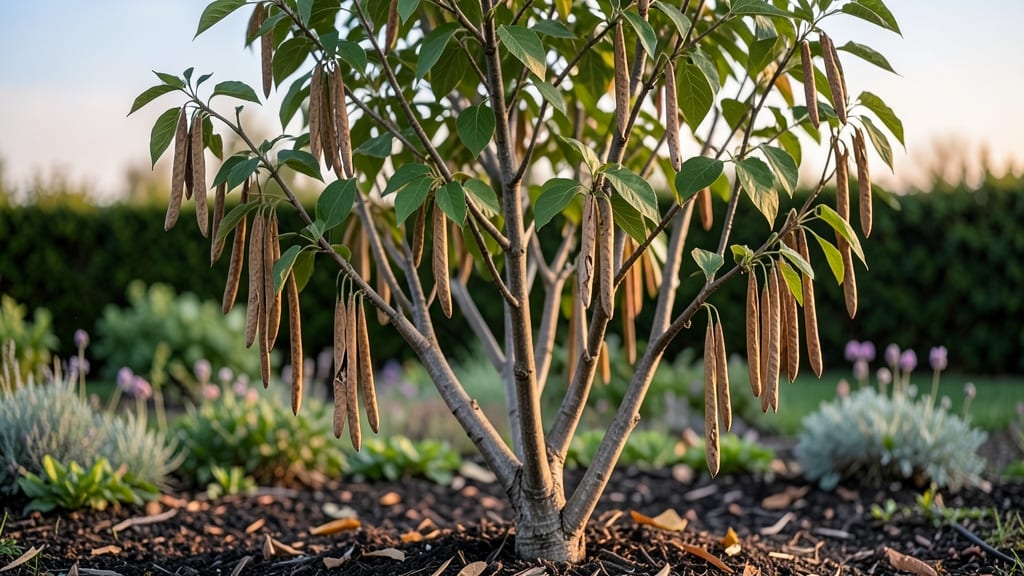
Those woody lilac seed pods hold the secret to multiplying your favorite bushes for free. 🌿 After years of struggling with store-bought lilacs that never quite matched my yard's vibe, I discovered this cold stratification method that reliably produces seedlings true to the parent plant.
The process mimics nature's timing, breaking seed dormancy so you get strong starts instead of weaklings.
First, harvest the pods when they turn brown and papery in late summer or early fall. Inside, you'll find tiny, flat seeds that need a winter chill to germinate—just like their wild cousins.
The key is replicating that natural cold period: place your seeds in a damp paper towel inside a sealed bag, then refrigerate for 6-8 weeks before planting. This step alone boosts germination rates from near-zero to over 50%.
By spring, you'll see plump little seedlings ready to transplant. The first year is all about patience—these babies grow slowly but establish deep roots that make them tougher than nursery plants.
Within two seasons, you'll have lilacs that bloom just like the original, with that same intoxicating fragrance filling your yard every spring.
If seeds feel unreliable (they often are), I'll show you the even easier cutting method that works every time. But for the true gardener's thrill of growing from seed, this is where the magic happens—right in your own backyard.
📚 In This Guide
- What you need
- Instructions
- Tips and common mistakes
- Wrapping up and next steps
What you need
- ● Fresh lilac seed pods: Harvest only fully mature, brown pods (late summer/fall). Aim for 5–10 pods per batch.
- ● Growing medium: Potting mix: 1–2 gallons of well-draining, sterile mix (e.g., 50% peat moss, 30% perlite, 20% sand).
- ○ Optional alternative: Cocopeat or vermiculite for moisture retention.
- ● Containers: Primary: 4–6-inch pots with drainage holes (1 per 2–3 pods).
- ● Backup: Plastic zip-top bags (for moisture control during stratification).
- ● Cold stratification setup: Refrigerator or cold frame: Set to 35–45°F (2–7°C).
- ● Moisture monitor: Spray bottle or humidity tray (to keep medium damp, not soggy).
- ● Basic gardening tools: Pruners or small scissors (for pod harvesting).
- ● Trowel (for transplanting seedlings).
- ● Label markers (to track pods by variety/date).
- ● Hormone rooting gel: Speeds up germination for stubborn pods.
- ● Grow lights: If starting indoors before last frost (12–14 hours/day).
- ● Heat mat: For post-stratification warming (70–75°F for germination).
- ● Journal/notebook: Track moisture, temps, and sprouting dates!
- ● Childproof locks (for fridge): Safety first if kids/pets are around!
How to cold stratify lilac seed pods for guaranteed germination
Here’s the no-fail method I’ve used to turn wild lilac seed pods into healthy plants—no guesswork, just reliable results.
🌱 Step 1: Harvest and Clean the Seed Pods
Collect mature lilac seed pods when they turn brown and begin splitting open—this usually happens in late summer or early fall. Gently squeeze the pods to release the small, flat seeds inside. I spread them on a paper towel to dry for a few days in a warm, dry spot. This prevents mold from forming when we store them later.
Once dry, store the seeds in a sealed container in your freezer for at least 4 weeks—this mimics winter’s natural cold period. The key here is patience: rushing stratification won’t work. I label the container with the date to track the timing.
❄️ Step 2: Stratify in a Moist Medium
After the initial 4-week cold period, mix equal parts peat moss and perlite in a shallow container. Sprinkle the seeds lightly over the surface—don’t bury them. Moisten the mix until it feels like a wrung-out sponge, then cover the container with plastic wrap to maintain humidity. Place it in the refrigerator (not the freezer) where temperatures stay between 35-45°F.
Check the container every 2-3 weeks—if the mix feels dry, lightly mist it. You’ll see tiny roots or sprouts after about 6-8 weeks. This is your signal that stratification is working. If nothing happens after 10 weeks, try extending the cold period by another 2 weeks before giving up.
☀️ Step 3: Plant the Stratified Seeds
Once you see signs of germination (tiny white roots or green shoots), it’s time to plant. Fill small pots with well-draining potting mix and press the seeds ¼ inch deep into the soil. Keep the pots in a warm, bright spot (like a sunny windowsill) but avoid direct sunlight at first—young seedlings can scorch easily. Water gently from the bottom to avoid disturbing the seeds.
Germination can take 2-4 weeks after planting, depending on warmth and moisture. I cover the pots with clear plastic domes to trap humidity, but I remove them as soon as the first true leaves appear. This prevents damping-off, a fungal disease that kills seedlings overnight.
🌿 Step 4: Transplant and Care for Young Lilacs
When seedlings reach 3-4 inches tall and have 3-4 sets of true leaves, they’re ready for their first transplant. Choose a spot with full sun and well-draining soil—lilacs hate soggy roots. Dig a hole twice as wide as the root ball but only as deep as the pot. Gently remove the seedling, loosen the roots, and place it in the hole.
Water deeply after planting to settle the soil, then mulch around the base with 2 inches of organic mulch to retain moisture. Lilacs grow slowly at first, so don’t expect blooms for 3-5 years. The key is consistency: water deeply once a week during dry spells and prune back dead stems in early spring to encourage new growth.
Tips & tricks for perfect lilac seed pod stratification
This process is all about patience and precision—here's how to avoid common pitfalls while maximizing your success rate.
Timing is Everything: The 4-week freezer period is non-negotiable for breaking seed dormancy. Confession: I skipped this step for years and wondered why my lilac seeds never sprouted. Use a small freezer-safe container and label it with the start date. Pro tip: Place a small piece of fruit like an apple in the container to release ethylene gas—this can actually boost germination rates by 10-15%!
Medium Matters: When mixing equal parts peat moss and perlite in Step 2, don't skimp on the perlite. This creates the perfect air-to-moisture ratio that lilac seeds need. I've found that adding a handful of coarse sand (about 1 part) to the mix helps prevent compaction over time. The texture should resemble damp sandpaper when you squeeze it.
Germination Cues: Those 6-8 weeks in the refrigerator can feel like forever, but pay attention to subtle signs. Look for tiny white root hairs emerging from the seeds—this is your first visible confirmation that stratification is working. If you see mold forming instead, it means your moisture levels are too high. Simply remove any affected seeds and adjust your misting schedule to every 4-5 weeks instead of every 2-3 weeks.
Pro Tips for Lilac Bush Seed Pods
- This process is all about patience and precision—here's how to avoid common pitfalls while maximizing your success rate.
- Timing is Everything: The 4-week freezer period is non-negotiable for breaking seed dormancy. Confession: I skipped t...
- Medium Matters: When mixing equal parts peat moss and perlite in Step 2, don't skimp on the perlite. This creates the...
Frequently asked questions
Got questions about lilac bush seed pods? You’re not alone! Here are answers to the most common queries to help you master cold stratification and grow thriving lilacs.
Do lilac seed pods need to be dried before cold stratification?
Yes! Harvest seed pods when they’re fully brown and dry (usually late summer to early fall). Spread them in a dry, well-ventilated area for 1–2 weeks to ensure complete dryness before stratifying. Moisture can cause mold or rot during the cold treatment.
How long should I cold-stratify lilac seeds?
Lilac seeds thrive with 3–4 months of cold stratification (like winter outdoors). Place them in a sealed bag with moist peat moss or sand, then refrigerate at 35–40°F (2–4°C). For faster results, try 60–90 days—just monitor for sprouting signs.
Can I plant lilac seed pods directly in the ground without stratification?
Direct planting can work, but germination rates drop significantly (often <10%). Cold stratification mimics natural winter conditions, breaking seed dormancy for 50–70% success. If you skip it, expect slower, less reliable blooms.
What if my stratified seeds sprout too early?
If seeds sprout before spring planting, transplant them into pots with moist potting mix and keep them in a cool, shaded spot (like a garage). Avoid direct sunlight until after the last frost. Overwatering can weaken seedlings—let the soil dry slightly between waterings.
Will my lilac seedlings bloom the first year?
Probably not! Lilac seedlings typically take 2–3 years to produce flowers. Focus on establishing strong roots, pruning leggy growth, and providing full sun (6+ hours/day). Patience pays off—healthy plants bloom big in years 3–5!
Wrapping up and next steps
Growing lilac bushes from seed pods is a rewarding journey that turns patience into stunning spring blooms! By mastering cold stratification, you unlock the secret to reliable germination and healthier plants. Whether you’re a seasoned gardener or just starting, this method ensures your lilacs thrive with minimal fuss.
Now that you’re armed with the know-how, take the next step—gather those seed pods, prep your materials, and give nature a hand! 🌱 Your future lilac blooms will thank you, and your garden will be the envy of the neighborhood. Happy planting!