
Lawn
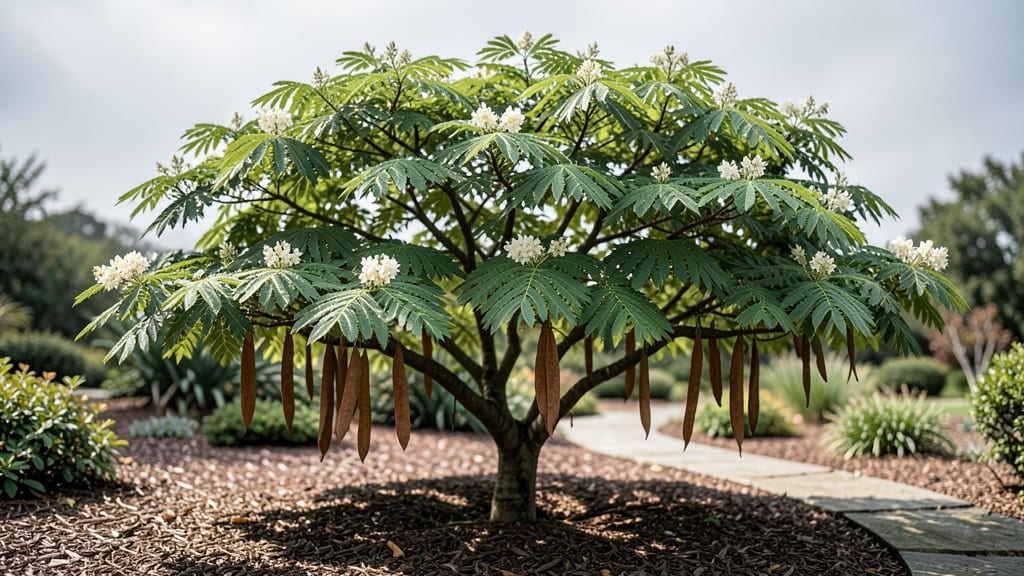
Those papery brown pods are nature’s way of giving you free trees—if you know how to crack the code. 🌳 Japanese pagoda trees (Styphnolobium japonicum) produce seed pods that hold the key to growing your own stunning shade tree, but the process requires patience and a few tricks to break dormancy.
I’ve propagated dozens this way, and the secret isn’t just in collecting the pods—it’s in how you dry, store, and stratify them for reliable germination.
The first step is easy: harvest pods when they turn brown and papery in late fall, but don’t rush—wait until they’re fully dry to avoid mold. You’ll need a clean workspace, a paper bag for drying, and a sealed container for cold storage.
The tricky part comes next: breaking dormancy through cold stratification, which mimics winter conditions and tricks the seeds into thinking spring has arrived.
Once you’ve completed the stratification, you’ll watch tiny green shoots emerge in just a few weeks—proof that your patience paid off. These seedlings grow fast, reaching 6–12 inches in their first season, and they thrive in full sun with well-draining soil.
The payoff? A tree that’ll cast elegant shade for decades, all from a handful of seeds you collected yourself.
This method works best in zones 5–9, but with adjustments (like longer stratification in warmer climates), you can try it almost anywhere. Just be patient—some seeds take a full year to germinate, but the wait is worth it for that first glimpse of new growth peeking through the soil.
📚 In This Guide
- What you need
- Instructions
- Tips and common mistakes
- Wrapping up and next steps
What you need
- ● Japanese pagoda tree seed pods: Freshly harvested pods (aim for at least 10-15 mature pods for reliable germination).
- ● Pruning shears or small hand pruners: Sharp, clean tools to avoid damaging pods or branches (look for bypass pruners with 5-7 inch blades).
- ● Paper bags or breathable mesh sacks: For collecting and storing pods (use unbleached, kraft paper or 100% cotton mesh to prevent moisture buildup).
- ● Newspaper or paper towels: To line a flat surface for drying pods.
- ● Plastic zip-top bags: For cold stratification (choose quart-sized bags with a sealable closure).
- ● Refrigerator or cold stratification setup: A space that maintains 35–45°F (2–7°C) for 6–8 weeks.
- ● Labeling supplies: Masking tape + marker to label bags with the date and pod type.
- ● Desiccant packets: To absorb excess moisture inside storage bags (great for humid climates).
- ● Fine-mesh strainer or colander: For rinsing pods if dirt or debris is present.
- ● Digital scale: To weigh pods before and after drying (helps track moisture loss).
- ● Notebook or app: For logging harvest dates, drying progress, and stratification timelines.
Step-by-step guide to harvesting and preparing Japanese pagoda tree seed pods
Here’s how to collect, dry, and cold-stratify these pods for reliable germination next spring.
🌿 Step 1: Harvest Mature Seed Pods at the Right Time
Wait until the seed pods turn deep brown and begin to split open naturally—usually in late fall after the tree’s flowers have faded. The pods should feel dry and papery to the touch, not moist or green. I like to harvest on a dry, sunny morning when the pods are fully mature but haven’t yet released their seeds.
Gently twist or pull the pods from the branches, being careful not to damage the tree. If some pods resist, they’re not ready yet—leave them for another week. Collect 4-6 pods (enough for multiple seedlings) and place them in a paper bag to prevent moisture buildup. Avoid plastic bags, which trap humidity and encourage mold.
💧 Step 2: Dry the Pods Thoroughly Before Opening
Spread the harvested pods in a single layer on a dry, well-ventilated surface like a mesh screen or cardboard box. Place them in a shady, dry spot (a garage or covered porch works well) for 7-10 days. The goal is to ensure the pods are completely dry—no dampness should remain when you gently squeeze one.
Check daily for any signs of mold or soft spots. If you notice fuzzy growth, discard those pods immediately and move the rest to a drier location. Once fully dry, the pods will feel lightweight and brittle. This step mimics the natural drying process in the wild and prevents rot during storage.
✂️ Step 3: Extract and Clean the Seeds
Once the pods are bone-dry, open them carefully with your fingers or a small knife. The seeds inside will be small, flat, and dark brown. Place the seeds in a bowl and gently rub them between your palms to remove any remaining pod fragments or chaff. A fine-mesh sieve helps separate the seeds from debris.
Inspect the seeds for any that look shriveled or discolored—these won’t germinate. Healthy seeds should feel firm and smooth. Store the cleaned seeds in a paper envelope labeled with the harvest date. Avoid airtight containers, as seeds need airflow to prevent moisture buildup.
⏰ Step 4: Cold Stratify for Germination Success
Place the dried seeds in a sealed plastic bag with a damp (not soaking) paper towel. Fold the towel to cover the seeds completely, then place the bag in the refrigerator for 6-8 weeks. This mimics winter conditions and breaks seed dormancy. Check the towel weekly—it should stay moist but not soggy.
After 6-8 weeks, remove the seeds from cold storage and let them sit at room temperature for 24 hours before sowing. This gradual transition prevents shock. Japanese pagoda tree seeds are notoriously slow to germinate, so patience is key. Plant them in well-draining soil and keep the soil consistently moist until sprouts appear.
☀️ Step 5: Plant Stratified Seeds in Ideal Conditions
Sow the seeds ¼ inch deep in a mix of equal parts potting soil and perlite to ensure drainage. Use a small pot or seed tray, as the seeds don’t need much space. Place the tray in a bright, indirect light spot (like a north-facing window) and maintain 60-70°F soil temperature. Germination can take 4-8 weeks, so don’t give up if nothing happens quickly.
Once seedlings emerge, provide dappled sunlight to avoid scorching their delicate leaves. Thin to the strongest seedling if multiple sprouts appear. Transplant outdoors only after the last frost, when soil temperatures consistently stay above 50°F. These trees thrive in USDA Zones 4-8, so choose a spot with partial shade and well-draining soil.
Tips & tricks for perfect Japanese pagoda tree seed pod preparation
Took me a while to figure these out, so here goes—these simple tricks will help you avoid the most common pitfalls when working with these delicate seed pods.
Harvesting Timing: The 7-10 day drying window in Step 2 is non-negotiable—don't rush it! I've learned the hard way that even slightly damp pods will mold during cold stratification. If you're in doubt about ripeness, wait another week rather than risking it. A good test is to gently squeeze a pod: if it feels springy, it needs more time on the tree.
Drying Strategy: For extra insurance against mold, place a small silica gel packet (the kind that comes with electronics) in your drying container. These pods absorb moisture like sponges, and even trace amounts can ruin your entire batch. I keep mine in a cardboard box with holes drilled in the sides for airflow—this creates a perfect microclimate.
Cold Stratification Hack: The 6-8 week refrigerator period is critical, but don't let the paper towel dry out completely. I like to use a spray bottle to mist the towel weekly—just enough to keep it damp but not dripping. This mimics natural winter moisture patterns and gives you the best germination rates. The 24-hour room temp transition before planting is equally important—it helps the seeds "wake up" gradually.
Planting Depth: That ¼ inch depth in Step 5 might seem shallow, but these seeds need light to germinate. If you plant too deep, they'll rot before sprouting. Use a toothpick to mark your planting depth if you're working with small pots—it's easier to gauge than you'd think. And remember, these seeds are tiny—don't overcrowd them in your tray, or you'll have to thin more later.
Pro Tips for Japanese Pagoda Tree Seed Pods
- Took me a while to figure these out, so here goes—these simple tricks will help you avoid the most common pitfalls wh...
- Harvesting Timing: The 7-10 day drying window in Step 2 is non-negotiable—don't rush it! I've learned the hard way th...
- Drying Strategy: For extra insurance against mold, place a small silica gel packet (the kind that comes with electron...
Frequently asked questions
Got questions about those striking Japanese pagoda tree seed pods? You’re not alone! Here are some of the most common queries—plus quick answers to help you navigate harvesting, drying, and cold stratification like a pro.
How do I know when Japanese pagoda tree seed pods are ready to harvest?
The pods are ready when they turn a tan or light brown color and begin to split open slightly on their own. Aim for late fall (October–November) in most climates. Avoid harvesting if the pods are still green or firm—this means the seeds aren’t mature yet!
Do Japanese pagoda tree seed pods need cold stratification, or can I skip it?
Cold stratification is highly recommended for breaking dormancy and improving germination rates. Place the dried pods in a sealed bag with moist peat moss or sand, then refrigerate for 60–90 days. Skipping this step may result in slower or uneven sprouting.
How long does it take for Japanese pagoda tree seeds to germinate after stratification?
Germination typically takes 2–4 weeks after removing the seeds from cold storage, provided they’re planted in well-draining soil at 60–70°F. Keep the soil consistently moist (but not soggy) during this time. Patience is key—some seeds may take longer!
What should I do if my Japanese pagoda tree seed pods won’t open naturally?
If the pods stay closed, try gently squeezing them by hand or placing them in a paper bag for a few days to mimic natural drying. Avoid forcing them open—this can damage the seeds inside. If they’re still stubborn, check for moisture or pest issues (like weevils) that might be blocking the process.
Can I grow Japanese pagoda trees from store-bought seeds, or do I need fresh pods?
While fresh pods yield the highest germination rates, store-bought seeds can work if they’re properly stratified. Look for seeds labeled as "dormant" or "untreated"—these are more likely to succeed. Just add extra patience, as older seeds may germinate more slowly.
Wrapping up and next steps
Harvesting, drying, and cold-stratifying Japanese pagoda tree seed pods is a rewarding way to ensure vibrant blooms for seasons to come! 🌸 With the right tools and patience, you’ll unlock the secret to nurturing these stunning trees from seed.
Whether you’re a seasoned gardener or just starting out, every step—from gathering pods to simulating winter—brings you closer to a thriving garden.
Ready to take the next step? Start small—plant a few seeds this fall and observe their progress. Before you know it, you’ll be sharing your success with fellow plant enthusiasts (or even gifting them their own pagoda tree starters!). Happy growing! 🌱