
Lawn
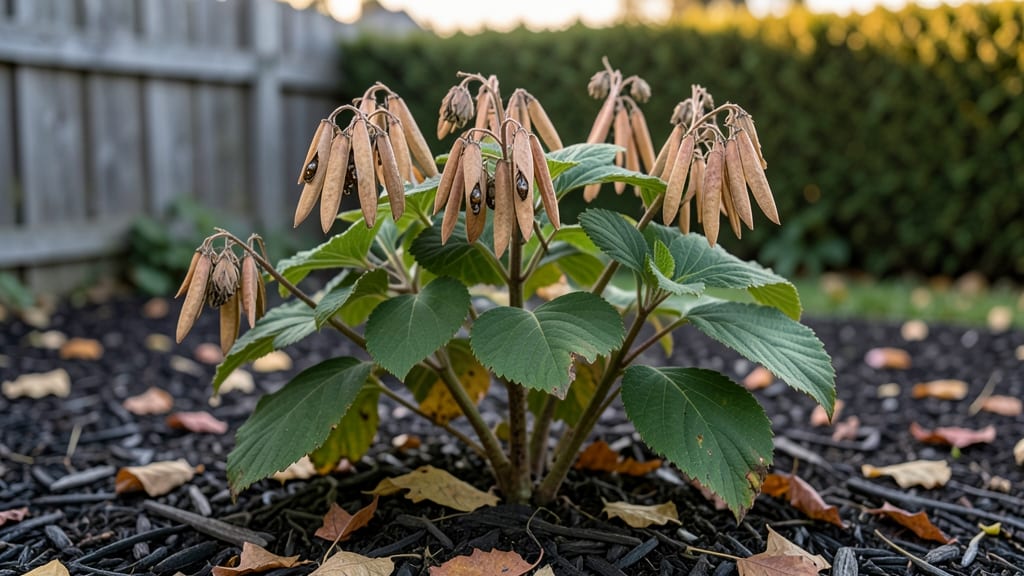
Collecting hydrangea seed pods in late fall unlocks next year’s blooms—if you do it right. 🌿 The key is timing: harvest when the pods turn brown and papery, then mimic winter’s chill to break dormancy. I’ve grown dozens from seed, and the secret lies in cold stratification, not just planting.
This isn’t about luck—it’s about science. You’ll need a damp paper towel, a sealed bag, and patience. After 8-12 weeks in the fridge, those tiny seeds wake up ready to sprout. The trade-off?
Seedlings may not match the parent’s colors or size, but the thrill of watching them grow from scratch makes it worth it. By spring, you’ll have lush young plants with 5-7 inch stems, ready to transplant. They’ll need bright light and consistent moisture to avoid leggy growth.
The payoff? A garden full of hydrangeas that are uniquely yours. Works for bigleaf, panicle, or oakleaf varieties—just adjust timing for your climate. Here’s how to do it without the guesswork.
📚 In This Guide
- What you need
- Instructions
- Tips and common mistakes
- Wrapping up and next steps
What you need
- ● Fresh hydrangea seed pods: Harvest fully mature, dry pods (brown, papery texture) from late fall to early winter. Aim for 5–10 pods per variety to maximize success.
- ● Potting soil: 1–2 gallons of well-draining, sterile seed-starting mix (avoid garden soil—it’s too dense!). Look for labels with perlite or vermiculite.
- ● Small pots or containers: 2–4 shallow, breathable containers (4–6 inches deep) with drainage holes. Plastic nursery trays or seed-starting cells work perfectly.
- ● Plastic bags or wrap: 1–2 resealable bags (gallon-sized) or clear plastic wrap for humidity control.
- ● Spray bottle: 1 with water to keep seeds moist without over-saturating.
- ● Label markers & tags: 5+ to track varieties (e.g., ‘Endless Summer,’ ‘Nikko Blue’).
- ● Refrigerator or cold frame: A space to maintain 34–40°F (1–4°C) for 6–12 weeks.
- ● Growth hormone gel: (e.g., Rooting hormone) to boost germination rates if seeds are stubborn.
- ● Heating mat: For post-stratification warmth (65–75°F / 18–24°C) to speed up sprouting.
- ● Grow lights: If starting indoors before last frost—12–14 hours/day of light.
- ● Humidity dome: A clear plastic lid or mini greenhouse to maintain moisture during germination.
- ● Journal/notebook: To log stratification start/end dates and seed progress!
How to cold stratify hydrangea seed pods for successful germination
Here's my foolproof method for breaking dormancy and getting those finicky hydrangea seeds ready to sprout.
🌱 Step 1: Harvest and Prepare the Seed Pods
Collect mature hydrangea seed pods in late fall when they've turned brown and opened slightly. You'll know they're ready when the seeds inside look plump and dark brown. Gently twist the pods to release the seeds—don't squeeze or they'll crack. I like to spread them on a paper towel to dry for a few days in a warm, dry spot before storing.
The key here is patience. If you harvest too early, the seeds won't be fully mature and won't germinate. Wait until most pods on the plant have opened naturally. Once dry, store them in a paper envelope in a cool, dark place until you're ready to stratify them in 3-4 months.
❄️ Step 2: Perform Cold Stratification
Fill a sealed plastic bag with damp (not wet) peat moss or coconut coir—just enough to hold the seeds without crowding. Add your hydrangea seeds and seal the bag tightly. Place it in your refrigerator's crisper drawer where temperatures stay between 35-40°F for 90-120 days.
Check the bag every 2-3 weeks to ensure the medium stays moist but not soggy. You'll see condensation on the bag walls—that's normal. If the seeds start to look shriveled or the medium dries out, spritz it lightly with water and reseal. This cold treatment mimics winter conditions and breaks the seed's dormancy.
☀️ Step 3: Plant Stratified Seeds in Spring
When you're ready to plant in early spring, fill small seedling trays with a mix of 50% peat moss and 50% perlite. Scatter the seeds on the surface—hydrangea seeds don't need deep planting. Lightly press them into the medium so they make good contact but don't bury them more than 1/8 inch.
Cover the tray with clear plastic wrap to retain moisture and place it in a warm spot with bright indirect light. Keep the soil consistently moist but never waterlogged. Germination can take 4-8 weeks, so be patient. You'll know it's working when you see tiny green shoots pushing through the soil surface.
🌿 Step 4: Care for Young Seedlings
Once seedlings emerge, remove the plastic wrap and move them to a sunny windowsill or under grow lights for 14-16 hours of light daily. Keep the soil lightly moist—never let it dry out completely. You'll see the first true leaves appear in 2-3 weeks after germination, which means the seedlings are ready for their first real growth phase.
When seedlings have 2-3 sets of true leaves and are about 3-4 inches tall, they're ready to be transplanted into individual pots. Use a well-draining potting mix and keep them in bright, indirect light for another 4-6 weeks before considering outdoor planting after the last frost date.
Tips & tricks for perfect hydrangea seed pod germination
Here's what nobody tells you about getting those stubborn hydrangea seeds to sprout reliably.
Timing is Everything: The 3-4 month storage period before stratification is non-negotiable. I learned this the hard way after trying to rush the process—seeds need this time to fully mature and develop the hard outer shell that cold stratification will break down. If you harvest early, the seeds won't germinate no matter how long you stratify them. Mark your calendar now for when you'll start the stratification process.
Medium Matters: While the instructions mention peat moss or coconut coir, I've found that mixing in a small amount of sand (about 10%) improves drainage and prevents mold during the 90-120 day cold period. The medium should feel like a damp sponge—not dripping wet. Too much moisture creates anaerobic conditions that can kill your seeds before they even germinate. I use a spray bottle to keep it consistently damp without overwatering.
Stratification Check: During the 90-120 day cold treatment, check your seeds every 2-3 weeks for signs of mold or drying out. If you see fuzzy white growth, that's mold—open the bag immediately, remove any affected seeds, and let the medium dry out slightly before resealing. If seeds look shriveled, they've dried out too much—spritz lightly with water and reseal. This careful monitoring is what separates successful germination from wasted effort.
Lighting Strategy: For the 14-16 hours of light daily after germination, I recommend using a simple LED grow light rather than relying on a sunny windowsill. Natural light varies too much, and seedlings can get leggy if they don't get consistent light. Position the light 4-6 inches above the seedlings and adjust as they grow. This ensures even growth without the risk of sunburn from direct window light.
Pro Tips for Hydrangea Seed Pods
- Here's what nobody tells you about getting those stubborn hydrangea seeds to sprout reliably.
- Timing is Everything: The 3-4 month storage period before stratification is non-negotiable. I learned this the hard w...
- Medium Matters: While the instructions mention peat moss or coconut coir, I've found that mixing in a small amount of...
Frequently asked questions
Got questions about hydrangea seed pods? You’re not alone! Here are some of the most common queries—and straightforward answers—to help you navigate the process with confidence.
Do hydrangea seed pods always produce viable seeds?
Not always! Viability depends on the plant’s health, pollination success, and seed maturity. Mophead and lacecap varieties are more likely to yield good seeds than sterile hybrids. If pods appear shriveled or fail to open, they may not contain viable seeds.
How long does cold stratification take for hydrangea seeds?
Cold stratification typically requires 6–12 weeks in moist, refrigerated conditions (34–40°F). Some gardeners extend this to 3 months for better germination rates. Patience pays off—rushing this step often leads to poor or uneven sprouting.
Can I skip cold stratification and plant seeds directly?
While possible, germination rates will likely be low or inconsistent. Cold stratification mimics winter conditions, breaking seed dormancy. If you’re impatient, try soaking seeds in warm water for 24 hours first—but expect fewer successes without stratification.
What do I do if my hydrangea seed pods won’t open?
Pods may resist opening due to immature seeds or dry conditions. Try these fixes:
Seeds are ready when they’re dry, dark, and easily extracted from the pod. Look for:
How do I know when hydrangea seeds are ready to plant?
Plant them immediately after stratification—or store in a sealed container with damp peat moss in the fridge for up to 3 months.
Wrapping up and next steps
Hydrangea seed pods hold the promise of vibrant blooms for seasons to come—but success starts with patience and the right technique! Cold stratification isn’t just a step; it’s the key to unlocking nature’s potential in your garden.
Whether you’re a seasoned gardener or a curious beginner, these pods are your ticket to reliable, homegrown hydrangeas that’ll steal the show next year.
Ready to take the plunge? Gather your supplies, follow the blueprint, and let winter work its magic! Once your seeds are stratified, it’s time to plant and watch your garden transform—one seed at a time. 🌱✨