
Planting
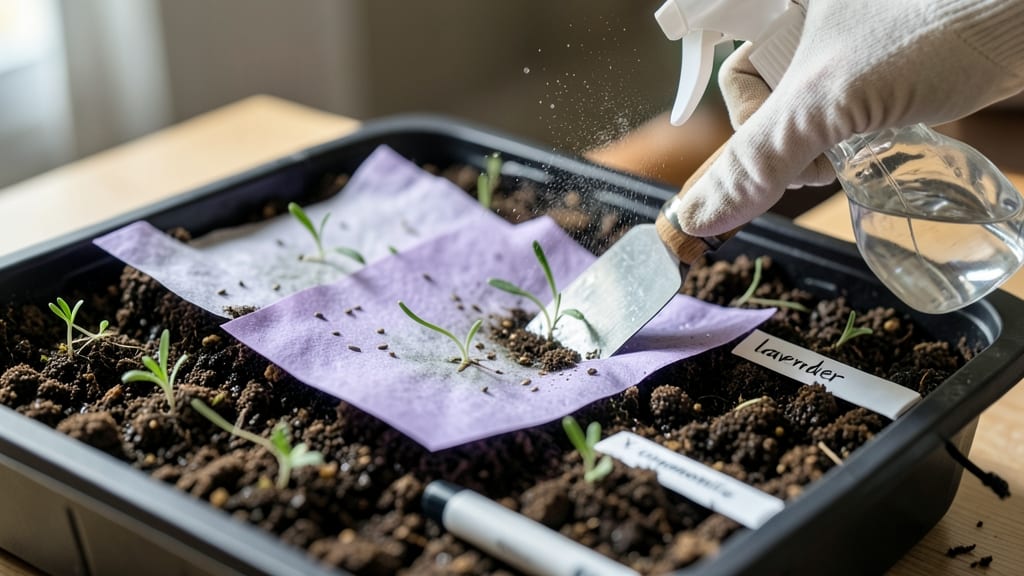
Planting seed paper is like giving your garden a slow-release bouquet—no soil prep needed, just water and watch the magic unfold. ✨ I’ve turned my balcony into a wildflower meadow using these biodegradable sheets, and the best part?
You can toss the whole thing into the ground when it’s done. The secret lies in keeping the paper consistently moist without drowning the seeds, which is where most people stumble.
You’ll need seed paper (available online or handmade), a shallow tray, water, and a spray bottle for gentle hydration. Place the paper seed-side down on damp soil, lightly press it in, and mist it daily until sprouts appear—usually within 7-14 days.
Overwatering is the enemy here; soggy paper smothers seeds, while too little moisture stalls germination. Think of it like nurturing a delicate origami flower.
Once sprouted, the paper breaks down naturally, feeding the soil as roots establish. You’ll end up with delicate blooms or lush herbs, depending on your seed mix, and the process is zero-waste from start to finish.
Perfect for window boxes, hanging planters, or even gifting—just add water, wait, and enjoy the show.
Troubleshooting slow starts? Check your watering routine—consistency is key. For faster results, place the tray in a sunny spot (but not scorching direct sun) and cover it lightly with a plastic wrap until sprouts emerge. The payoff? A garden that grows with intention, not effort.
📚 In This Guide
- What you need
- Instructions
- Tips and common mistakes
- Wrapping up and next steps
What you need
- ● Seed paper: Choose pre-made seed paper (e.g., wildflower, herb, or vegetable blends) or make your own with 1 part seed to 3 parts recycled paper pulp (see our DIY guide for details!).
- ● Water: A spray bottle (8-16 oz) or a shallow tray filled with ½ inch of water.
- ● Plastic wrap or a clear lid: To create a moisture-controlled environment (e.g., a plastic container with a lid or a zip-top bag).
- ● Scissors or a craft knife: For trimming seed paper to size if needed.
- ○ Planting tray or shallow container: With drainage holes (optional for initial sprouting phase).
- ● Glove or tweezers: To handle seed paper gently (especially if it’s damp or delicate).
- ● Labeling tags: To track seed types if planting a mix (e.g., wildflower vs. herb).
- ● Light source: A sunny windowsill or grow light for 6-8 hours/day once sprouts emerge.
- ● Compost or soil: For transplanting seedlings (if not planting directly in soil).
- ● Misting spray bottle: For maintaining moisture without over-saturating.
Step-by-Step instructions for planting seed paper
Here's how to transform seed paper into vibrant blooms with minimal effort—just moisture and patience.
🌱 Step 1: Prepare Your Planting Surface
Choose a shallow tray or flat container with drainage holes—your seed paper needs to stay moist but never soggy. I like using a seedling tray with 1-inch deep cells because it keeps everything organized. Line the bottom with a layer of pebbles or a coffee filter to prevent root rot from trapped water.
Fill the tray with 1-2 inches of potting soil, pressing it down lightly so it's firm but still loose enough for roots to penetrate. Water the soil until it's damp to the touch, but not dripping. The goal is to create a sponge-like environment where the seed paper can absorb moisture evenly without floating.
💧 Step 2: Plant the Seed Paper
Gently place the seed paper on the prepared soil, smoothing it out so it lies flat. You'll notice the seeds are embedded in the paper—some may already be visible as tiny specks. Press lightly along the edges to ensure full contact with the soil. This step is critical because the paper needs to stay in place while roots establish.
Mist the seed paper thoroughly with a spray bottle until the paper looks damp but not soaked. You want the moisture to penetrate the paper and reach the seeds without creating puddles. I like to work in sections, misting one area at a time and letting the water soak in before moving on. This ensures even hydration.
☀️ Step 3: Maintain Moisture and Light
Cover the tray with a clear plastic dome or wrap it loosely with plastic wrap to retain humidity. Seed paper thrives in a warm, moist environment—think of it like a mini greenhouse. Place the tray in a spot with bright, indirect light, like a windowsill with sheer curtains. Direct sunlight can dry out the paper too quickly, while too little light slows germination.
Check the moisture daily—you'll want the paper to stay damp like a wrung-out sponge. If it feels dry to the touch, mist it again. You'll see the first signs of life in 7-14 days, when tiny green shoots begin to push through the paper. This is your cue that everything is working!
🌿 Step 4: Transition to Soil and Care for New Plants
Once the seedlings reach about 1-2 inches tall and have developed their first true leaves, it's time to transplant them. Gently peel back the seed paper to expose the roots, then carefully lift the seedlings out of the tray. You can either plant them directly into your garden or transfer them to individual pots with fresh soil.
Water the seedlings lightly after transplanting to help them settle in. From here, care for them like any other young plant—keep the soil moist but not waterlogged, and provide 4-6 hours of sunlight daily. The seed paper will break down naturally over time, enriching the soil with organic matter as the roots grow.
⏰ Step 5: Monitor Growth and Bloom
Watch for new growth and adjust care as needed. Seed paper plants often bloom faster than traditional seedlings because they start with a head start on nutrients. You'll know they're thriving when they develop strong stems and vibrant leaves. Most varieties will flower in 6-8 weeks, depending on the type of seeds embedded in the paper.
Once the flowers fade, you can either deadhead them to encourage more blooms or let them go to seed for next year. The beauty of seed paper is that it's a sustainable way to grow flowers without the mess of traditional planting. Plus, you'll have a zero-waste garden that's as eco-friendly as it is beautiful!
Tips & tricks for planting seed paper
Transforming seed paper into blooming plants is easier than it looks—once you know these simple tricks that keep everything just right.
Moisture Control: The secret to success lies in that perfect dampness. After planting, weigh down the edges of your seed paper with small pebbles or a light mesh screen to keep it flat against the soil. This prevents the paper from curling up and drying out unevenly, especially in Step 2 when you're misting. I've found that using a spray bottle with a fine mist setting gives you the most control—aim for a light mist until water just begins to bead on the surface, not soak through.
Lighting Strategy: In Step 3, when you're positioning your tray, don't underestimate the power of indirect light. I've seen beginners place their trays in direct sunlight, only to have the paper dry out within hours. Instead, try a south-facing window with sheer curtains or use a grow light 6-12 inches above the tray for 10-12 hours daily. The key is to mimic spring conditions—gentle warmth without harsh exposure.
Transplanting Timing: Waiting for those 1-2 inch seedlings in Step 4 can be tempting to rush, but patience pays off. The paper needs to break down enough to release the roots without tearing. I recommend waiting until you see at least three true leaves and the roots are visibly pushing against the paper. Gently peeling back just a corner to check root development helps avoid over-handling the delicate seedlings.
Soil Quality: While the instructions mention potting soil, I've had the best results using a mix of 60% potting soil and 40% perlite or vermiculite. This improves drainage while retaining moisture—critical in Step 1 when you're creating that sponge-like environment. The extra aeration also prevents that dreaded root rot from trapped water, especially important if you're using a tray without drainage holes.
Pro Tips for Plant Seed Paper
- Transforming seed paper into blooming plants is easier than it looks—once you know these simple tricks that keep ever...
- Moisture Control: The secret to success lies in that perfect dampness. After planting, weigh down the edges of your s...
- Lighting Strategy: In Step 3, when you're positioning your tray, don't underestimate the power of indirect light. I'v...
Frequently asked questions
Got questions about growing your seed paper? Here are answers to the most common ones—so you can bloom with confidence!
How much water does seed paper need to sprout?
Seed paper thrives with gentle, consistent moisture—not soaking! Lightly mist the surface daily (or place it in a shallow tray with ¼-inch water) until roots appear (5–7 days). Avoid soggy paper; it can rot seeds. Think "damp sponge," not "swamp."
How long until flowers bloom from seed paper?
Germination takes 7–14 days, but blooms arrive months later—typically 6–12 weeks, depending on the plant (e.g., marigolds bloom faster than sunflowers). Patience pays off! Track growth with a journal or app for fun.
Can I plant seed paper in soil instead of water?
For direct soil planting, press the paper into damp earth (like a mini seed bomb) and cover lightly with soil. Water gently to settle it. This skips the sprouting tray step—ideal for gardens or pots. Just ensure soil stays moist until roots establish.
What if my seed paper doesn’t sprout?
Troubleshoot with these fixes:
- No moisture: Increase misting or try the water tray method.
- Too dry: Seal the tray with plastic wrap to retain humidity.
- Old seeds: Check the seed paper’s expiration date (usually 1–2 years).
- Light issues: Place near a sunny window or use a grow light.
Can I reuse seed paper if it doesn’t sprout?
Yes! If seeds fail, compost the paper or repurpose it as mulch—it’s still biodegradable. For a creative twist, turn it into seed paper art (e.g., confetti for future plantings) or use it as a seed-starting marker in your garden. Waste not!
Wrapping up and next steps
Planting seed paper is a simple yet impactful way to bring life to your space while reducing waste—every sheet is a tiny garden waiting to bloom! 🌱 With just a little patience and the right conditions, you’ll soon enjoy vibrant flowers or fresh herbs right on your windowsill or balcony.
Now that you’re ready to grow, why not expand your green thumb? Try experimenting with different seed blends, track your sprouting progress, or even gift handmade seed paper to friends for a sustainable surprise.