
Lawn
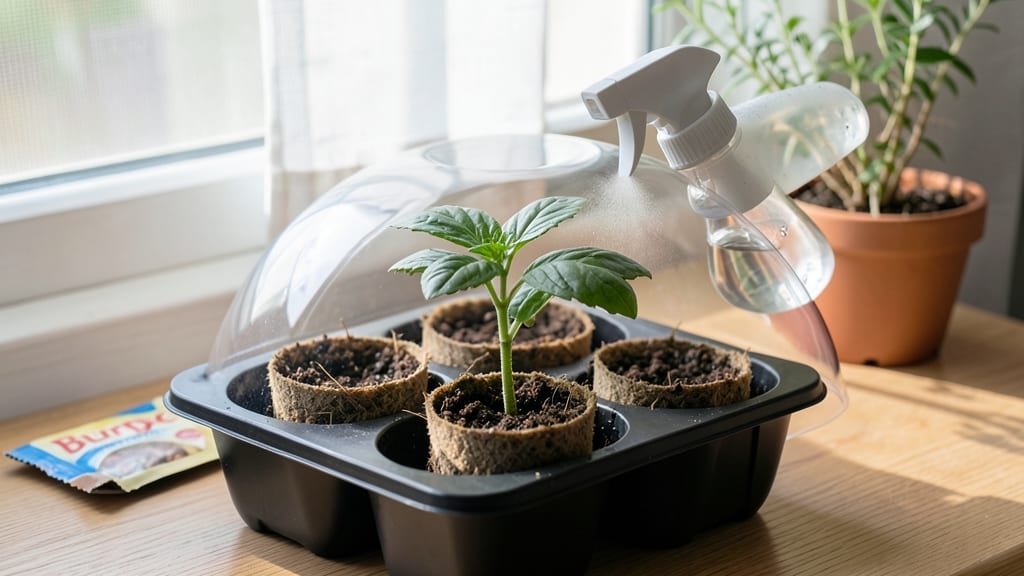
Getting a seed to sprout starts with moisture—the single factor that makes or breaks your first tiny green shoot. 🌱 I’ve watched seeds rot in soggy soil one season and pop up in days the next, and the difference always comes down to keeping that soil damp, not drenched, while giving roots the warmth they crave.
Most beginners overthink it, but the science is simple: seeds need cozy, consistently moist conditions to wake up and grow. The right setup makes all the difference. You’ll need a shallow tray, some well-draining soil mix, and a way to control warmth—whether that’s a sunny windowsill or a heat mat.
Small seeds like lettuce need barely any soil coverage (just press them in), while big seeds like beans can sit 1 inch deep. The key is patience: most seeds take 5–14 days to sprout, but some stubborn varieties need up to 30.
Once you crack the moisture-warmth balance, you’ll see those first sprouts push through like magic. The moment you spot that tiny loop breaking the surface, move them to bright light (but not direct sun yet) and keep the soil lightly moist. No more guessing—just reliable, predictable growth every time.
This method works for everything from tiny herbs to towering sunflowers. The only real mistake? Giving up too soon. Stick with it, and you’ll have seedlings ready to transplant in no time.
📚 In This Guide
- What you need
- Instructions
- Tips and common mistakes
- Wrapping up and next steps
What you need
- ● Seeds: Choose fresh, high-quality seeds (check the packet for germination rates and planting depth). Quantity: 1–10 seeds (depends on your container size).
- ● Growing Container: Small pots (3–4 inches deep) or seed trays with drainage holes
- ○ Optional: Paper towels, damp coffee filters, or a seed-starting kit for indoor sprouting
- ● Potting Mix: Lightweight, sterile seed-starting mix (avoid garden soil—it’s too dense!). Quantity: Enough to fill your container 2–3 inches deep.
- ● Water: Room-temperature, distilled, or rainwater (chlorine-free). Tip: A spray bottle works best for gentle moisture control!
- ● Heat Source: Heat mat (90–95°F for optimal warmth) or
- ● Warm spot near a sunny window, under a grow light, or on top of a fridge
- ○ Humidity Dome or Plastic Wrap: To retain moisture (especially for tiny seeds). Optional: A clear plastic bag with holes punched in it.
- ○ Grow Lights (Optional): LED or fluorescent grow lights (12–16 hours/day) if natural light is insufficient.
- ● Seed Prep: Soak seeds overnight in water (for hard-coated seeds like beans or peas) to soften the shell. ✨ Pro Tip: Use a warm, dark place for soaking—like a glass of water on your counter!
- ● Cleanliness: Sterilize tools and containers with a 10% bleach solution (1 part bleach to 9 parts water) to prevent mold.
- ● Patience: Some seeds (like tomatoes or peppers) take 7–14 days to sprout, while others (like radishes) may appear in just 3–5 days!
Step-by-step guide to germinating seeds successfully
Here's how I get every seed to sprout—no guesswork, just reliable moisture and warmth.
🌱 Step 1: Prep Seeds for Faster Germination
Start by soaking seeds overnight in lukewarm water to soften their outer coating. This is especially helpful for seeds with hard shells, like beans or peas. I use a small bowl or jar and let them soak for 8-12 hours—just enough to plump them up without drowning them. Drain well before planting.
For tiny seeds like lettuce or carrots, I skip soaking and plant them directly. The key is keeping them moist but not waterlogged. If you're unsure, check the seed packet—some varieties need soaking, others don’t. This step cuts germination time in half for many seeds.
💧 Step 2: Plant in Moist, Warm Soil
Fill your seed-starting container with light, well-draining soil and moisten it until damp but not soggy. Press the soil down gently so it’s firm enough to hold seeds in place. Plant seeds at the depth recommended on the packet—usually 2-3 times their diameter. For example, a ¼-inch deep planting works for most small seeds.
I like to use a spray bottle to mist the soil after planting. This keeps seeds from shifting too deep while ensuring consistent moisture. Cover the container with plastic wrap or a humidity dome to trap warmth and moisture. Place it in a warm spot—70-80°F is ideal for most seeds.
☀️ Step 3: Maintain Consistent Moisture and Warmth
Check the soil daily—it should stay evenly moist but never waterlogged. If the top inch feels dry, mist it lightly. Avoid overwatering, which can suffocate seeds or cause rot. I use a small fan on low to keep humidity stable without creating a damp, moldy environment.
Keep the container in a warm, dark place for the first few days. Many seeds need darkness to germinate—light too soon can stunt them. Once you see tiny green sprouts (usually in 3-10 days), move the container to a bright spot but keep it out of direct sunlight until the seedlings are stronger.
⏰ Step 4: Watch for Sprouts and Adjust Care
The moment you see the first true leaves—not the initial seed leaves—remove any plastic coverings. This prevents seedlings from becoming leggy as they stretch toward light. I like to place a grow light 2-3 inches above the seedlings to give them strong, even growth.
If germination is slow, try a seedling heat mat to keep soil temperatures at 75-85°F. Some seeds, like tomatoes, germinate faster with extra warmth. Once sprouts appear, thin them to the strongest seedling per container to avoid competition.
Tips & tricks for speeding up seed germination
These simple adjustments will help you turn stubborn seeds into strong sprouts faster than ever.
Soaking Savvy: For seeds with hard shells like beans or peas, that 8-12 hour soak in lukewarm water is your secret weapon. I've seen germination rates double when using this method! After soaking, drain them thoroughly—waterlogged seeds won't sprout. For tiny seeds like lettuce, skip soaking entirely to avoid over-moistening their delicate structures.
Temperature Matters: That 70-80°F range is perfect for most seeds, but some tropical varieties need warmth up to 85°F. If your kitchen runs cooler, place the container on top of your fridge or use a seedling heat mat. I've had chili pepper seeds that took 3 weeks to sprout at room temperature but popped up in 5 days with extra warmth.
The Depth Difference: Planting seeds at ¼-inch deep (or 2-3 times their diameter) might seem like a small detail, but it's crucial. Deeper planting requires more energy for the sprout to break through, while shallow planting risks drying out. Use a pencil to make small holes if your soil is too firm for easy planting.
Light Timing: Keep seeds in darkness for the first few days—this might seem counterintuitive, but many seeds need this period to activate properly. Once you see those first green sprouts (usually within 3-10 days), move them to bright, indirect light. Direct sunlight too soon can scorch tender seedlings.
Pro Tips for Get A Seed To Sprout
- These simple adjustments will help you turn stubborn seeds into strong sprouts faster than ever.
- Soaking Savvy: For seeds with hard shells like beans or peas, that 8-12 hour soak in lukewarm water is your secret weapon.
- Temperature Matters: That 70-80°F range is perfect for most seeds, but some tropical varieties need warmth up to 85°F.
Frequently asked questions
Got questions about coaxing life from a tiny seed? You’re not alone! Here are answers to the most common germination dilemmas—so you can avoid frustration and start growing with confidence.
How long does it take for a seed to sprout?
The time varies by plant type, but most seeds sprout within 3 to 14 days under ideal conditions (warmth, moisture, and light). Fast growers like radishes sprout in 3–5 days, while stubborn seeds (e.g., beans or tomatoes) may take 2–3 weeks. If nothing happens after 2–3 times the expected germination period, the seed might be dead or need better conditions.
What if my seed won’t sprout, even with warmth and moisture?
Don’t panic! Try these fixes:
- Check viability: Test with a paper towel method—wrap damp paper around the seed and wait 7–10 days. No sprouts? It’s likely non-viable.
- Adjust moisture: Overwatering can drown seeds; under-watering dries them out. Aim for consistently damp (not soggy) soil.
- Light vs. dark: Some seeds (like peas) need darkness to germinate; others (like lettuce) thrive with light. Research your seed’s needs!
- Temperature tweak: Most seeds prefer 65–85°F. Use a heating mat if your home runs cooler.
Can I use a microwave or oven to speed up germination?
Yes! A quick 1–2 minute microwave session (place seeds in a damp paper towel, microwave on high, then let cool) can soften the seed coat and kickstart germination. For ovens, try the “baking method”: Place seeds in a bowl, cover with damp paper towels, and bake at 120°F (49°C) for 12–24 hours. Never exceed 120°F—higher temps can kill seeds. Monitor closely!
Do I need special soil or fertilizer to help seeds sprout?
Not necessarily! Start with light, well-draining seed-starting mix (or even a damp paper towel for testing). Fertilizer isn’t needed at this stage—it can burn tender sprouts. Once your seedling has 2–3 true leaves, you can introduce a balanced, diluted fertilizer (like 5-5-5). For stubborn seeds, a pinch of compost or worm castings can boost nutrients without overpowering.
What’s the best way to reuse leftover seeds from sprouted plants?
Save seeds from healthy, non-hybrid plants (like tomatoes, beans, or herbs) for next season! Let them fully mature on the plant, then:
- Dry seeds in a cool, dark place for 1–2 weeks.
- Store in an airtight container with a silica packet or rice to absorb moisture.
- Label with the plant name and date—most seeds stay viable for 1–5 years.
Wrapping up and next steps
Getting a seed to sprout is all about patience, the right conditions, and a little know-how! 🌱 With the perfect balance of warmth, moisture, and light, you’ll soon see tiny green shoots breaking through the soil.
Remember, every gardener starts with a single seed—your green thumb is just waiting to bloom!
Now that you’re armed with these tricks, take the next step: grab your favorite seeds, set up your germination station, and watch the magic happen. Happy growing—your future plants are cheering you on! 🌿✨