
Lawn
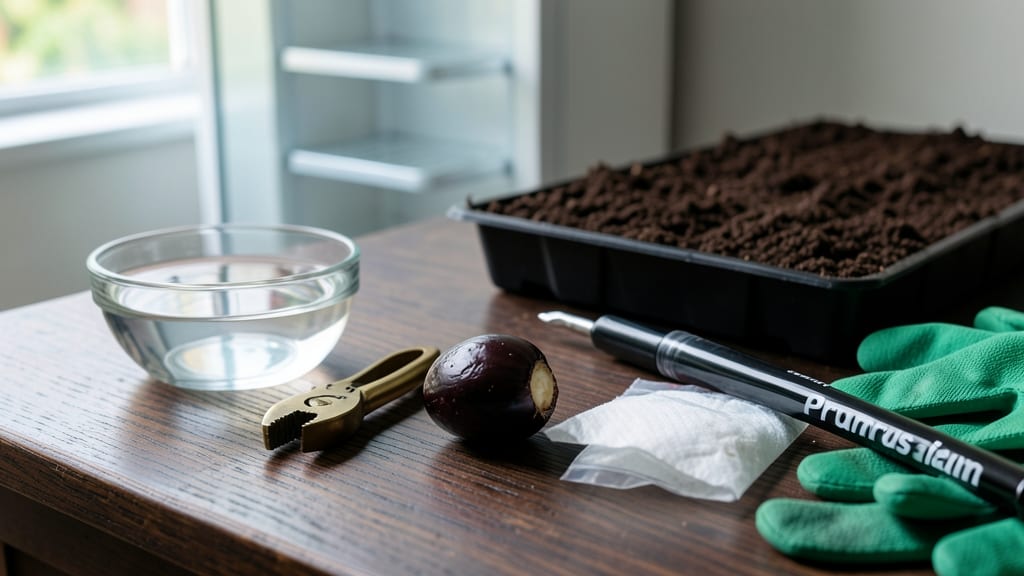
Preparing a cherry seed for planting starts with a simple scarification trick that cuts germination time from months to weeks. 🌱 I learned this method after struggling with seeds that sat dormant for years—until I discovered the key to breaking their tough outer shell.
The process is straightforward, but timing matters: start in late fall or early winter for the best results.
You’ll need just a few household items: a cherry pit (fresh is best), sandpaper or a knife, a plastic bag, and a damp paper towel. The scarification step—lightly filing or nicking the seed’s hard coat—triggers faster sprouting.
This mimics natural wear and tear that seeds experience in the wild, giving them the signal to wake up.
Within 4-6 weeks, you’ll see a tiny sprout pushing through, ready to transplant. The resulting seedling will grow into a tree, but here’s the catch: it won’t produce fruit identical to the parent cherry.
Instead, you’ll get a wild-type tree with small, tart cherries—great for ornamental value or bird-friendly landscapes.
Common mistakes include over-scarifying (which damages the seed) or rushing the process. Patience pays off—this method works best when you let nature take its course. Once you’ve mastered it, you’ll never look at a cherry pit the same way again!
📚 In This Guide
- What you need
- Instructions
- Tips and common mistakes
- Wrapping up and next steps
What you need
- ● Fresh cherry seeds: Collect seeds from fully ripe, organic cherries (avoid store-bought varieties if you want true-to-type fruit). Aim for at least 10-20 seeds to account for potential losses.
- ● Sandpaper (medium-grit, 100-120 grit): A small sheet (around 3" x 3") is perfect for gently scarifying seeds.
- ● Paper towels or coffee filters: 2-3 sheets to create a moist environment for germination.
- ● Plastic bag or airtight container: A quart-sized ziplock bag works well for storing seeds during stratification.
- ● Spray bottle with water: For keeping seeds hydrated without over-saturating them.
- ● Small pots or seed trays: With drainage holes, filled with well-draining potting mix (e.g., 50% peat moss, 30% perlite, 20% vermiculite).
- ● Plastic wrap or clear lid: To create a mini greenhouse effect for sprouting seeds.
- ● Refrigerator: For cold stratification (if needed, depending on seed type).
- ● Hydrogen peroxide (3% solution): For a quick 5-minute soak to disinfect seeds and boost germination.
- ● Grow lights or sunny windowsill: To provide consistent warmth (70-75°F) for sprouting.
- ● Planting labels: To track seed varieties and planting dates.
- ○ Heat mat (optional): For faster germination in cooler climates.
- ● Patience and a journal: To log progress and adjust techniques! 📖✏️
Step-by-step instructions for preparing cherry seeds for faster germination
Here's how to break through nature's defenses and get those stubborn cherry seeds sprouting in record time.
🌱 Step 1: Harvest and Clean the Seeds
Pick fully ripe cherries and scoop out the pits, letting them dry completely for 2-3 days in a warm, dry place. The seed coat must be completely dry before handling—wet seeds won't scarify properly. I like to place them on a paper towel in a single layer, turning them daily to ensure even drying.
Once dry, use a small knife to carefully slice the pit in half lengthwise. This exposes the seed inside, which looks like a small, flat brown bean. Gently pry it out with the knife tip—don't crush it, or you'll damage the embryo. You'll need 4 seeds total for this process, so prepare them all at once.
✂️ Step 2: Perform the Scarification Process
Take one seed and place it on a flat surface. Using the same small knife, make 3-4 shallow cuts around the outer edge of the seed, being careful not to slice too deep—you're only breaking the hard outer shell, not the seed itself. Think of it like scoring an egg: just enough to crack the surface.
Here's the thing—don't worry if the cuts aren't perfect. The goal is to create small weaknesses in the seed coat so water can penetrate. I like to use a magnifying glass to check my work—you should see tiny white lines where the knife passed through the outer shell.
💧 Step 3: Soak the Scarified Seeds
Place all four scarified seeds in a small bowl and cover them with lukewarm water. Let them soak for 24-48 hours, changing the water halfway through if it starts to look cloudy. You'll know it's working when you see tiny white roots beginning to emerge from the cut edges.
Don't skip this step—soaking ensures the seed absorbs moisture through the damaged coat. I've tried planting scarified seeds dry, and they either won't sprout or take months to germinate. The soak is what makes this process truly fast.
🌿 Step 4: Prepare the Planting Medium
While the seeds soak, fill a small pot with well-draining potting mix (I use a blend of peat moss and perlite). The mix should be moist but not soggy—think of it as holding together when squeezed but not dripping water. Tap the pot gently to settle the soil, then use your finger to create ¼-inch deep planting holes.
Here's where it gets fun—watch the seeds after soaking. If roots have formed, you'll see them curling around the edges. Plant them immediately in the prepared holes, covering them with just enough soil to hold them in place. Gently press the soil around the seeds to ensure good contact.
☀️ Step 5: Provide Ideal Germination Conditions
Place the pot in a warm, dark location with a consistent temperature of 70-75°F. I use a seedling heat mat under the pot to maintain warmth. Keep the soil moist by misting lightly every 2-3 days—you want it damp but never waterlogged.
Germination should begin in 7-14 days. You'll see the first tiny green shoots pushing through the soil, followed by the first true leaves. Once the seedlings have 2-3 sets of leaves, they're ready to move to brighter light. Don't rush this—waiting ensures strong, healthy growth.
Tips & tricks for faster cherry seed germination
Let me share the little secrets that'll turn your cherry seeds from stubborn to sprouting in no time!
The Drying Factor: Those 2-3 days of drying aren't just about removing moisture—they're about hardening the seed coat. Place your pits on a paper towel in a single layer and turn them daily. This prevents mold growth and ensures even drying. I've found that using a fan on low speed speeds up the process by about 24 hours while keeping them completely dry. The key is patience here—rushing this step means your scarification won't work properly later.
Scarification Precision: When making those 3-4 shallow cuts in Step 2, think of them as creating tiny windows for water to enter. I like to use a fresh razor blade for cleaner cuts than a knife. You'll know you've done it right when you see those faint white lines through the seed coat. Pro tip: If you accidentally cut too deep and see the green embryo inside, don't panic—just use that seed for planting immediately as it's already compromised.
Soaking Strategy: The 24-48 hour soak is where the magic happens! I've found that using filtered water prevents any chemical buildup that could inhibit germination. Change the water halfway through if it looks cloudy—this removes any acids released from the seeds. Watch for those first white root hairs emerging after about 18-24 hours. If you see this, your seeds are ready for planting immediately—don't wait for the full 48 hours!
Planting Timing: Here's what nobody tells you—plant your scarified seeds as soon as you see those first root hairs. The moment they emerge, the seed starts using its energy reserves. I've had seeds that sprouted right in the soaking bowl if left too long. Once planted, keep the soil consistently moist but never soggy during the germination period. A spray bottle works perfectly for this delicate balance.
Pro Tips for How Do You Prepare A Cherry Seed For Planting
- Let me share the little secrets that'll turn your cherry seeds from stubborn to sprouting in no time!
- The Drying Factor: Those 2-3 days of drying aren't just about removing moisture—they're about hardening the seed coat...
- Scarification Precision: When making those 3-4 shallow cuts in Step 2, think of them as creating tiny windows for wat...
Frequently asked questions
Got questions about growing cherries from seeds? You’re not alone! Here are some of the most common queries—plus straightforward answers to help you succeed.
How long does it take for a cherry seed to sprout after scarification?
With proper scarification (like sandpaper or cold stratification), most cherry seeds sprout in 4–12 weeks. Patience is key—some varieties may take longer, especially if moisture or temperature isn’t ideal. Keep the soil consistently damp and in a warm spot (around 65–75°F) to speed things up!
Can I skip scarification and just plant the seed directly?
Technically, yes—but your success rate will plummet! Cherry seeds have a hard outer shell that blocks water and oxygen, delaying (or preventing) germination. Scarification mimics natural weathering, breaking dormancy faster. For best results, always scarify or stratify seeds before planting.
What’s the best time of year to plant scarified cherry seeds?
Plant scarified seeds in early spring or late winter (6–8 weeks before your last frost date) for the best start. If you’re using cold stratification (the fridge method), begin the process in fall so seeds are ready to plant in spring. Avoid planting in hot summer months—seeds dry out quickly!
Will a cherry tree grown from seed produce fruit like the parent plant?
Probably not! Seed-grown cherries are unpredictable—they may take 5–10 years to fruit (if at all) and could have different flavors, sizes, or even colors. For reliable fruit, graft a known variety onto a seedling rootstock or buy a young tree from a nursery.
My scarified seeds aren’t sprouting—what did I do wrong?
Don’t panic! Common issues include:
- Overwatering (roots need air—keep soil moist, not soggy).
- Improper scarification (too light? Try sanding longer or using a drill).
- Poor soil (use a mix of potting soil + perlite for drainage).
- Temperature stress (keep seeds in a warm, stable spot).
Wrapping up and next steps
Preparing cherry seeds for planting is all about patience and the right technique—like scarification—to break dormancy and encourage faster sprouting. With just a few simple steps, you’ll be on your way to growing a thriving cherry tree from seed! 🌱
Now that you’re ready, grab those seeds and get planting. Keep an eye on their progress, and soon you’ll be rewarded with a new addition to your garden. Happy growing! 🌿