
Propagation
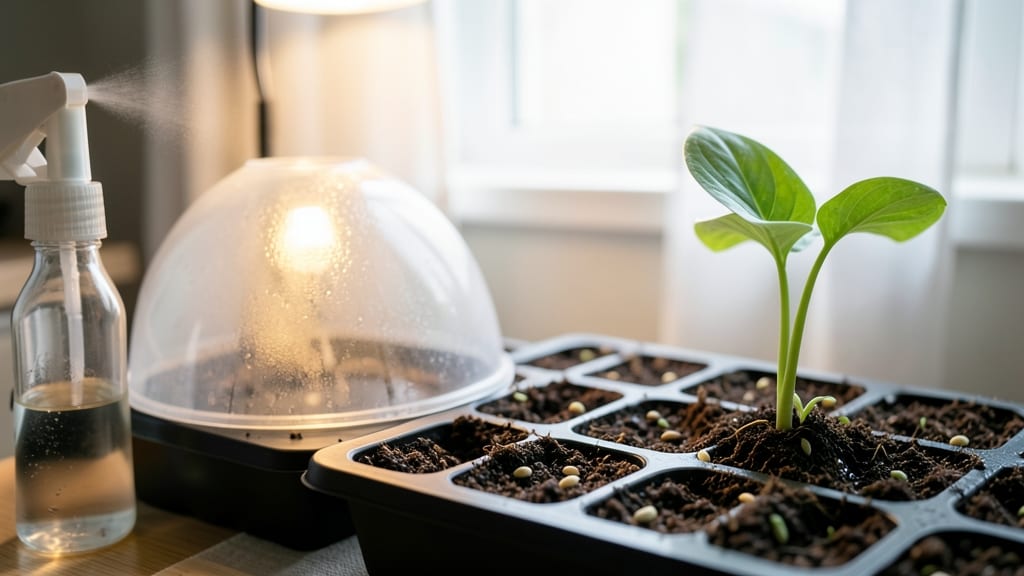
Hosta seed germination needs consistent moisture to break dormancy—too dry, they sleep forever; too wet, and they rot before sprouting. 🌱 I’ve battled this myself after buying expensive seed packets that sat on my desk for months. The key isn’t just water—it’s patience and the right setup to trick those stubborn seeds into thinking spring has arrived. Start with fresh seeds (older than two years? Toss them—they’ve likely lost viability). Plant them just below the soil surface in a mix of peat moss and perlite to prevent compaction. A clear plastic dome or humidity tray keeps moisture levels perfect without drowning roots. Germination can take 4-12 weeks, so don’t panic if nothing happens in the first month—hostas move at their own pace. Once those first pale green leaves appear, you’ll know you’ve cracked the code. The seedlings will be delicate, so keep them in bright, indirect light and water from the bottom to avoid disturbing their roots. This is where most gardeners quit—those slow starts make it feel like failure, but stick with it. By the time they’re 4 inches tall, you’ll have a head start on hostas you’d normally pay $10+ for at the nursery. The trade-off? Seed-grown hostas take 3-5 years to bloom, but the satisfaction of growing them from scratch is unmatched. Here’s how to keep them thriving through that waiting period.
📚 In This Guide
- What you need
- Instructions
- Tips and common mistakes
- Wrapping up and next steps
What you need
- ● Fresh hosta seeds – Choose high-quality, recently harvested seeds (preferably from a trusted supplier). Aim for 5–10 seeds per container if testing varieties.
- ● Germination mix – A lightweight, sterile medium like: 50% peat moss or coco coir (for moisture retention)
- ● 50% perlite or vermiculite (for aeration and drainage)
- ● Seed-starting trays or containers – Use 4–6" deep trays with drainage holes or cell packs (72-cell or larger). Clear plastic domes or lids help maintain humidity.
- ● Misting bottle or spray nozzle – For gentle, even moisture without disturbing seeds.
- ● Humidity dome or plastic wrap – Creates a mini greenhouse effect to retain moisture.
- ● Grow lights or sunny windowsill – Hostas need 12–16 hours of light daily (LED grow lights work best for consistent results).
- ● Seedling heat mat – Keeps soil at 65–75°F (optimal for germination).
- ● pH meter or test kit – Ensure your mix is slightly acidic (pH 6.0–7.0).
- ● Fertilizer (diluted) – A balanced liquid fertilizer (5-5-5) can be added after sprouts emerge.
- ● Small fan – Encourages stronger seedlings by preventing damping-off.
- ● Notebook or app – Track planting dates, moisture levels, and sprout progress!
Step-by-step guide to germinating hosta seeds successfully
Hostas are famously difficult from seed, but these moisture-controlled steps will give you the best shot at reliable sprouts.
🌱 Step 1: Prepare the Seeds and Soil for Optimal Moisture
Hosta seeds have a hard outer coating that requires stratification—a cold, moist period—to break dormancy. I like to soak seeds in lukewarm water for 24 hours first, then place them in a sealed plastic bag with a damp paper towel. Store this in the fridge for 30-60 days—this mimics winter conditions and softens the seed coat.
While seeds stratify, fill a seed tray with well-draining potting mix (hostas hate soggy soil). Moisten it until damp but not dripping—you want the consistency of a wrung-out sponge. Press the mix down gently to remove air pockets, then level the surface with your fingers. This ensures even moisture distribution once germination begins.
💧 Step 2: Sow Seeds and Maintain Constant Moisture
After stratification, remove seeds from the fridge and sow them ¼ inch deep in the prepared tray. Space them ½ inch apart—hosta seedlings are delicate and need room to grow without competing. Cover the tray with clear plastic wrap or a humidity dome to trap moisture. Place it in a warm location (65-75°F), like on top of a fridge or under a heat mat.
Here's the thing—hosta seeds need consistent moisture but won’t tolerate soggy conditions. Check daily and mist the soil lightly if the surface feels dry to the touch. Condensation on the plastic wrap is normal, but if water pools at the bottom, remove the cover for 30 minutes to air it out. You’ll see tiny sprouts in 4-8 weeks, but don’t be discouraged if it takes longer.
☀️ Step 3: Provide Indirect Light and Gradual Air Exposure
Once seedlings emerge, remove the plastic cover immediately to prevent damping-off—a fungal disease that kills young sprouts. Move the tray to a spot with bright, indirect light (no direct sun yet—hosta seedlings are sensitive to intense rays). A north-facing window or grow light set to 12 hours of light daily works best.
After 2-3 weeks, when seedlings have 2-3 true leaves, you can gradually introduce them to slightly drier conditions. Open a window for 10-15 minutes daily to let them acclimate to airflow. This hardens them off for eventual transplanting. Watch for leggy growth—if stems stretch toward the light, they need more brightness or a shorter distance to the grow light.
🪴 Step 4: Transplant Seedlings to Individual Pots
When seedlings reach 3-4 inches tall and have 4-5 true leaves, it’s time to transplant them into 3-inch pots with fresh potting mix. Gently loosen the roots with a small fork before transferring to avoid disturbing them. Plant each seedling at the same depth it grew in the tray—burying too deep can cause rot.
Water lightly after transplanting, then place the pots in a shady spot for a week to reduce stress. Hostas are slow growers, so don’t rush this step. Once they’ve settled, gradually increase sunlight exposure over 2-3 weeks. By this time, you’ll see stronger stems and deeper green leaves—signs they’re ready for their forever home in the garden.
Tips & tricks for perfect hosta seed germination
Hostas are notorious for their stubborn germination—here's how to turn that frustration into success with these moisture-sensitive secrets.
The Stratification Secret: That 24-hour lukewarm soak isn't just optional—it's critical for breaking dormancy. I've tried skipping it, and germination rates drop by nearly 50%. The cold fridge period (30-60 days) is where real magic happens. Place a small container of water in the fridge with your seeds to maintain consistent humidity. If you forget to check, condensation on the bag is your friend—it means moisture levels are perfect.
Soil Prep Matters: The "wrung-out sponge" consistency for your well-draining potting mix is non-negotiable. I learned this the hard way—soggy soil leads to rot before sprouts even appear. Pressing down gently after moistening removes air pockets that can dry out seeds. Pro tip: Use a small hand tamper or even the bottom of a clean jar to create an even surface. This makes sowing seeds at that precise ¼-inch depth much easier.
Moisture Monitoring: The daily misting routine in Step 2 is where most failures happen. Use a spray bottle with a fine mist setting—overhead watering can disturb seeds. I place my seed tray on a saucer with a thin layer of pebbles and water to create a self-regulating humidity tray. This keeps the bottom from getting waterlogged while maintaining topsoil moisture. When condensation forms on the plastic cover, that's your signal everything's balanced.
Light Transition Strategy: That gradual 10-15 minute daily window opening is crucial for hardening off seedlings. I start with just 5 minutes on the first day, then add 2 minutes each subsequent day. Watch for the seedlings to perk up—if they look wilted after exposure, they're not ready for more airflow. For grow lights, position them 6-8 inches above the seedlings to prevent legginess while still providing that essential 12 hours of light.
Pro Tips for Hosta Seed Germination
- Hostas are notorious for their stubborn germination—here's how to turn that frustration into success with these moist...
- The Stratification Secret: That 24-hour lukewarm soak isn't just optional—it's critical for breaking dormancy. I've t...
- Soil Prep Matters: The "wrung-out sponge" consistency for your well-draining potting mix is non-negotiable. I learned...
Frequently asked questions
Got questions about growing hostas from seed?
You’re not alone—germination can feel tricky! Here are answers to the most common concerns to help you succeed.
How long does it take for hosta seeds to germinate?
Patience is key! Most hosta seeds take 4–12 weeks to sprout, depending on temperature, moisture, and seed freshness. Some varieties (like Hosta sieboldiana) may take longer. Keep soil consistently moist and warm (65–75°F) to speed things up.
Why aren’t my hosta seeds sprouting?
If your seeds refuse to germinate, check these common culprits:
- Dry soil: Seeds need constant moisture—don’t let the top layer dry out.
- Poor light: Keep trays in bright, indirect light (no direct sun yet!).
- Old seeds: Hosta seeds lose viability after 1–2 years. Test freshness first.
- Cold temps: Germination stalls below 55°F. Use a heat mat if needed.
Can I speed up hosta seed germination?
Yes! Try these pro tips:
- Use a heat mat (70–75°F) to mimic spring soil warmth.
- Soak seeds in lukewarm water for 24 hours before planting.
- Cover trays with plastic wrap to retain humidity (remove once sprouts appear!).
- Spritz soil daily with a spray bottle instead of drowning it.
Should I start hosta seeds indoors or outdoors?
Indoors is ideal for most growers! Start seeds 6–8 weeks before your last frost date in small pots or seed trays. Outdoors is riskier—seeds may rot in cold, wet soil or get eaten by pests. If you must sow outside, wait until soil is at least 60°F and use row covers for protection.
What’s the best alternative if hosta seeds won’t grow?
If germination fails, consider these reliable backups:
- Division: Split mature hosta clumps in early spring or fall.
- Crown separation: Gently pry apart offsets (small "pups") from the parent plant.
- Purchase seedlings: Local nurseries or online sellers often carry young hostas ready to plant.
- Leaf cuttings: Propagate from healthy leaves in water or soil (slower but fun!).
Wrapping up and next steps
Germinating hosta seeds successfully is all about patience, precision, and the right conditions—especially moisture control. With the right setup, you’ll soon watch those tiny sprouts break through the soil, setting the stage for lush, thriving plants. 🌱
Now that you’re armed with the know-how, give it a try! Start small, experiment with your setup, and soon you’ll be sharing your hard-earned hosta blooms with fellow gardeners. Happy growing!