
Propagation
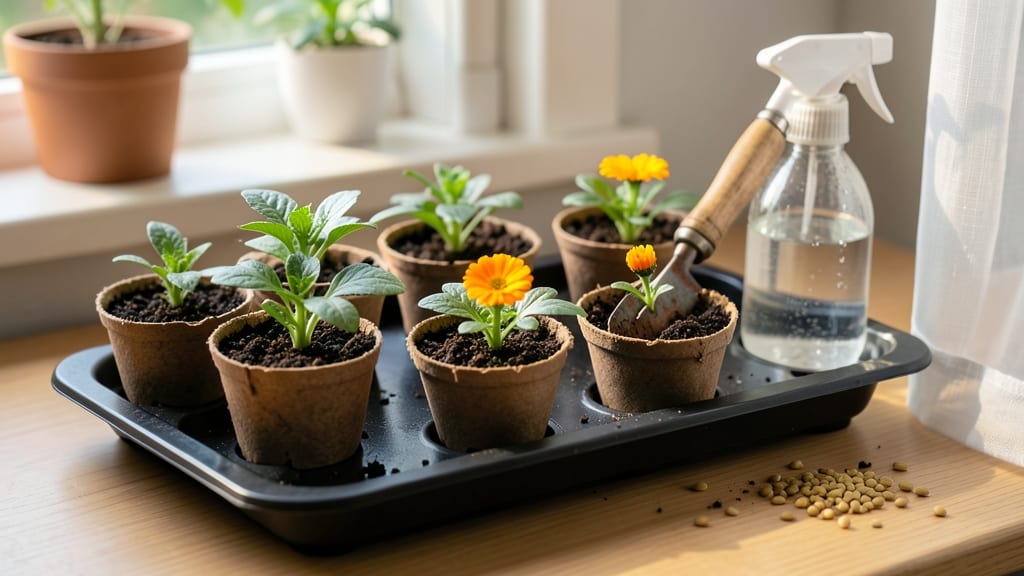
Calendula seeds in pots bloom into vibrant orange flowers in just 60 days—no fancy greenhouse needed. 🌱 I’ve grown calendula for years, and the secret is simple: the right pot, soil, and a little patience.
These cheerful blooms aren’t just pretty; they’re edible, pest-repellent, and perfect for pollinators. Even my first attempt (which I nearly drowned) taught me what not to do.
The magic starts with well-draining soil and 4-6 inch pots—calendula hates soggy roots. Plant seeds ¼ inch deep, keep them moist (not soaked), and give them 6+ hours of sunlight daily.
Most beginners overwater, but calendula is tough: let the top inch of soil dry between waterings. Within 2-3 weeks, you’ll see those first true leaves—proof you’re on the right track.
By day 60, you’ll be snipping bold orange petals for salads, sachets, or simply admiring the cheerful faces peeking over your windowsill. The plants stay compact, so they’re perfect for balconies, patios, or kitchen windows.
Just watch for powdery mildew (space them out!) and aphids (spray with water if you see them).
Once you master this, try succession planting every 2 weeks for nonstop blooms all season. The flowers even self-seed, so you’ll have calendula popping up “volunteer-style” next year. Here’s how to set it up without the guesswork—no green thumb required.
📚 In This Guide
- What you need
- Instructions
- Tips and common mistakes
- Wrapping up and next steps
What you need
- ● Calendula seeds: 1 packet (50–100 seeds, non-GMO preferred for best results).
- ● Containers: 4–6-inch pots (3–4 pots per seed packet) with drainage holes, or a seed tray with individual cells.
- ● Potting mix: 1 bag of well-draining, seed-starting mix (avoid garden soil—it’s too dense!).
- ● Watering can or spray bottle: With a fine mist nozzle for gentle hydration.
- ● Grow lights or sunny windowsill: A south-facing window (6+ hours of sunlight) or a 12–16 hour LED grow light for indoor setups.
- ● Plant labels: Small markers or popsicle sticks to track varieties.
- ● Heat mat: Speeds up germination (70–75°F ideal).
- ● Fertilizer: Balanced liquid fertilizer (5-5-5 or 10-10-10) for transplanting.
- ● Humidity dome: Keeps seeds moist during germination.
- ● Tweezers: For delicate seed handling if they’re tiny.
- ● Compost or worm castings: Boosts soil nutrients for healthier blooms.
Step-by-step instructions for growing calendula from seed in pots
Here's how to coax vibrant calendula blooms from tiny seeds—no greenhouse needed.
🌱 Step 1: Prepare Containers and Seed Mix for Germination
Choose 4-inch diameter pots with drainage holes for your four plants. Calendula seeds germinate best in light, airy seed-starting mix—never garden soil. Fill each pot ¾ full with the mix and moisten it until damp but not soggy. I press down lightly to remove air pockets, then create ¼-inch-deep furrows using a small stick or finger.
This mix is critical—calendula hates compacted soil. If your mix feels dense, stir in 20% perlite before planting. The seeds are tiny, so I use a toothpick to place 2-3 seeds per pot, spacing them ½ inch apart along the furrow. Cover them with a thin layer of mix—just enough to obscure the seeds. Gently pat the soil to ensure good seed-to-soil contact.
💧 Step 2: Create Ideal Germination Conditions
Place the pots in a humidity dome or sealed plastic bag to trap warmth and moisture. Calendula seeds need 70-75°F soil temperatures to sprout reliably. If your home runs cooler, set the pots on a seedling heat mat—this cuts germination time from 14-21 days to just 7-10 days. Keep the mix consistently moist by misting lightly every 2-3 days until you see sprouts.
Watch for tiny green cotyledons breaking through the soil—this is your cue to remove the dome immediately. Leaving it on too long smothers seedlings and risks damping-off, a fungal disease that collapses stems overnight. Once sprouts appear, place the pots under bright, indirect light (like a south-facing window) to prevent leggy growth.
☀️ Step 3: Provide Light and Thin Seedlings
After 2-3 weeks, when seedlings have 2-3 true leaves, it’s time to thin. Use clean scissors to snip the weakest seedling at soil level, leaving the strongest one per pot. This prevents overcrowding and gives your calendula room to develop bold, disease-resistant stems. Within 48 hours, you’ll notice the remaining plant perking up—its roots now have full access to nutrients.
Move the pots to a sunny windowsill or under grow lights for 12-14 hours daily. Calendula thrives in full sun, but young plants need gradual acclimation. If leaves yellow or stems stretch toward the light, your setup isn’t bright enough—supplement with a LED grow light held 6 inches above the plants. Water when the top inch of soil feels dry, using a spray bottle to avoid disturbing roots.
✂️ Step 4: Encourage Bushy Growth and Blooms
When plants reach 4-6 inches tall, pinch off the top set of leaves just above a pair of lower leaves. This forces the plant to branch out, creating a fuller, more productive bush. You’ll see new side shoots emerge within 7-10 days—these will produce your vibrant orange blooms. Deadhead spent flowers by snipping stems ½ inch below the bloom to encourage continuous flowering through the season.
Fertilize lightly every 4-6 weeks with a balanced liquid fertilizer (10-10-10) diluted to half strength. Overfeeding leads to lush foliage but fewer flowers. Watch for aphids or powdery mildew—calendula is pest-resistant, but crowded pots invite trouble. If you spot issues, spray with neem oil and improve airflow by spacing pots 3 inches apart. With proper care, your pots will burst with bold, cheerful blooms in 60 days.
Tips & tricks for growing calendula in pots
Here's what I learned after growing calendula for years—these tricks help you avoid the most common pitfalls and get those stunning orange blooms.
Soil Texture Matters: Calendula roots need air to thrive, so never use garden soil. If your seed-starting mix feels compacted after moistening, stir in an extra 10% perlite to improve drainage. I've found that adding a handful of coarse sand (about 10% by volume) also prevents waterlogging, which can cause root rot. The goal is a mix that feels like damp potting soil but crumbles easily when squeezed.
Germination Temperature Secret: While the instructions call for 70-75°F soil temperatures, I've discovered that consistent warmth is more important than exact degrees. If your home runs cooler, place pots on a seedling heat mat for just 8-10 hours daily during germination. This targeted warmth speeds up sprouting without overheating the entire space. Once you see those first tiny green cotyledons, you can remove the heat mat completely.
Thinning Technique: When thinning to one seedling per pot, I recommend using sterilized scissors dipped in rubbing alcohol to prevent disease transmission. The 48-hour recovery period mentioned is spot-on—this gives the remaining plant time to establish new root growth. If you're nervous about thinning too early, wait until you see the second set of true leaves before making your cut.
Light Transition Strategy: For the 12-14 hours of daily light, start with just 6-8 hours on day one and increase by 2 hours daily. This gradual acclimation prevents the shock of sudden full-spectrum light that can cause yellowing leaves. I've had success using a simple LED bulb on a timer—calendula doesn't need the spectrum complexity of expensive grow lights until the flowering stage.
Pro Tips for Growing Calendula From Seed In Pots
- Here's what I learned after growing calendula for years—these tricks help you avoid the most common pitfalls and get ...
- Soil Texture Matters: Calendula roots need air to thrive, so never use garden soil. If your seed-starting mix feels c...
- Germination Temperature Secret: While the instructions call for 70-75°F soil temperatures, I've discovered that consi...
Frequently asked questions
Got questions about growing calendula from seed in pots? You’re not alone! Here are answers to the most common ones—so you can confidently grow these cheerful blooms at home.
How long does it take for calendula seeds to germinate?
Calendula seeds typically sprout in 7–14 days when kept in warm (65–75°F), moist soil. For faster results, soak seeds in warm water for 24 hours before planting. Patience is key—some seeds may take up to 3 weeks to break through!
Can I grow calendula indoors in pots all year?
Yes! Calendula thrives indoors with 6–8 hours of sunlight daily (a south-facing window or grow lights work). Use pots with drainage holes and keep soil consistently moist. Just watch for powdery mildew in humid conditions—space plants well for airflow.
What’s the best soil mix for potted calendula?
Use a well-draining potting mix blended with perlite or sand (ratio: 3 parts soil, 1 part amendment). Calendula dislikes soggy roots, so avoid heavy garden soil. A slightly acidic to neutral pH (6.0–7.0) keeps them happy!
Why aren’t my calendula seedlings growing?
Check for these common issues:
- Overwatering: Yellow leaves? Let soil dry slightly between waterings.
- Cool temps: Seeds need warmth (use a heat mat if below 60°F).
- Poor light: Leggy seedlings? Move to brighter light immediately.
- Damping off: Fuzzy mold at the base? Reduce humidity and improve airflow.
Can I harvest calendula petals from potted plants?
Snip fully open blooms in the morning for dried petals (tea, salves) or fresh ones (salads, garnishes). Leave some flowers to rebloom—deadheading spent blooms encourages more production. Pro tip: Wear gloves if you’re sensitive to latex (calendula has mild irritants).
Wrapping up and next steps
Growing calendula from seed in pots is a rewarding journey that brings vibrant color and natural beauty to your space—all in just 60 days! 🌱 With the right pots, soil, and a little patience, you’ll enjoy edible blooms that attract pollinators and boost your garden’s charm.
Whether you’re a beginner or a seasoned gardener, this cheerful flower is a fantastic addition to your indoor or outdoor pots.
Now that you’re armed with tips and tricks, why not start your seeds today? Grab a sunny spot, fill those pots, and watch your calendula thrive. Happy planting—and enjoy those bold orange blooms! 🌸