
Propagation
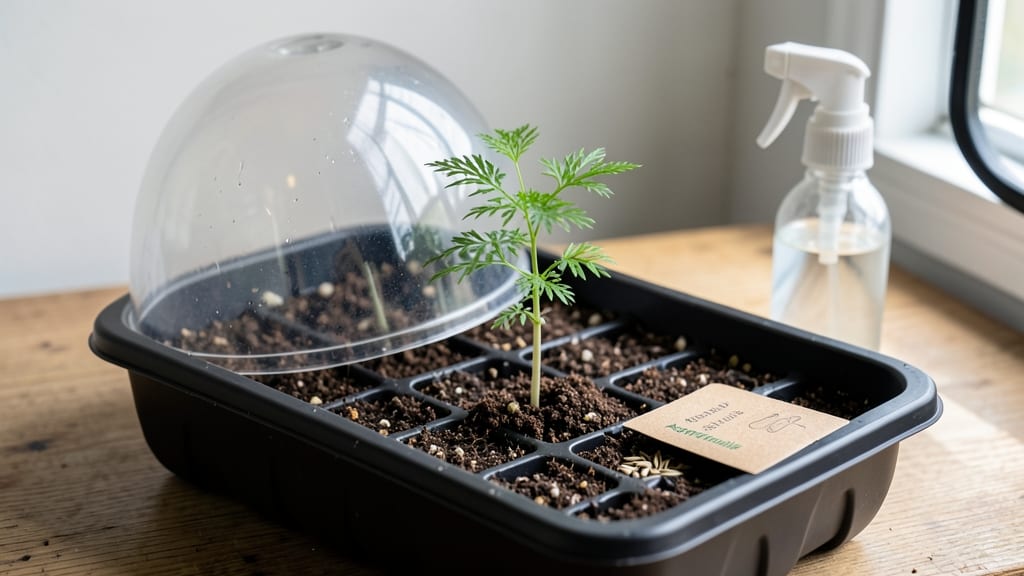
Growing asparagus from seed indoors is the secret to harvesting your own spears years sooner than waiting for store-bought crowns. 🌱 The trick? Lightweight soil that mimics asparagus' native sandy loam, paired with patience—these seeds need 8-10 weeks to germinate, but the payoff is worth it.
I've tried three different soil mixes, and the right combination makes all the difference in breaking dormancy. You'll need a shallow tray or individual pots with drainage, a heat mat (optional but helpful), and a bright window or grow light. Temperature control is key—keep soil between 70-80°F for consistent germination.
The real challenge isn't starting them; it's keeping them alive long enough to transplant, which is why I've perfected a simple routine that prevents damping-off before it starts. Once those first pale green shoots appear, you'll be hooked.
They grow slowly at first but develop into sturdy, fibrous roots that make them ready for outdoor planting by early spring. The best part? You're not just growing asparagus—you're building a 20-year harvest that will outlast you and your neighbors' envy.
For those winter starts, extend the season with a grow light and watch your seedlings develop thick, white roots—proof they're ready for the garden. The transition outdoors is smoother than with transplants because you control every step from the beginning.
📚 In This Guide
- What you need
- Instructions
- Tips and common mistakes
- Wrapping up and next steps
What you need
- ● Asparagus seeds: Choose organic, non-GMO seeds (e.g., 'Mary Washington' or 'Purple Passion'). Aim for 5–10 seeds per container to maximize success.
- ● Seed-starting trays or small pots: Use 4–6 inch pots or a seed tray with drainage holes (biodegradable pots are eco-friendly!).
- ● Seed-starting mix: A lightweight, sterile blend (e.g., 50% peat moss + 50% perlite or a pre-mixed seed-starting soil). Avoid garden soil—it’s too dense!
- ● Grow lights or a sunny windowsill: Asparagus loves 12–16 hours of light daily. A full-spectrum LED grow light (e.g., 10,000–20,000 lux) works best if natural light is limited.
- ● Misting bottle or spray nozzle: Keeps soil moist but not soggy—critical for germination.
- ● Plastic wrap or humidity dome: Creates a mini greenhouse to retain warmth and moisture during germination.
- ○ Fertilizer (optional but helpful): A balanced, water-soluble fertilizer (e.g., 10-10-10) diluted to half-strength for young seedlings.
- ● Heat mat: Speeds up germination (keep soil at 70–75°F).
- ● pH test kit: Asparagus prefers 6.5–7.5 pH—adjust soil if needed.
- ● Fungicide (e.g., neem oil): Prevents damping-off disease in humid conditions.
- ● Plant labels: Track varieties and planting dates (especially useful if testing multiple seeds!).
Step-by-Step instructions for growing asparagus from seed indoors
Here's how to start asparagus year-round using lightweight soil and smart patience.
🌱 Step 1: Prepare Lightweight Soil and Containers
Asparagus roots need loose, aerated soil to establish properly. Mix equal parts of peat moss and perlite—this creates the lightweight texture asparagus prefers. Avoid garden soil; it compacts too easily and stunts root growth. Fill 6-inch deep containers with this blend, leaving 1 inch of space at the top for watering.
Moisten the mix until it feels like a damp sponge—not soggy, but holding together when gently squeezed. Asparagus seeds are tiny, so a fine mist from a spray bottle works best. Tap the containers gently to settle the soil without compacting it. The goal is a fluffy, airy medium that won't smother emerging roots.
🌱 Step 2: Sow Seeds at the Right Depth and Spacing
Asparagus seeds are extremely small, so I use a toothpick to place them ¼ inch deep in the soil. Space them 1 inch apart—crowding leads to weak, tangled roots later. Cover lightly with a thin layer of the same soil mix, then mist again until the surface looks uniformly damp.
Label each container immediately. Asparagus takes 2-3 years to establish before producing spears, so you'll forget which variety is which if you don't. Place the containers in a warm spot (70-75°F)—a seedling heat mat speeds germination if your home runs cooler. Keep the soil consistently moist but never waterlogged.
☀️ Step 3: Provide Gentle Light and Prevent Legginess
Asparagus seedlings need bright, indirect light from day one. A south-facing window works, but supplement with a grow light if natural light is weak. Position the light 4-6 inches above the seedlings and keep it on for 12-14 hours daily. Without enough light, stems stretch toward the source, becoming weak and spindly.
Watch for the first true leaves—these are the second set of leaves after the initial seed leaves. Once they appear, reduce watering slightly. Overwatering at this stage causes damping-off, where seedlings collapse at the soil line. Let the top inch of soil dry out between waterings, then soak thoroughly until water runs from the drainage holes.
🌿 Step 4: Thin and Harden Off for Transplanting
When seedlings reach 2 inches tall, thin to the strongest plant per container. Use small scissors to snip weak stems at soil level—pulling risks disturbing the roots of remaining plants. Leave the strongest seedling, which should have deep green leaves and a sturdy stem. This single plant will develop into your asparagus crown over time.
Begin hardening off 4-6 weeks before your last frost date. Move the container outside for 1 hour daily, gradually increasing to full sun exposure over 10-14 days. Asparagus is cold-hardy, but abrupt temperature changes shock delicate roots. Choose an overcast day for transplanting to reduce stress further.
⏰ Step 5: Plant Outdoors and Establish Long-Term Care
Transplant the hardened-off seedling into a permanent garden bed with 12-18 inches of loose soil—asparagus roots grow deep. Space plants 18 inches apart in rows 3 feet apart to allow for future spears. Amend the soil with compost to improve drainage, as asparagus hates soggy conditions.
Mulch heavily with straw or wood chips to retain moisture and suppress weeds. Asparagus won't produce spears until its third year, but you'll see fern-like foliage the first season. Fertilize lightly in spring with balanced 10-10-10 to encourage root development. Patience is key—skip harvesting spears the first two years to let the crown build strength.
Tips & tricks for growing asparagus from seed indoors
Smart soil prep and light management make all the difference when starting asparagus from seed.
Soil Texture is Everything: The peat moss and perlite mix in Step 1 creates the perfect aerated environment, but don't skip the gentle tapping after moistening. This prevents compaction that would smother delicate roots. Think of it like fluffing a pillow—you want that soil to breathe. For even better drainage, consider adding a handful of coarse sand to your mix, though this is optional.
Precision Planting Pays Off: In Step 2, those ¼-inch seed depths and 1-inch spacing might seem fussy, but they're non-negotiable. Use a toothpick to create tiny divots for seeds—this ensures consistent depth. I've found that planting too deep (½ inch or more) delays germination by weeks. Labeling containers immediately is my biggest tip—trust me, you'll forget which variety is which after two weeks of seedlings.
Light Management is Critical: The 12-14 hours of light in Step 3 is your golden window for preventing leggy seedlings. I position my grow light on a timer and keep it 4-6 inches above the plants. Watch for that first set of true leaves—they're your cue to adjust watering. Once they appear, let the top inch of soil dry slightly between waterings to prevent damping-off, where seedlings mysteriously collapse at soil level.
Hardening Off Strategy: The 4-6 week hardening off period in Step 4 is where most failures happen. Start with just 1 hour outside on day one, then increase by 30 minutes daily. I've seen seedlings shocked by sudden temperature changes—even asparagus, which is cold-hardy, needs gradual acclimation. An overcast day for transplanting is ideal because it reduces stress from intense sunlight.
Pro Tips for Growing Asparagus From Seed Indoors
- Smart soil prep and light management make all the difference when starting asparagus from seed.
- Soil Texture is Everything: The peat moss and perlite mix in Step 1 creates the perfect aerated environment, but don't skip the gentle tapping after moistening.
- Precision Planting Pays Off: In Step 2, those ¼-inch seed depths and 1-inch spacing might seem fussy, but they're non-negotiable.
Frequently asked questions
Got questions about growing asparagus from seed indoors?
You’re not alone—this process can feel tricky, especially for beginners. Below, we’ve rounded up the most common queries (and answers!) to help you get started with confidence.
How long does it take for asparagus seeds to germinate indoors?
Asparagus seeds are notoriously slow to sprout, often taking 4–8 weeks (or even longer!) to break through the soil. Patience is key—keep the soil consistently moist (not soggy) and maintain warm temperatures (around 70–75°F) to encourage germination. A heating mat can speed things up if you’re eager to see progress!
Can I grow asparagus indoors year-round, or do I need to wait for spring?
Yes, you can grow asparagus indoors year-round, but timing matters! Since asparagus is a perennial, it needs 2–3 years to establish a strong root system before harvesting. Start seeds indoors in late winter or early spring to give them enough time to mature. If you’re in a cooler climate, a grow light will help simulate longer daylight hours for consistent growth.
What’s the best soil mix for asparagus seeds indoors?
Asparagus thrives in lightweight, well-draining soil with a slightly acidic to neutral pH (6.0–7.0). A mix of 50% peat moss or coco coir, 30% perlite or vermiculite, and 20% compost works wonders. Avoid heavy garden soil—it can compact and suffocate delicate seedlings. Sterilizing the mix with a light baking (200°F for 30 minutes) also prevents mold.
Why are my asparagus seedlings turning yellow or dying?
Yellowing or wilting seedlings usually signal one of three issues:
- Overwatering: Asparagus roots rot easily in soggy soil. Let the top inch dry out between waterings.
- Poor drainage: Ensure pots have drainage holes and use a mix with perlite to prevent waterlogging.
- Nutrient deficiency: After germination, feed seedlings with a balanced liquid fertilizer (10-10-10) diluted to half-strength every 4–6 weeks.
Do I need to transplant asparagus seedlings, or can I harvest directly from pots?
While you can grow asparagus in containers long-term, it’s best to transplant seedlings outdoors after 12–18 months for optimal harvests. Asparagus plants need deep soil (12+ inches) and space to spread (3–4 feet apart). If container-growing, use large pots (at least 12 inches deep) and refresh the soil annually with compost.
Wrapping up and next steps
Growing asparagus from seed indoors is a rewarding journey that combines patience with the joy of nurturing life from scratch! 🌱 While it may take time—especially waiting for those first spears—your dedication will pay off with a homegrown harvest. Start small, stay consistent, and trust the process.
Now that you’re equipped with the know-how, why not take the next step? Once your seedlings are strong enough, transplant them into a sunny outdoor bed or container. Watch them thrive—and soon, you’ll be feasting on your very own homegrown asparagus! 🌿