
Lawn
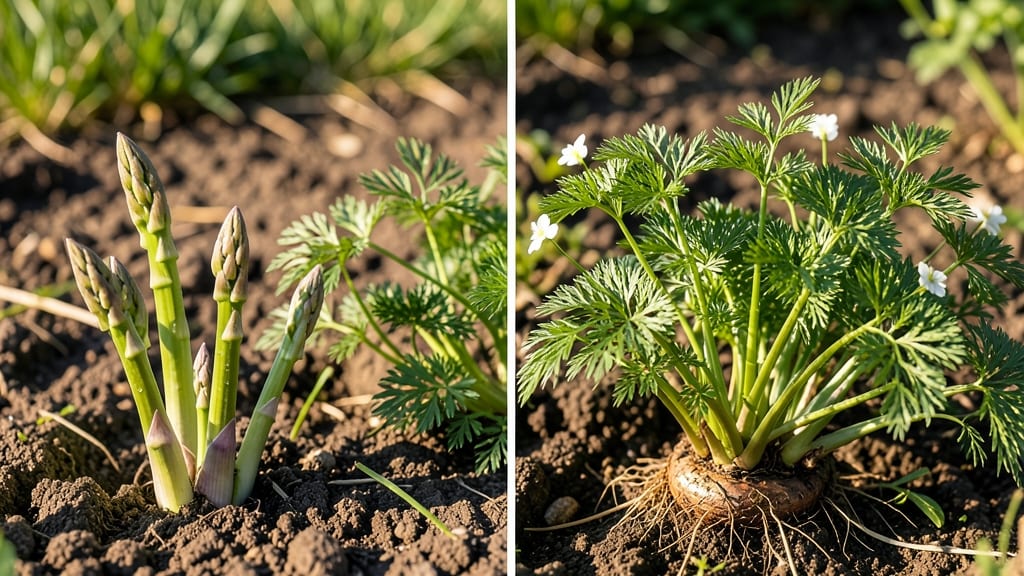
The seed stages of growing asparagus begin with a 3-4 month wait before you see anything above ground—patience pays off with spears thicker than your thumb. 🌱 I’ve watched my first asparagus seeds sprout after what felt like forever, only to realize the real magic happens underground where crowns form.
The key is understanding what’s happening below soil level, because those first shoots are just the beginning of a 5-year harvest waiting to unfold.
Germination kicks off 10-14 days after planting, but don’t expect much—tiny green needles push through the soil, growing just 1-2 inches in their first month. This is when weeds become your worst enemy, so mulch heavily and keep the bed weed-free.
The real growth spurt comes in year two when crowns establish, but you’ll need to resist harvesting until year three to let the plant build strength for future seasons.
By year four, you’ll see 10-20 spears per plant, each as thick as your finger, and the cycle continues for decades with proper care. The secret lies in consistent moisture and avoiding disturbance to those underground crowns—once established, asparagus plants will reward you with harvests that outlast most gardeners’ lifetimes.
Perfect for gardeners with patience and space, asparagus thrives in full sun and well-drained soil. Start small with 3-5 plants to test your site before expanding—this isn’t a crop you want to rush.
The first harvest will feel like winning the gardening lottery, and every subsequent spring brings that same thrill of anticipation.
📚 In This Guide
- What you need
- Instructions
- Tips and common mistakes
- Wrapping up and next steps
What you need
- ● Asparagus seeds: 1–2 lbs (preferably Asparagus officinalis varieties like 'Mary Washington' or 'Jersey Knight').
- ● Seed-starting mix: 10–15 lbs of sterile, well-draining potting soil (or coconut coir for eco-friendly growing).
- ● Seed trays or biodegradable pots: 72-cell trays or 2–3" pots (100+ units for bulk planting).
- ● Growing containers: 10–12" deep pots or a raised bed (minimum 3' x 6' for full-grown plants).
- ● Fertilizer: Balanced starter fertilizer (10-10-10, 5 lbs).
- ● Organic compost (aged, 2–3 lbs per planting area).
- ● Mulch: Straw or wood chips (2–3 lbs to suppress weeds).
- ● Tools: Hand trowel or small shovel.
- ● Spray bottle (for seedling hydration).
- ● Garden gloves (to protect your hands).
- ● Seedling heat mat ($20–$30) for faster germination.
- ● Grow lights (LED, 12–16 hrs/day) if indoors.
- ● Weed barrier fabric (to block weeds early).
- ● pH test kit (ideal soil pH: 6.5–7.5).
- ● Slow-release fertilizer (e.g., Osmocote, 1 lb).
Understanding the critical seed stages of asparagus growth
Here’s how to navigate asparagus development from seed to harvest—where patience meets precision.
🌱 Step 1: Germination (Weeks 1-3)
Asparagus seeds take 4-6 weeks to germinate, but you’ll see the first signs of life in 10-14 days if conditions are right. Start by sowing seeds ½ inch deep in well-draining soil with a pH of 6.5-7.5. Keep the soil consistently moist but not soggy—water when the top 2 inches feel dry. A seedling heat mat set to 75-85°F speeds germination, especially in cooler climates.
Germination is the most fragile stage. If seeds rot, they’ve been overwatered; if they stay dormant, the soil’s too cold. Watch for tiny green shoots breaking through—this confirms successful germination. Once 50% of seeds sprout, reduce watering slightly to prevent damping-off, a fungal disease that collapses seedlings overnight.
🌿 Step 2: Early Seedling Growth (Weeks 4-8)
Seedlings will develop first true leaves (not the initial seed leaves) in 4-6 weeks. This is when you’ll notice needle-like fern fronds emerging—classic asparagus foliage. Thin seedlings to 6 inches apart to avoid competition. Asparagus is slow-growing, so don’t rush this step. Use a lightweight mulch (like straw) to retain moisture and suppress weeds without smothering young plants.
At this stage, seedlings need full sun (6+ hours daily) but should be hardened off gradually if started indoors. Acclimate them to outdoor conditions over 7-10 days by moving them outside for increasing durations. You’ll know they’re ready when they don’t wilt after a full day in the garden. Avoid transplanting if temperatures dip below 50°F—asparagus roots are sensitive to cold shock.
☀️ Step 3: Crown Development (Weeks 9-12)
The crown—where roots meet the stem—begins forming 8-12 weeks after planting. This is the plant’s energy storage system for future harvests. By now, fronds should reach 12-18 inches tall. Fertilize lightly with a balanced 10-10-10 formula to encourage root growth, but avoid high-nitrogen feeds, which promote foliage over crowns. Water deeply once a week during dry spells, ensuring the soil stays evenly moist but not waterlogged.
Here’s the thing—do not harvest spears in the first year. The plant needs all its energy to establish a strong root system. You’ll see brown, papery fronds in late summer—this is normal and signals the plant is focusing on root growth. Mulch again in fall with 2-3 inches of compost to protect crowns from freezing temperatures. By winter, the crown will be 3-4 inches wide, ready for Year 2’s harvest.
⏰ Step 4: First Harvest Readiness (Year 2)
Asparagus won’t produce spears until Year 2, but you’ll know it’s ready when new shoots emerge in early spring. These are your first harvestable spears. Cut them when they’re 8-12 inches tall and 2 inches thick at the base. Harvest for 6-8 weeks until fronds turn yellow—this exhausts the crown. After harvest, let fronds grow back to 18 inches before trimming to replenish the plant’s energy stores.
Real talk: Patience is key. Skipping the first-year harvest is non-negotiable—rushing it yields weak spears. In Year 3, you’ll get full production, with spears appearing 2-3 weeks earlier than Year 2. Keep the bed weed-free and well-mulched—asparagus crowns can live 15+ years with proper care, making this stage the foundation for decades of harvests.
Tips & tricks for precision asparagus planting
Mastering asparagus growth requires understanding the delicate balance between timing, temperature, and plant development—here's how to optimize each critical stage.
Soil Temperature is Everything: The 75-85°F range for germination isn't just a suggestion—it's the sweet spot where asparagus seeds activate their growth hormones. If your climate can't maintain this naturally, a seedling heat mat becomes your best friend. I've seen germination rates double when using one in cooler spring conditions. The key is consistency: maintain that temperature range day and night during the first 10-14 days when seeds are most vulnerable.
Thinning Strategy for Stronger Plants: When you thin seedlings to 6 inches apart in Step 2, don't just pull the weakest ones—choose the healthiest, most vigorous plants. The ones you remove can actually be transplanted to another location if you're careful. I've successfully transplanted thinned asparagus seedlings to fill gaps in other garden beds, giving them a second chance at life. Just be gentle with the roots and water them well immediately after transplanting to reduce shock.
Crown Protection is Non-Negotiable: That 2-3 inches of compost mulch in fall isn't just about weed suppression—it's insulation for your developing crowns. Asparagus crowns can survive temperatures down to -20°F when properly protected, but exposed crowns will suffer frost damage that takes years to recover from. I've seen gardeners skip this step and end up with stunted plants that never reach full production. The extra effort now pays off with decades of harvests.
Harvest Timing Visual Cues: Those 8-12 inches tall and 2 inches thick measurements in Year 2 can be tricky to judge. Here's my pro tip: look for spears that have fully unfurled their tips but still have tightly closed buds at the base. The spear should snap cleanly when bent—if it bends without breaking, it's not ready. I harvest in the morning when spears are crispest, and I never cut more than 20% of the emerging shoots in any given week to preserve the plant's energy.
Pro Tips for Seed Stages Of Growing Asparagus
- Mastering asparagus growth requires understanding the delicate balance between timing, temperature, and plant develop...
- Soil Temperature is Everything: The 75-85°F range for germination isn't just a suggestion—it's the sweet spot where a...
- Thinning Strategy for Stronger Plants: When you thin seedlings to 6 inches apart in Step 2, don't just pull the weake...
Frequently asked questions
Got questions about starting asparagus from seed?
You’re not alone—this perennial veggie demands patience and precision. Below, we tackle the most common concerns to help you grow a thriving asparagus patch with confidence.
How long does it take for asparagus seeds to germinate?
Asparagus seeds are notoriously slow to sprout! Expect germination to take 2–4 weeks in ideal conditions (consistent warmth, 70–75°F, and moisture). Some seeds may take even longer—don’t give up until 6–8 weeks have passed. Pre-soaking seeds for 24 hours can speed up the process slightly.
Can I grow asparagus from seed in containers?
Yes, but choose deep containers (at least 12–18 inches) with excellent drainage. Asparagus crowns need room to spread, so opt for 5-gallon buckets or large pots if space is limited. Use a well-draining potting mix and rotate containers occasionally to prevent lopsided growth.
Why aren’t my asparagus seedlings growing after 3 months?
Slow growth in early stages is normal, but check for these red flags:
- Poor soil: Asparagus thrives in sandy-loam soil with a pH of 6.5–7.5. Amend clay or rocky soil with compost.
- Overcrowding: Thin seedlings to 6–8 inches apart to reduce competition.
- Cold stress: If temps drop below 50°F, growth stalls. Use row covers if needed.
Do I need to fertilize asparagus seedlings right away?
Hold off on heavy feeding! Young seedlings (first 6 months) only need light applications of a balanced fertilizer (10-10-10) at planting and again when shoots emerge in spring. Over-fertilizing can burn tender roots. After year 1, switch to low-nitrogen, high-potassium fertilizer (e.g., 5-10-10) to encourage crown development.
What’s the best way to protect asparagus from weeds in early growth?
Weeds compete for nutrients, so act fast!
- Mulch heavily: Apply 4–6 inches of straw or wood chips around seedlings (keep mulch away from crowns to prevent rot).
- Hand-pull weeds: Use a hula hoe or small trowel to avoid disturbing roots.
- Pre-emergent herbicide: Apply corn gluten meal (organic) or a vinegar-based spray only after seedlings are 4+ inches tall.
Wrapping up and next steps
Growing asparagus from seed is a rewarding journey that demands patience and precision—but the payoff is decades of lush, weed-resistant greenery!
By following the right timeline, preparing the soil, and protecting your young plants, you’ll set the stage for a thriving asparagus bed. Now’s the time to roll up your sleeves and start planting—your future lawn will thank you!
Ready to take the next step? Order your seeds, mark your calendar, and begin prepping your site this fall. With consistency and care, you’ll soon enjoy a low-maintenance, high-reward asparagus harvest that outshines weeds for years to come! 🌱✨